

Cheers SWRCStratosWRC wrote:Oh that is awesome so far. Really enjoying the progress pics
Toretto's '69 Daytona Charger F&F 6
Re: Toretto's '69 Daytona Charger F&F 6
Re: Toretto's '69 Daytona Charger F&F 6
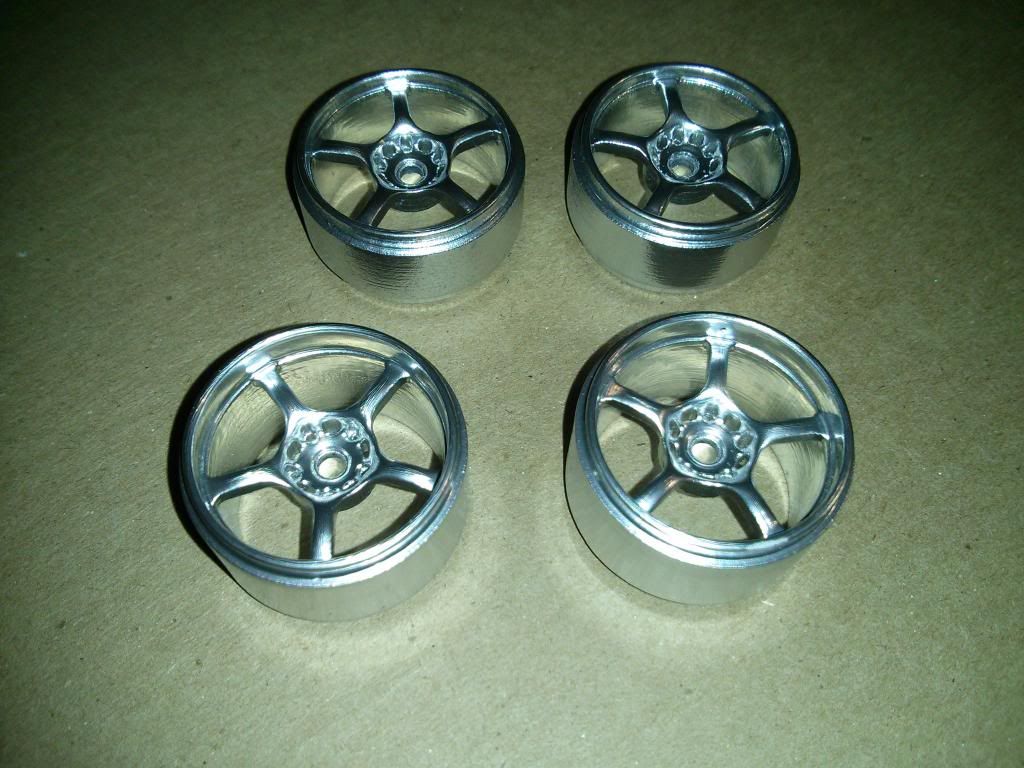
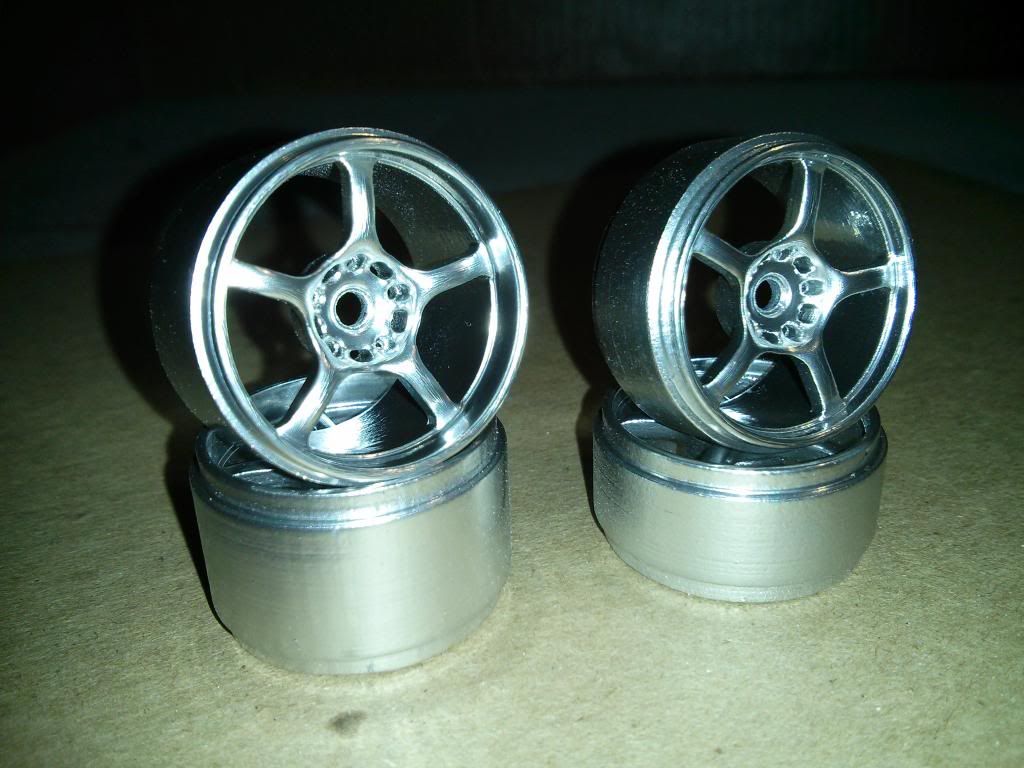
Chromed all 4 Wheels:

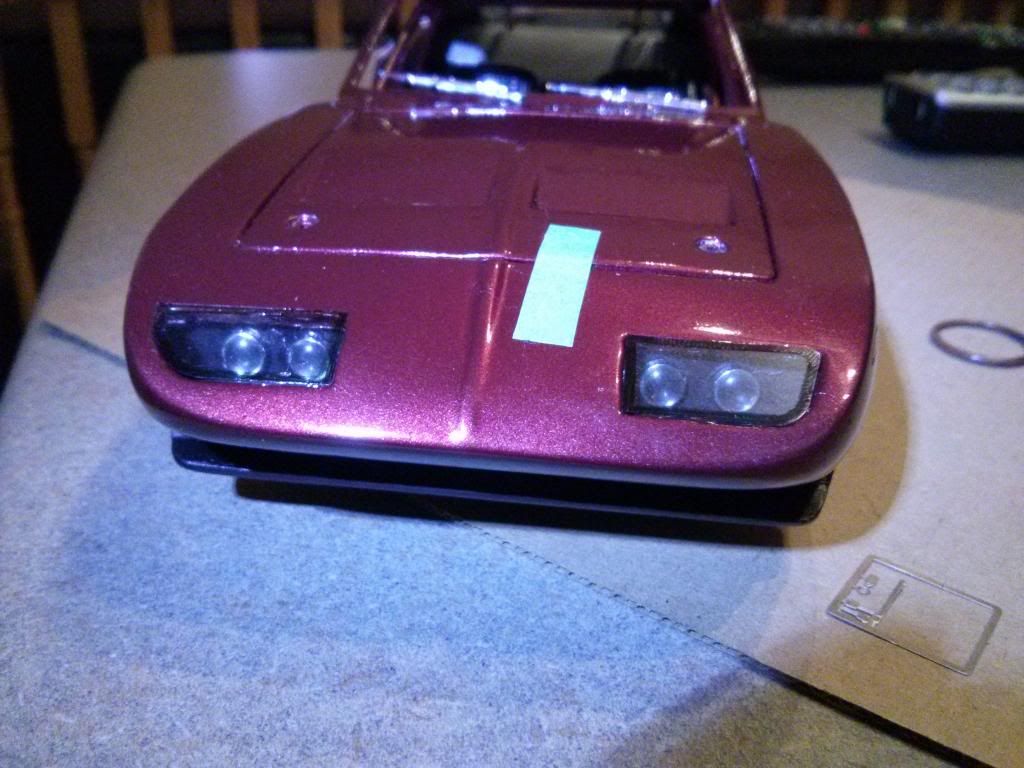
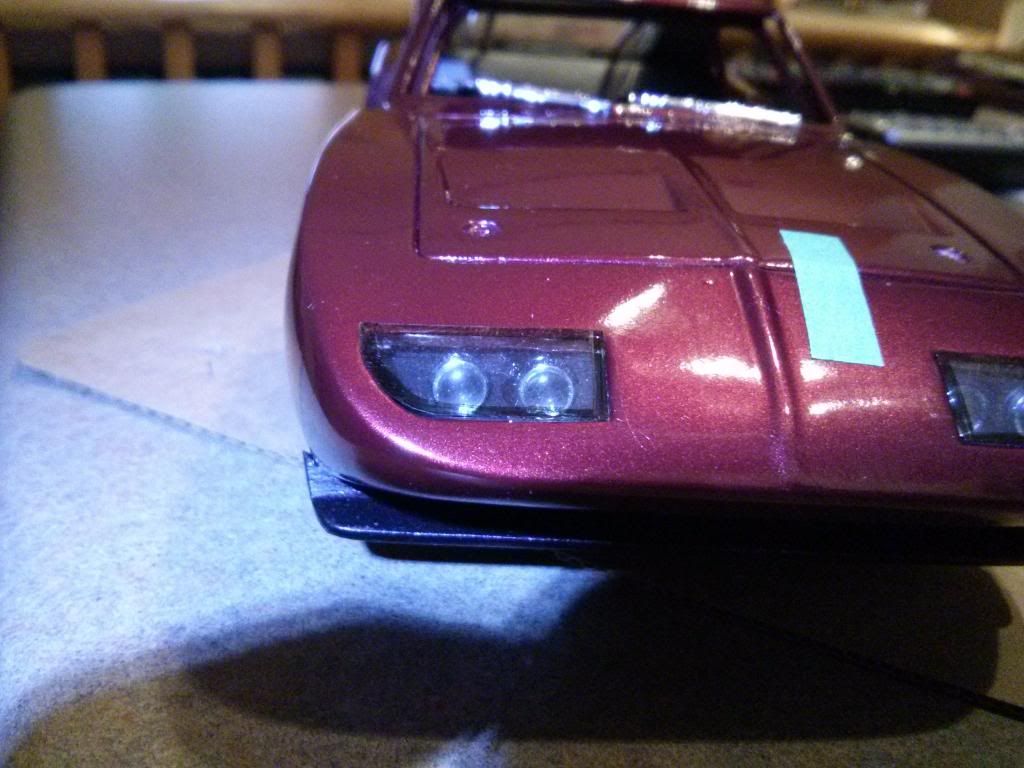
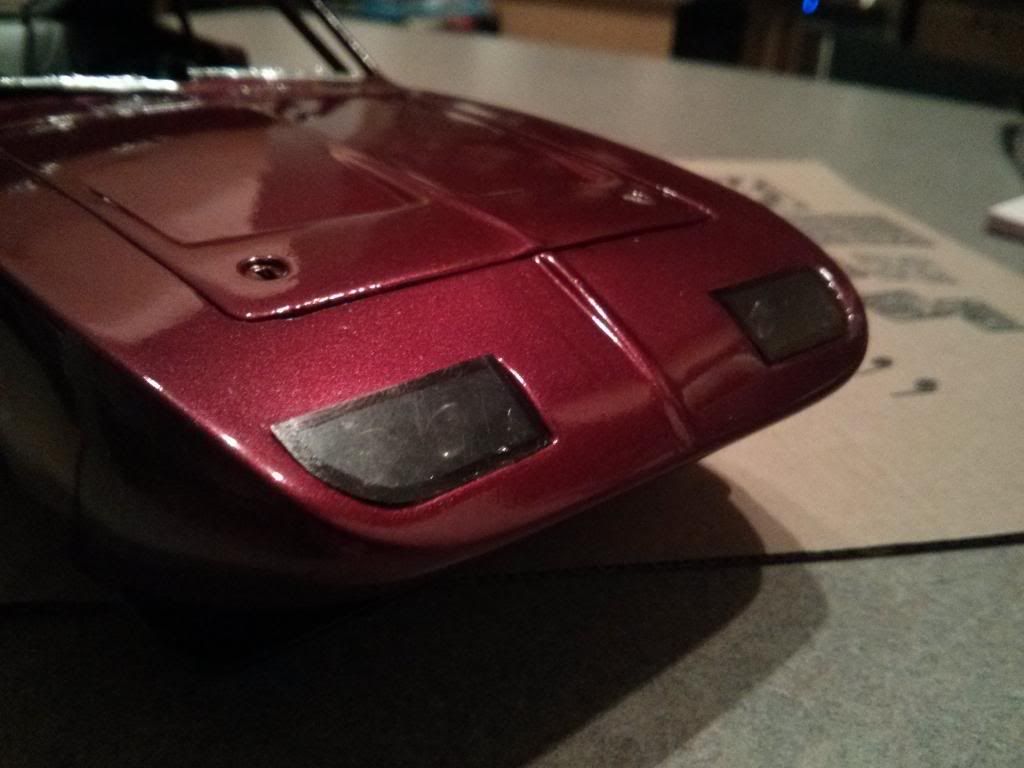
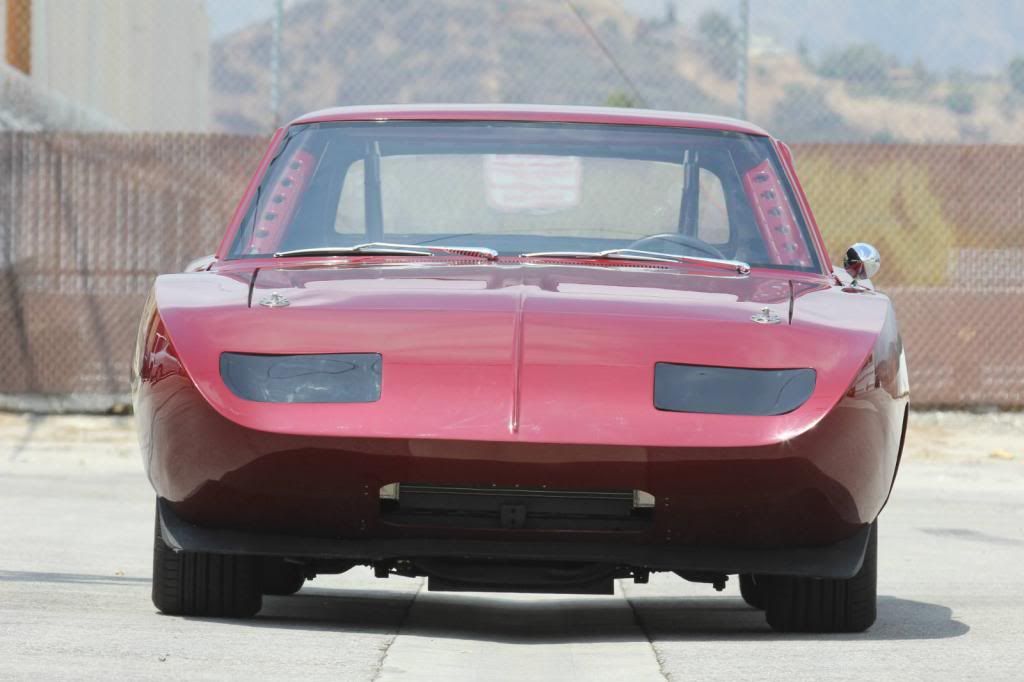
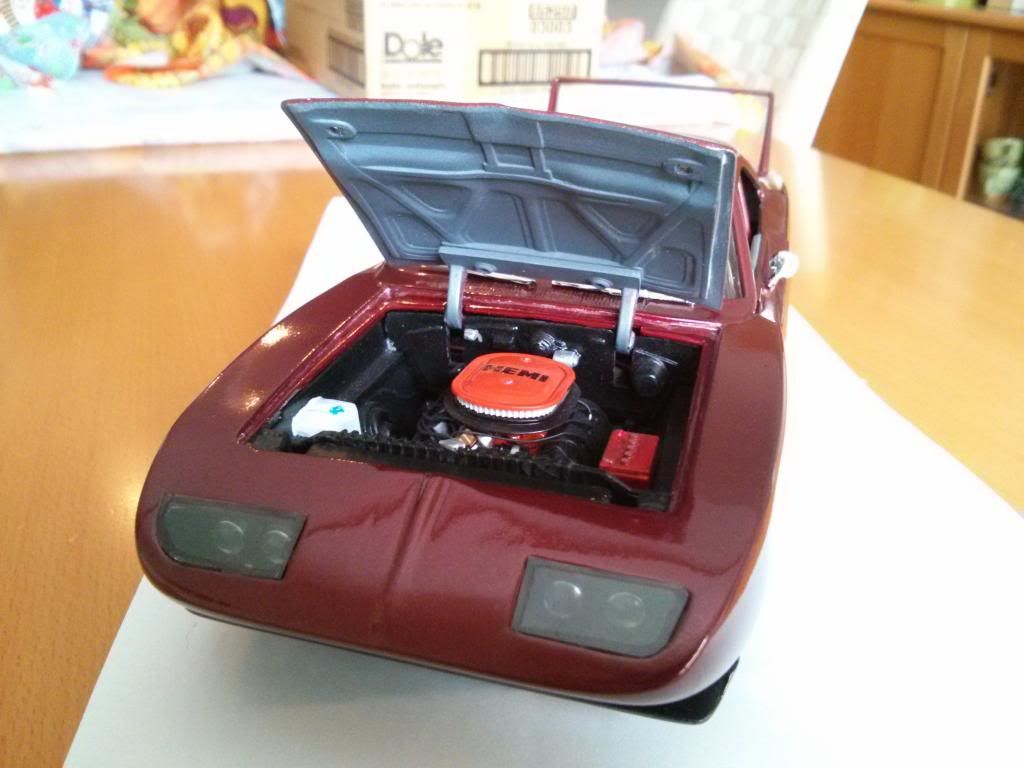
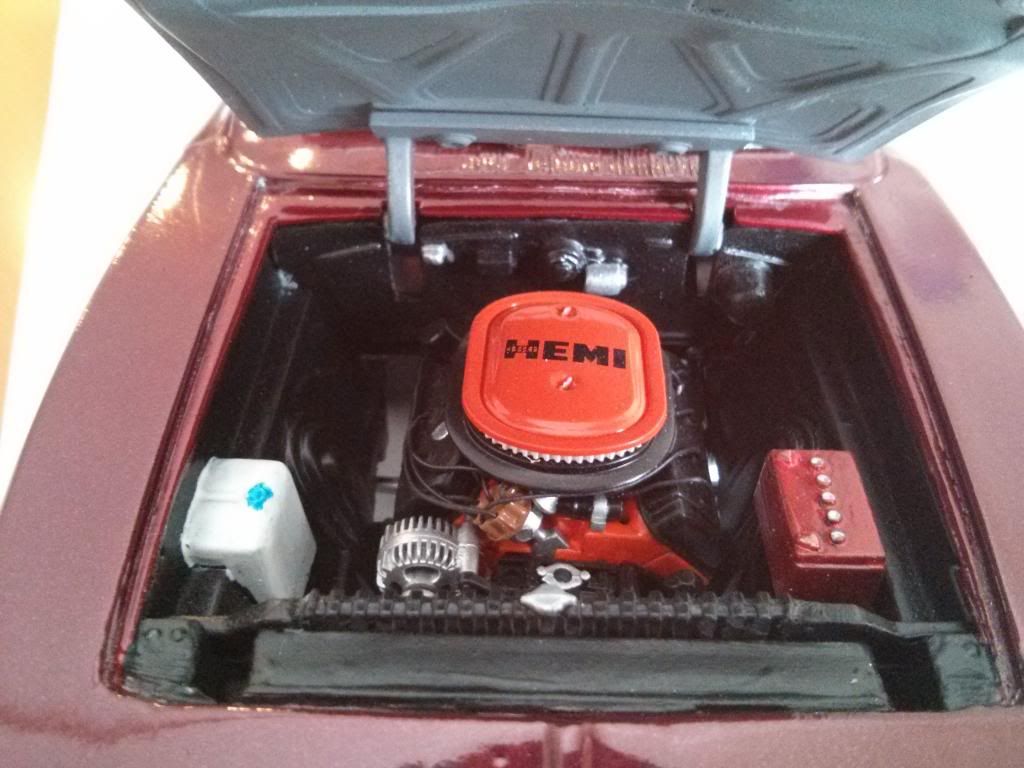
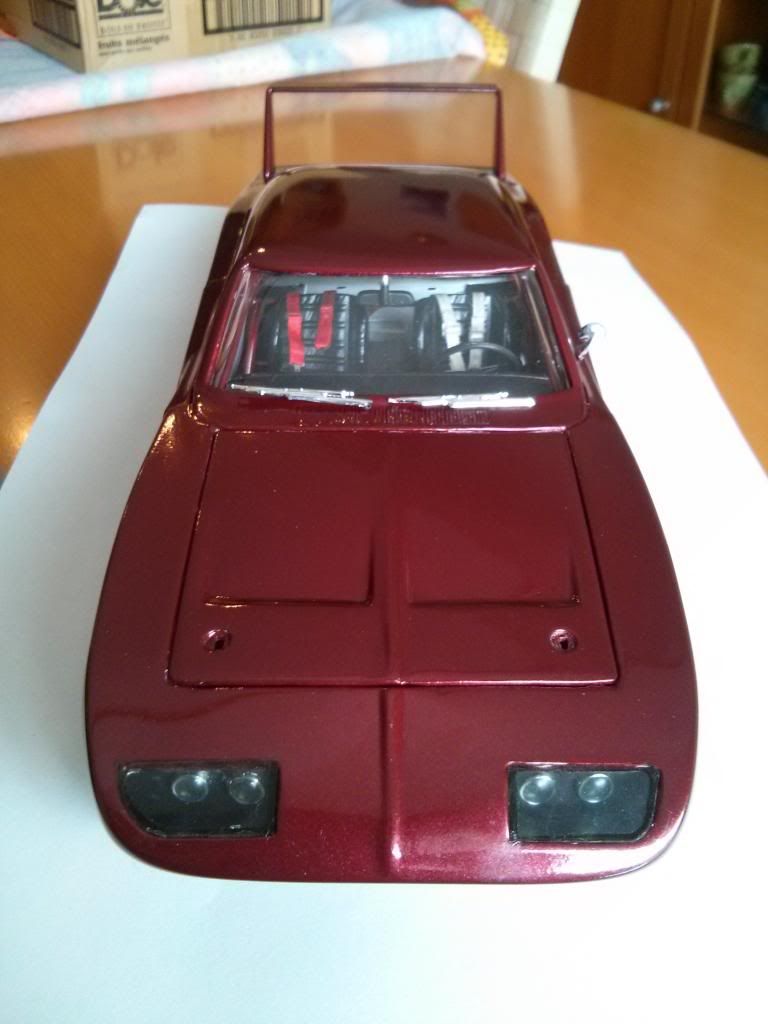
Installed Headlights: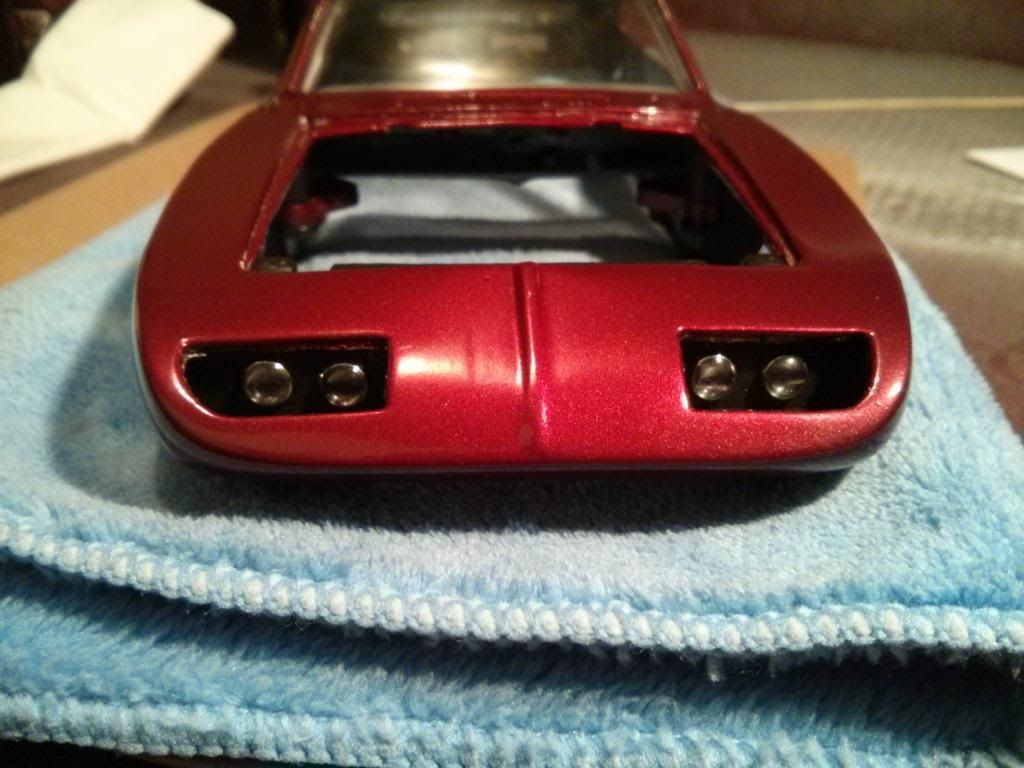
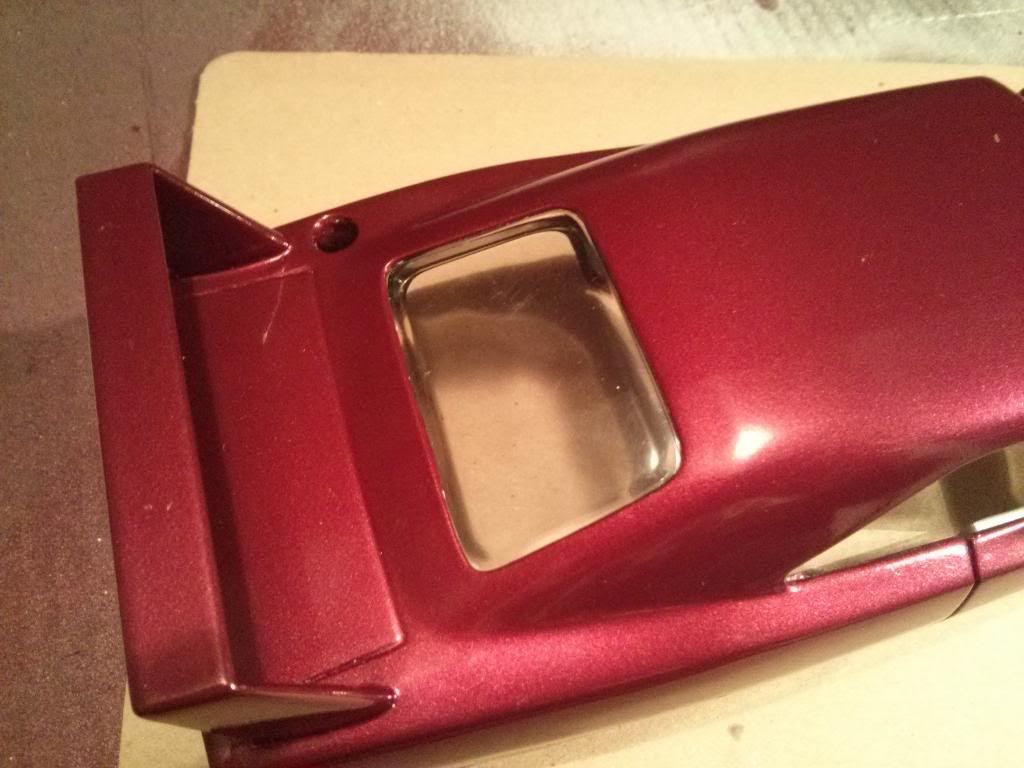
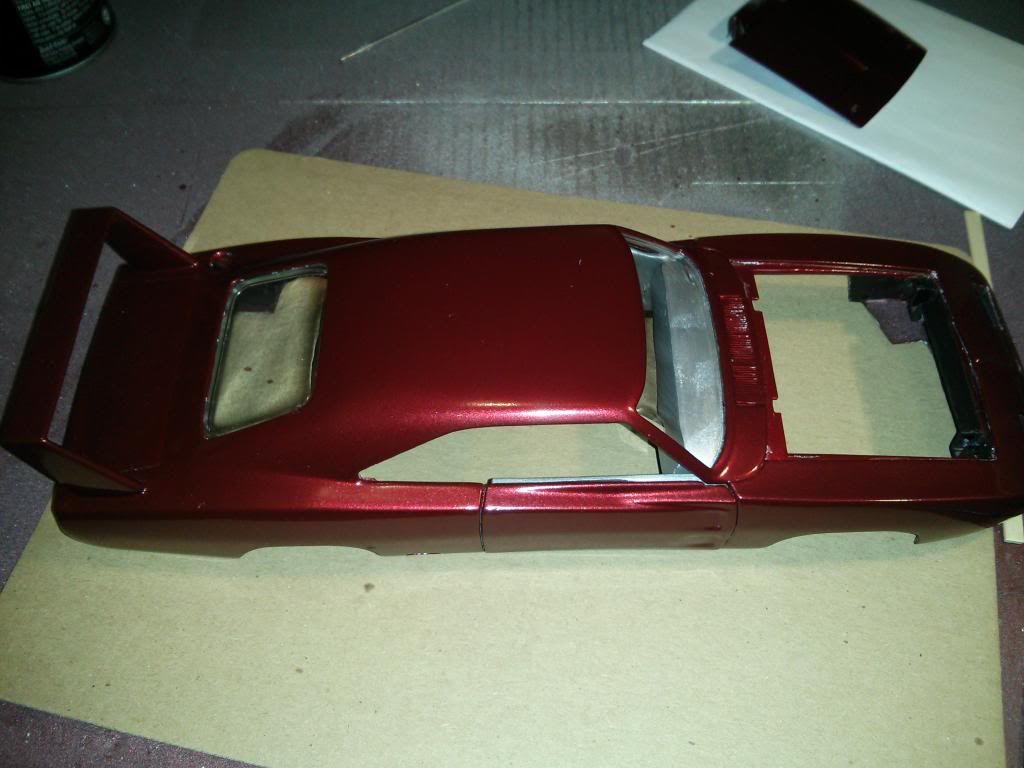
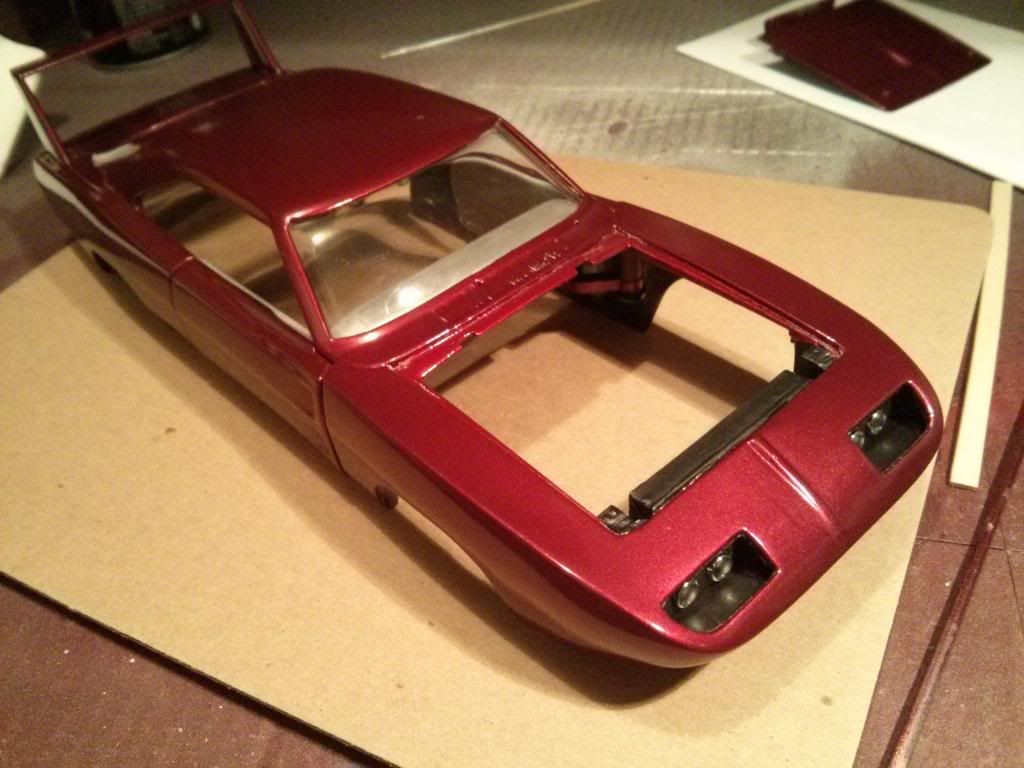
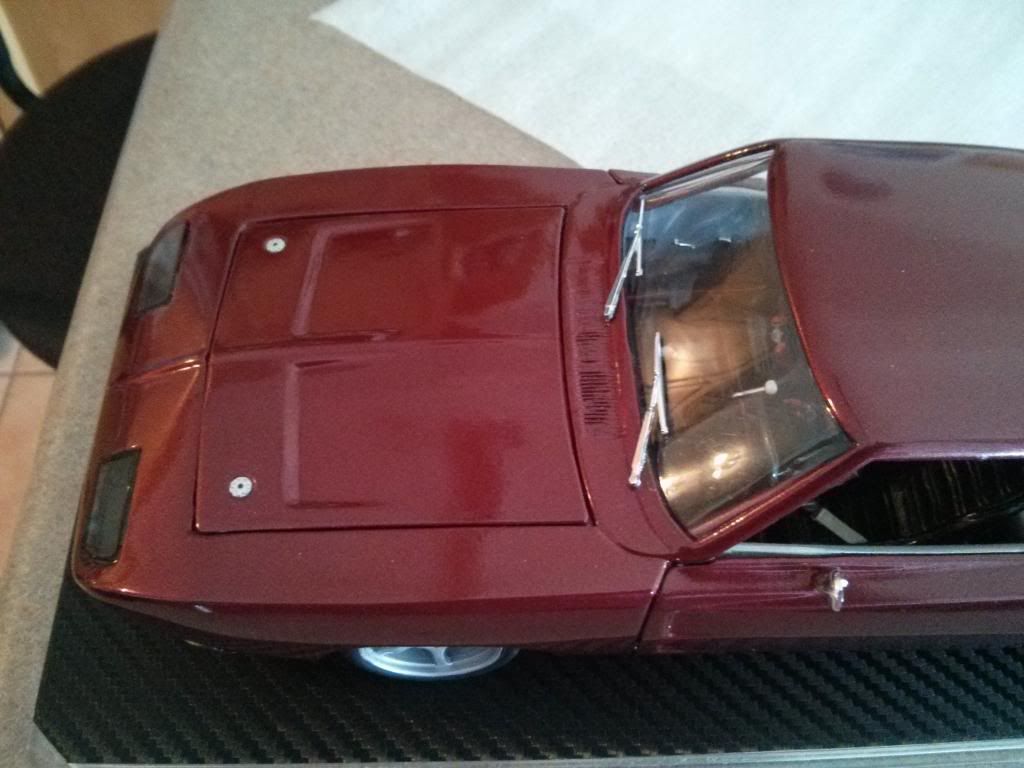
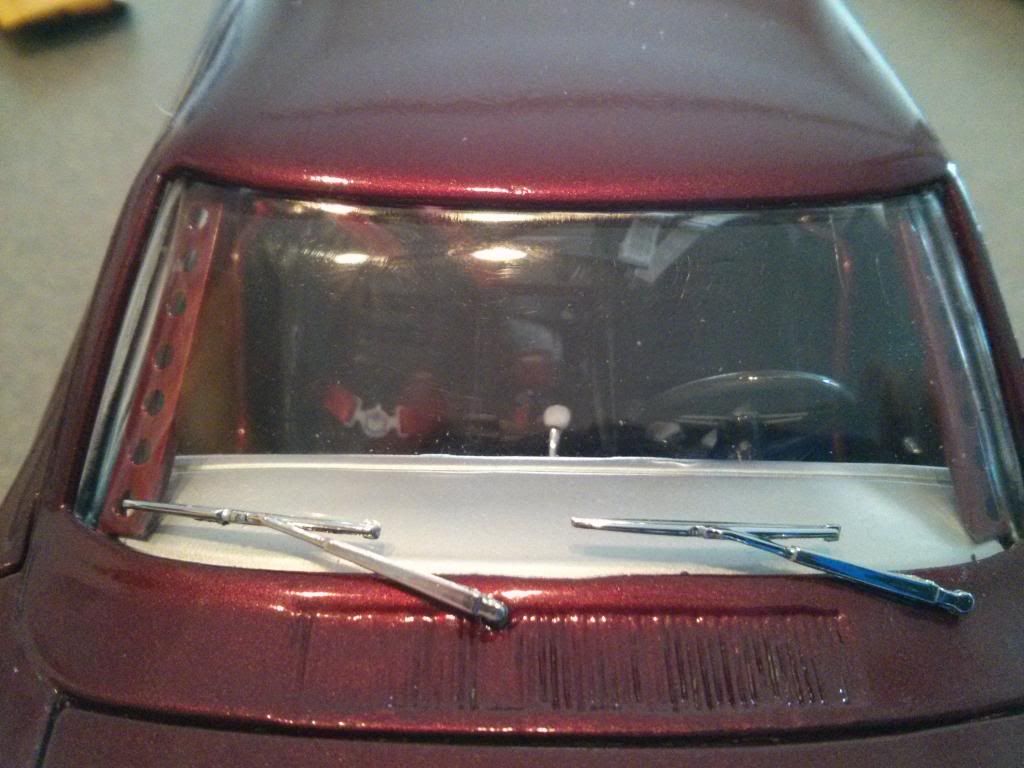
Installed Windows:
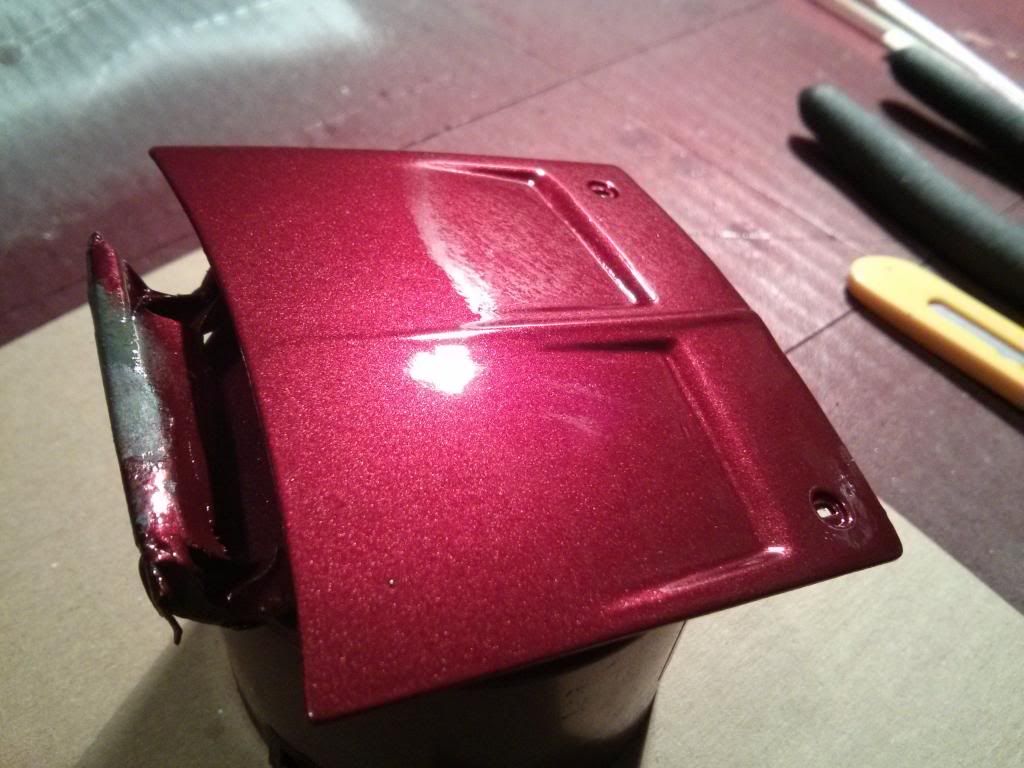
Primed,Painted & Cleared Hood: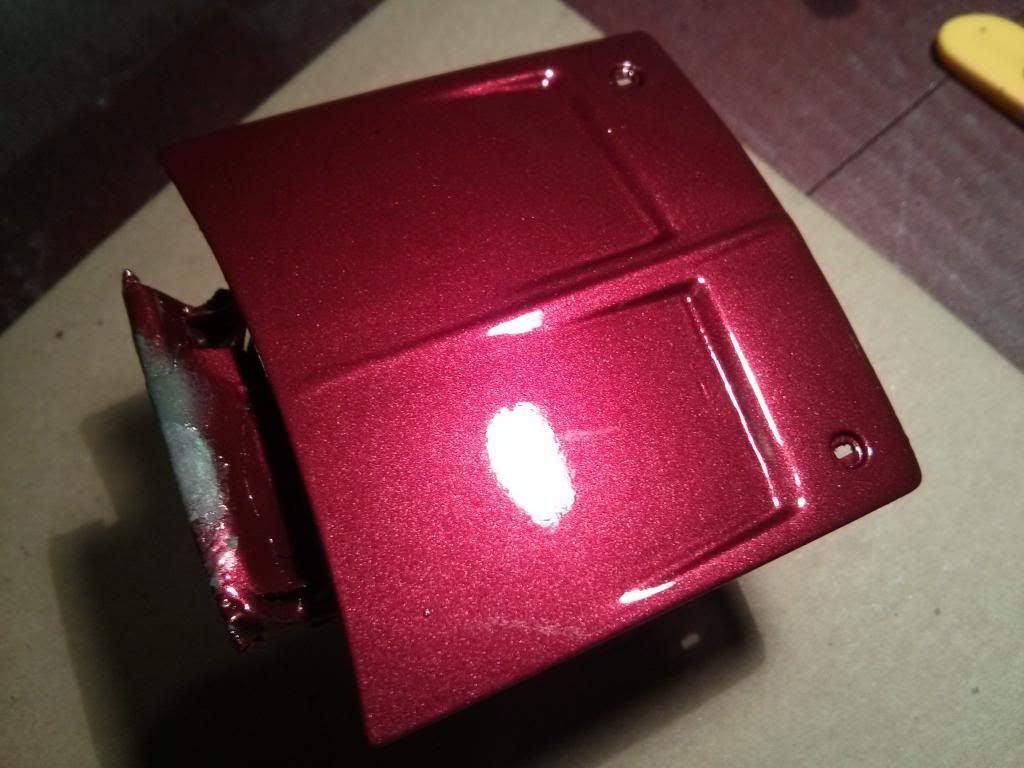
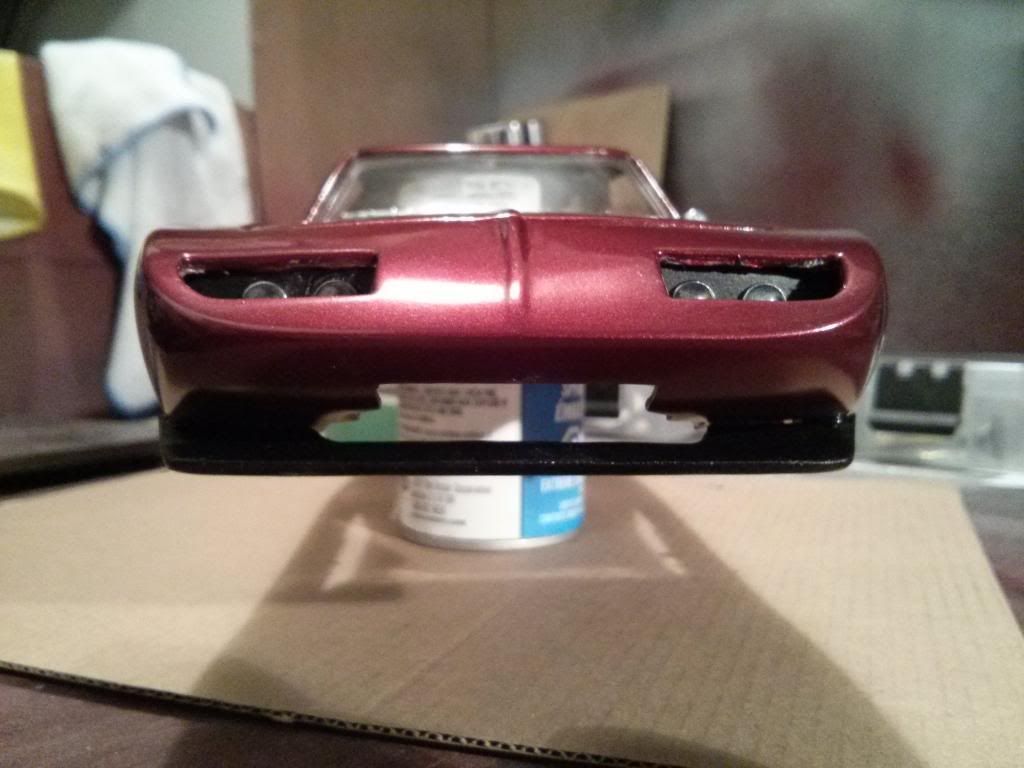
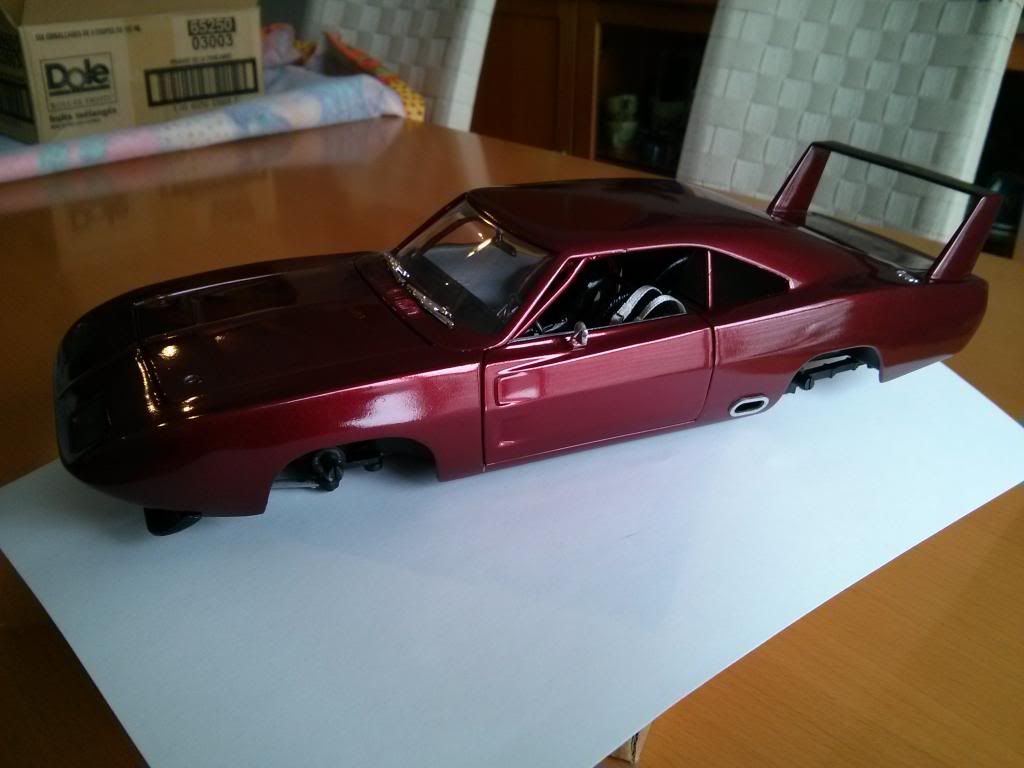
A little more progress with the a couple of the exterior additions.
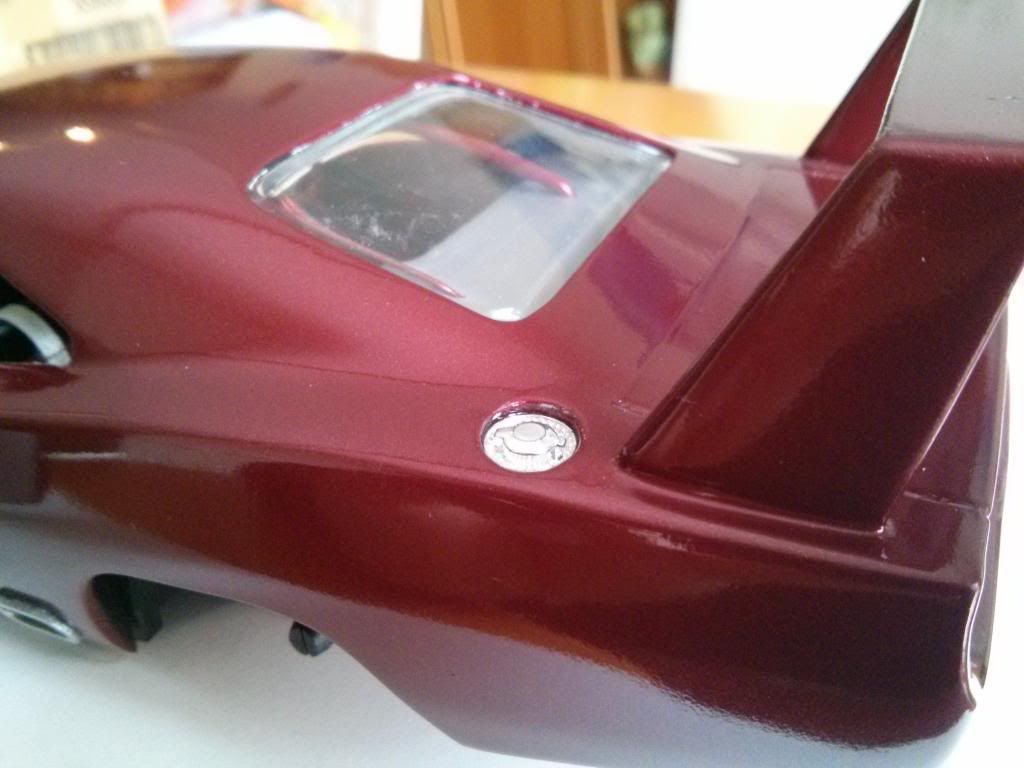
I painted the lower front spoiler, and did the rear tailights at the same time(lights will install later).
I then Very cautiously attached the spoiler to the underside using a 5 min epoxy.

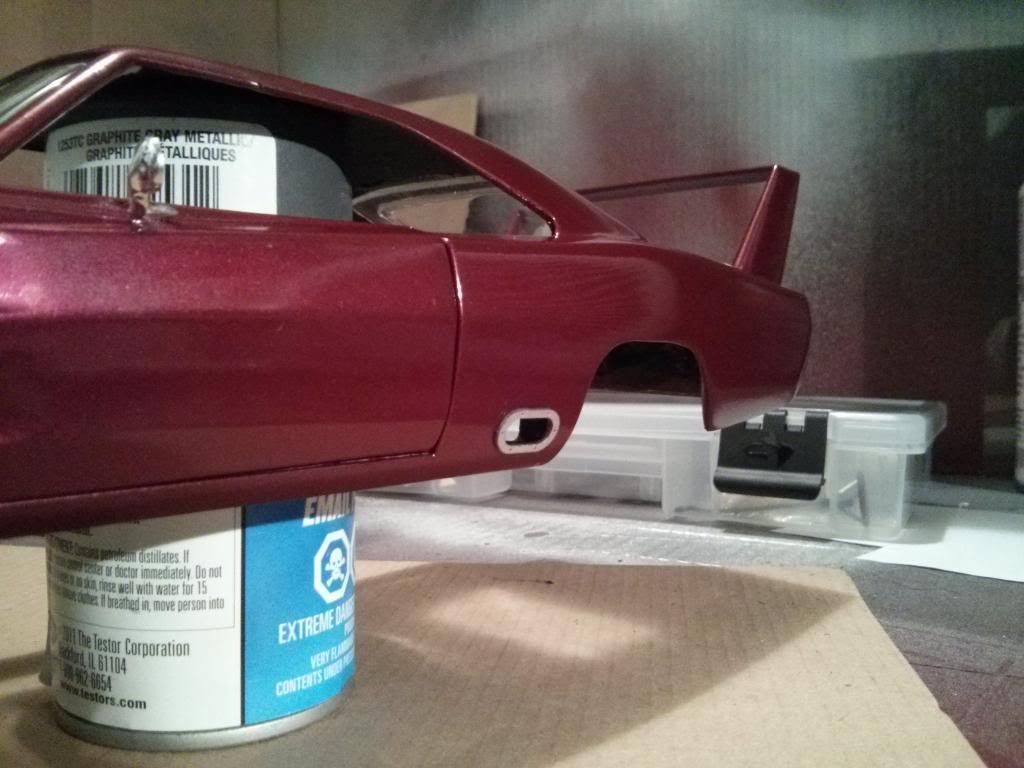
I then once again Very cautiously attached the side exhaust rings into place with the glue. Everything seems to be holding.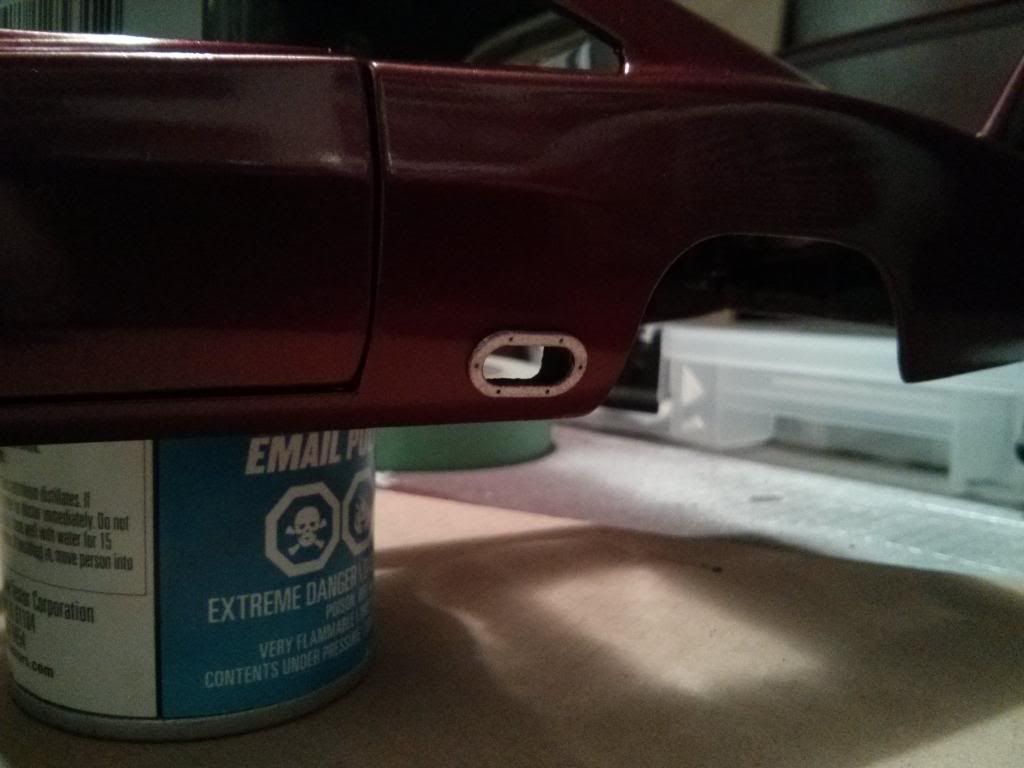
Painted and installed rear tailights: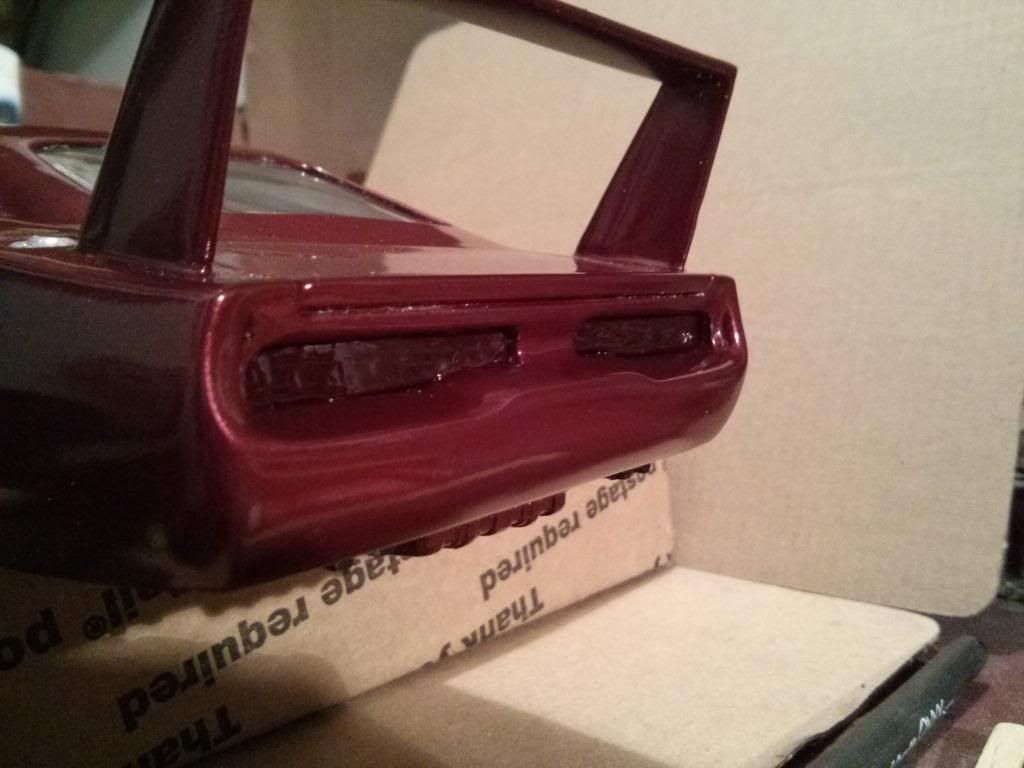
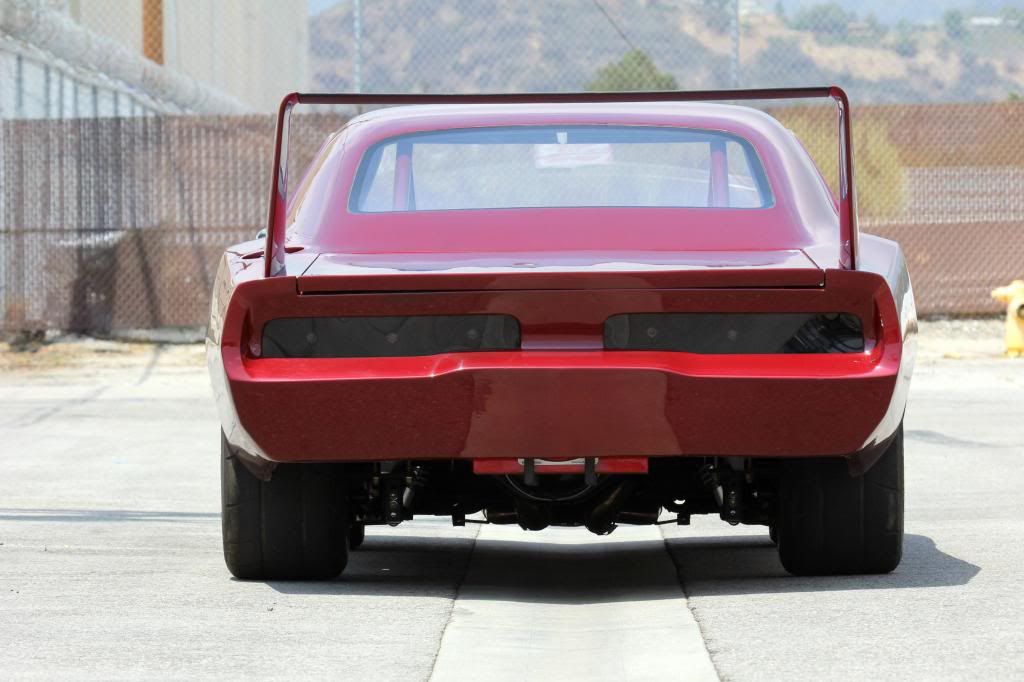
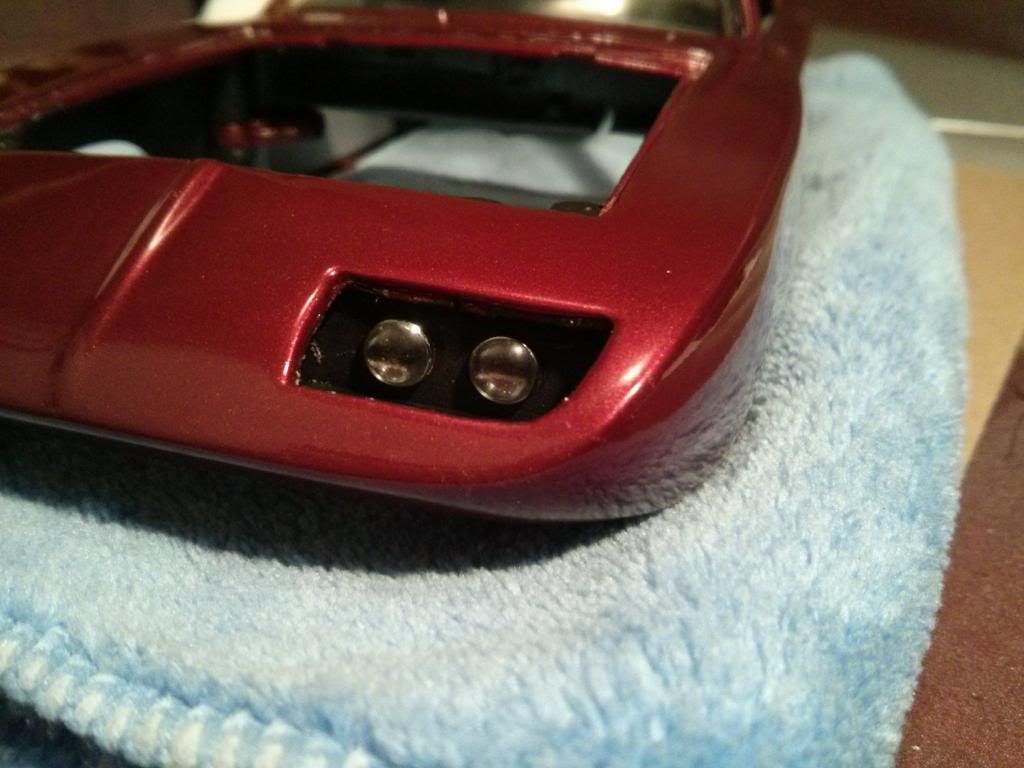
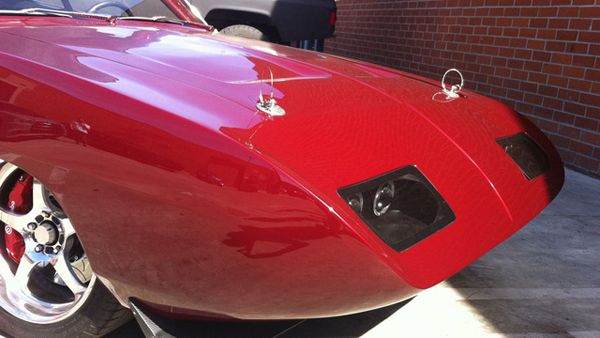
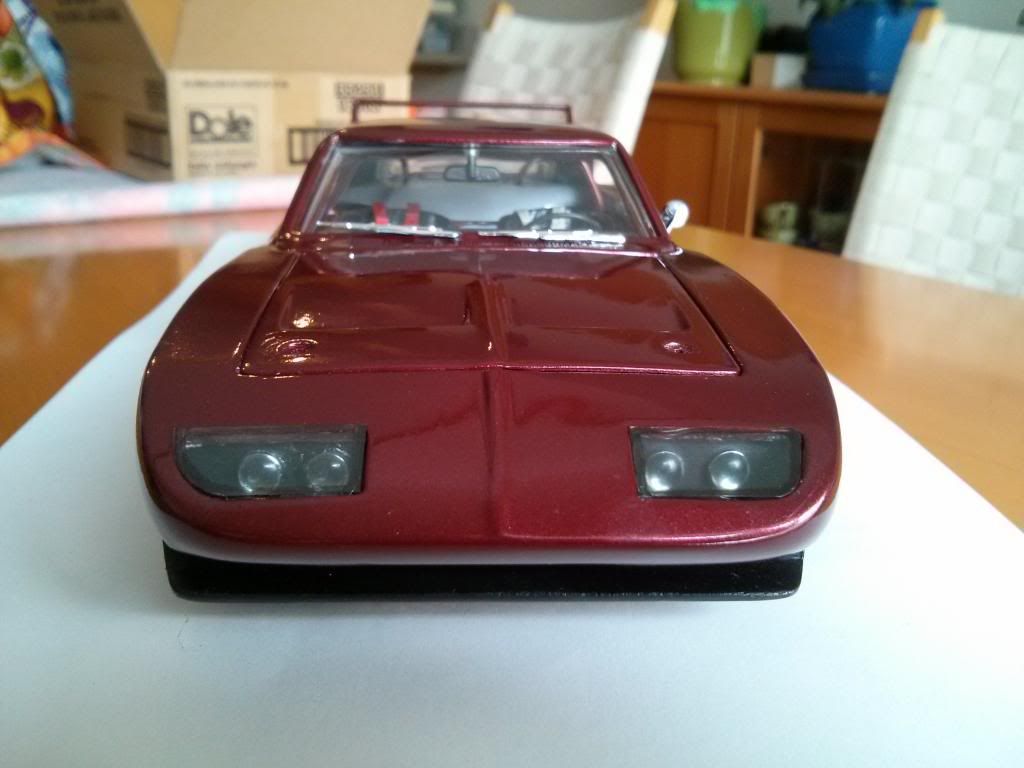
Added Front Headlight Covers:

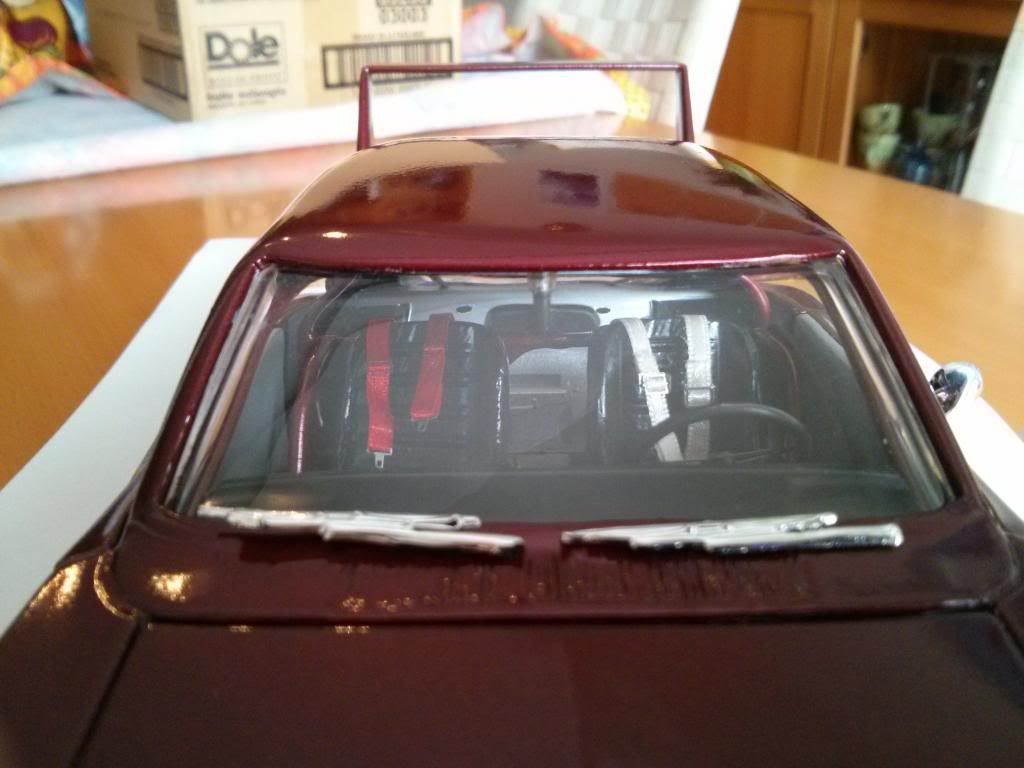
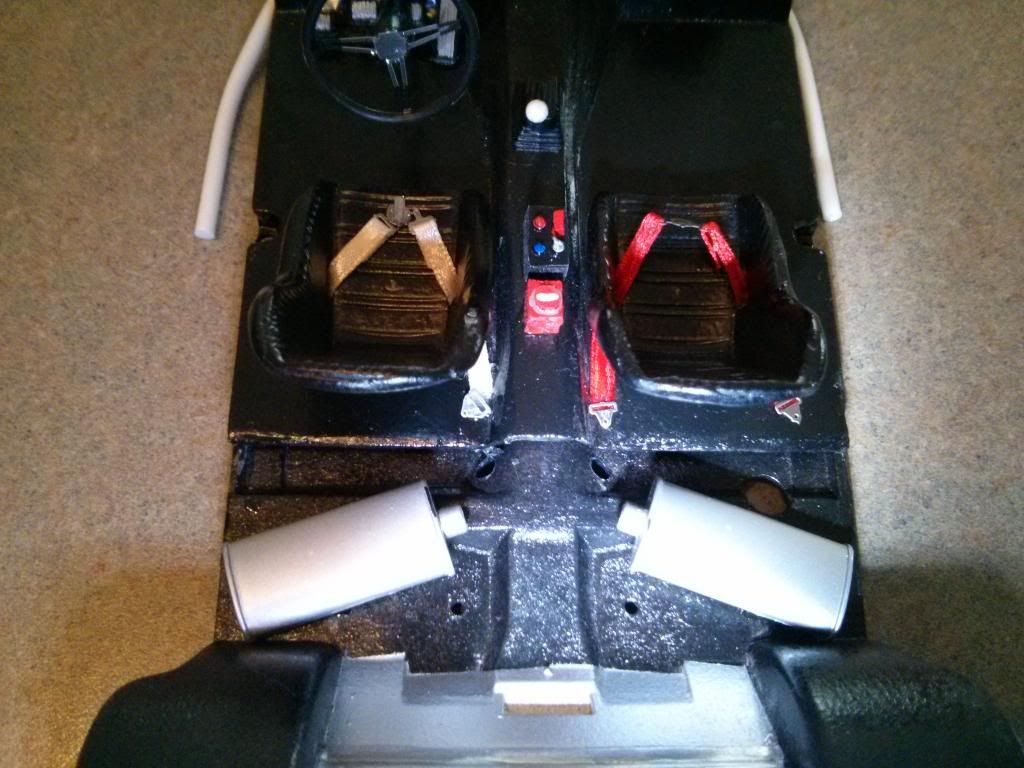
Put together Steering Wheel(PE & Rubber parts on the original shaft):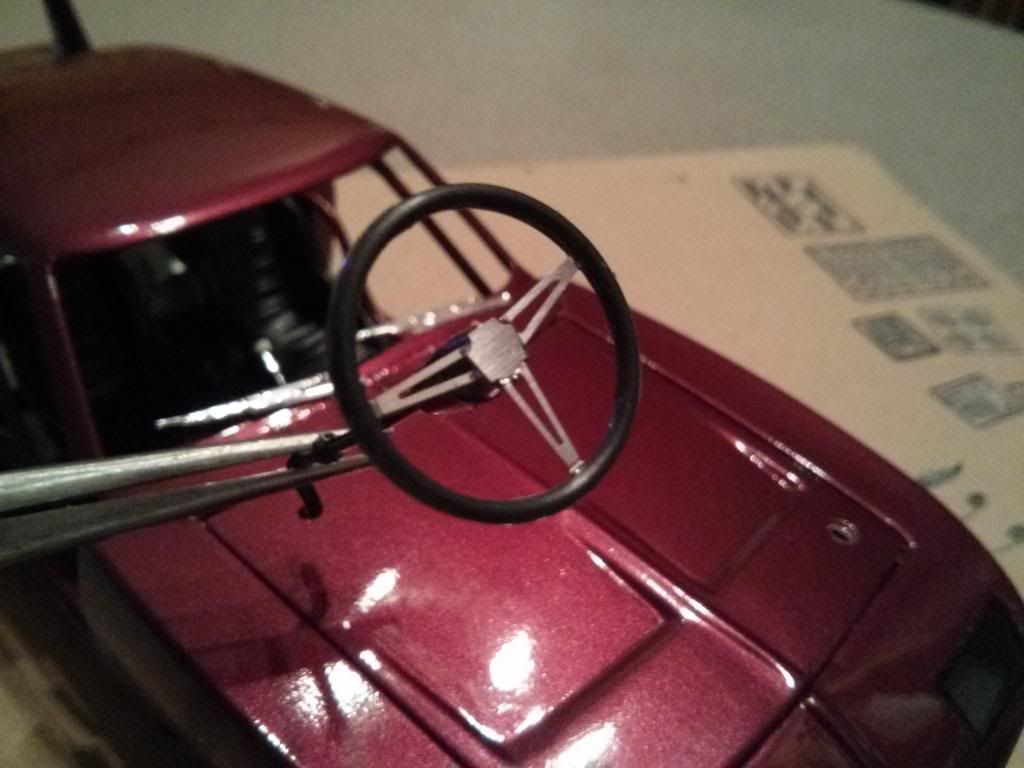
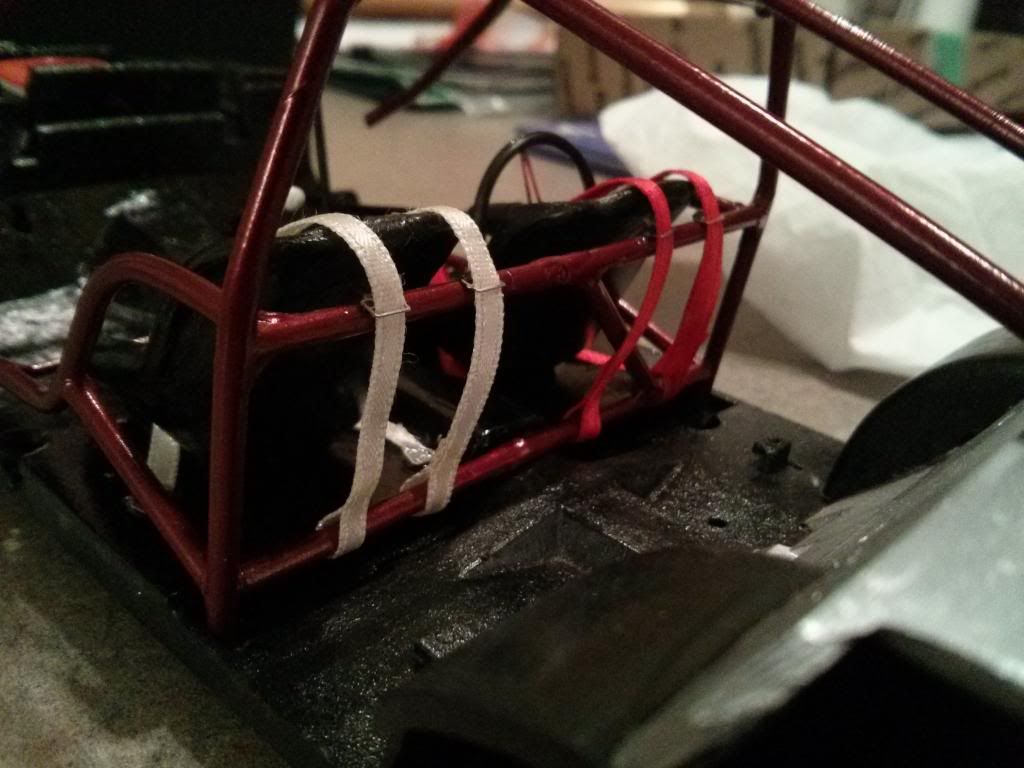
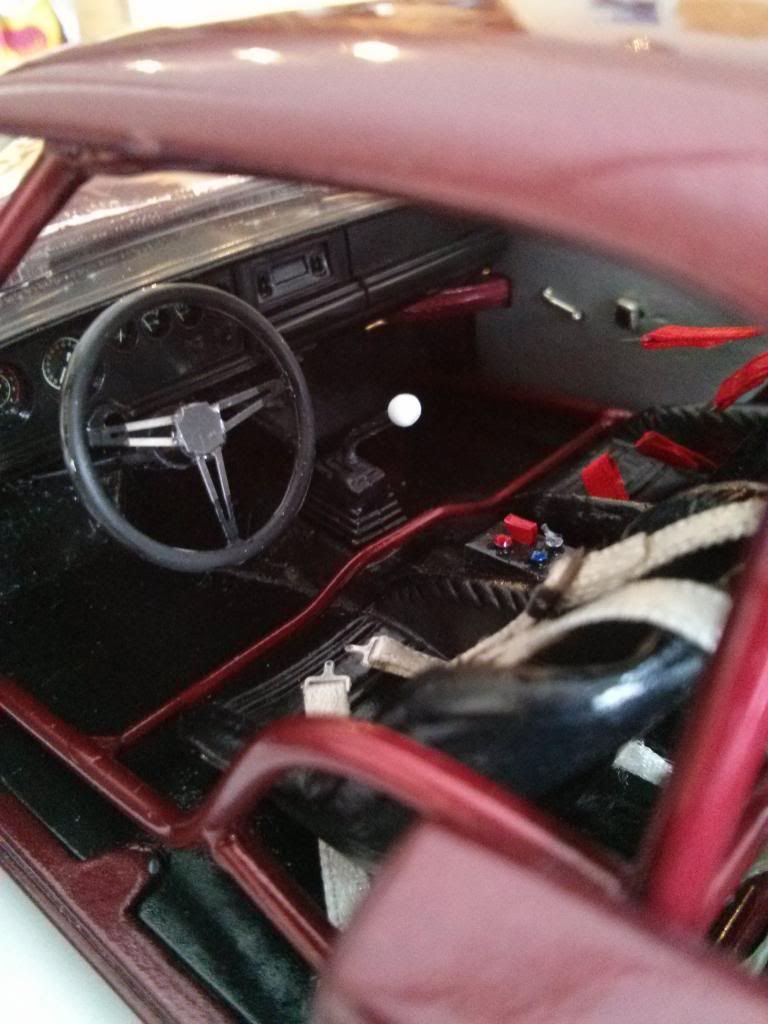
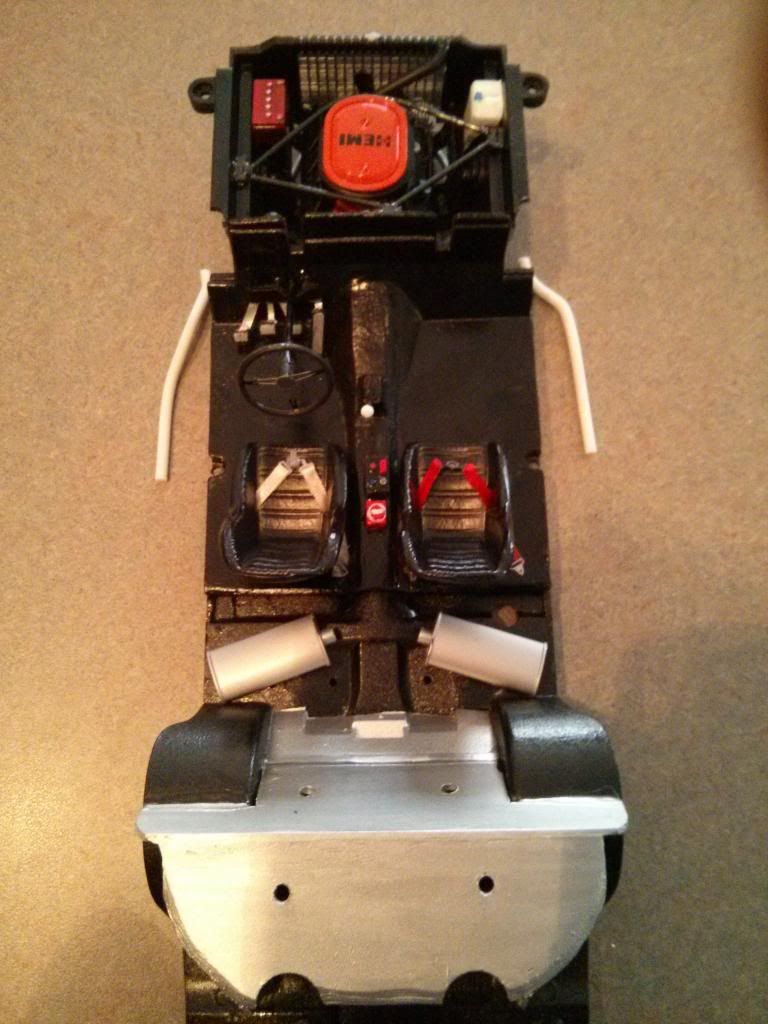
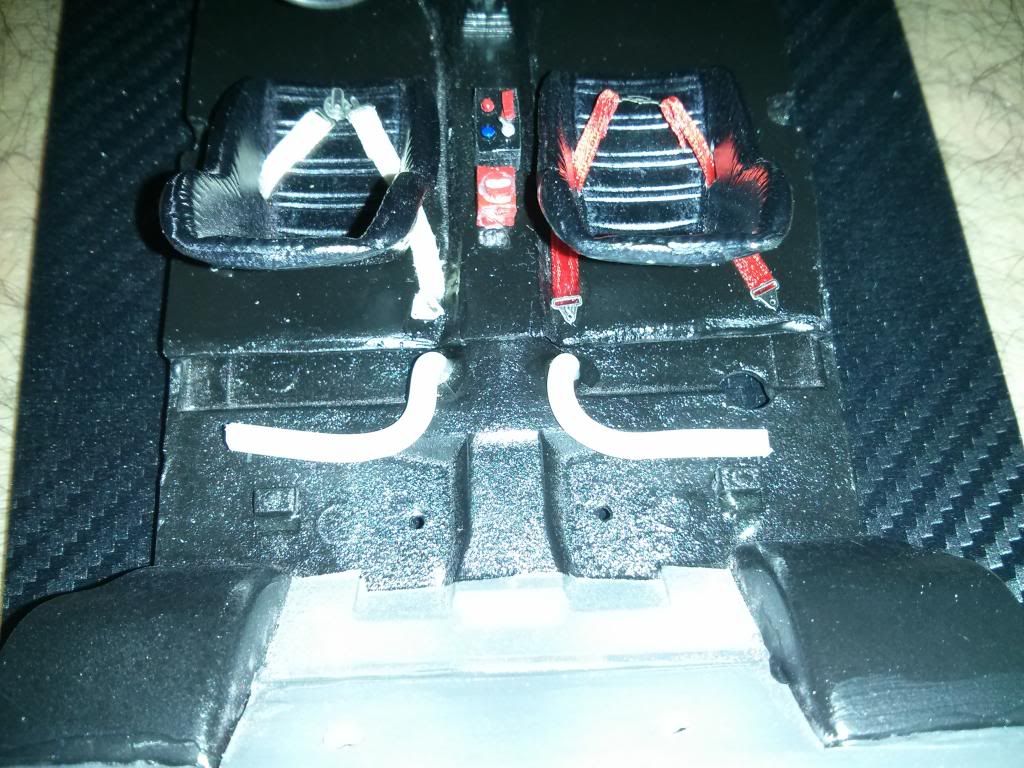
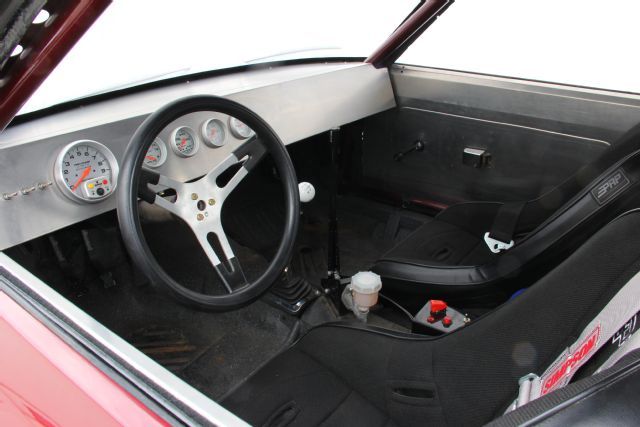 Installed Seats, Gear Shifter and Nitrous Control Switch Box:
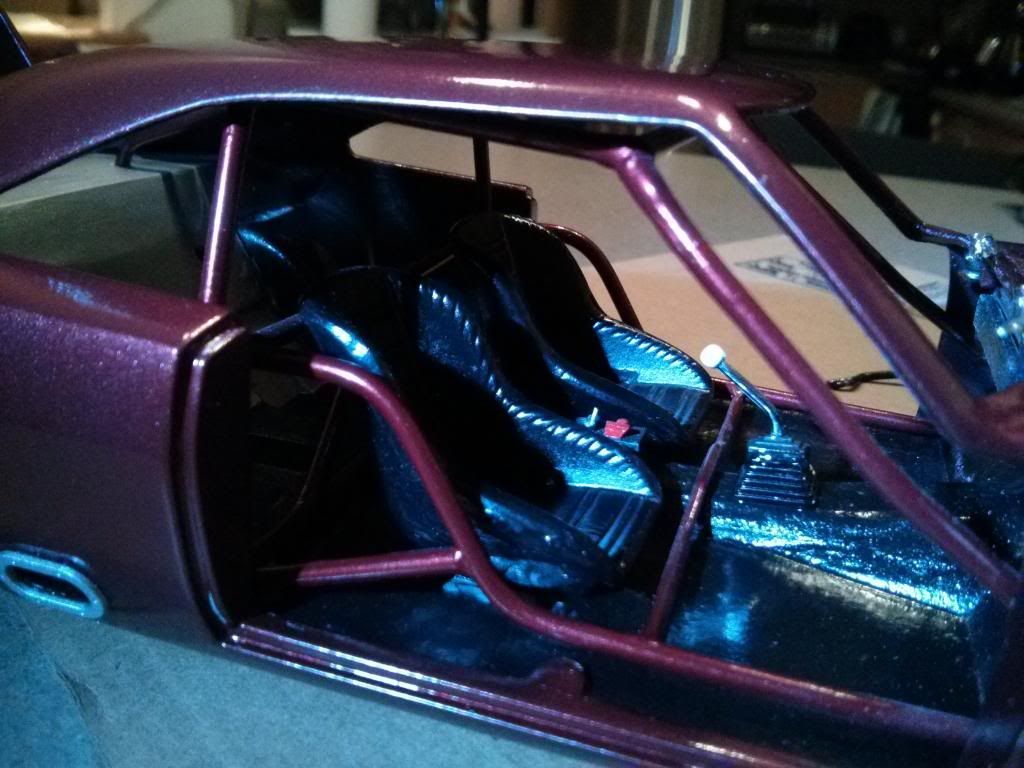
Still awaiting news on my remaining parts, but moved forward with the interior details, and have gotten some finished.
Seat Belts installed:
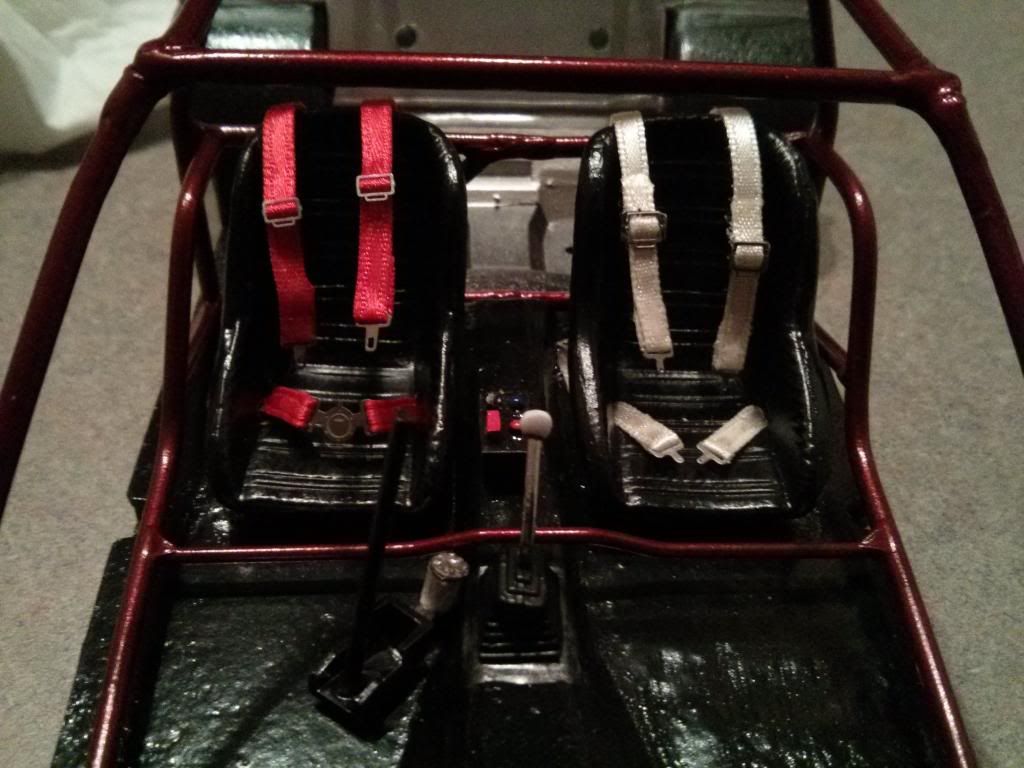
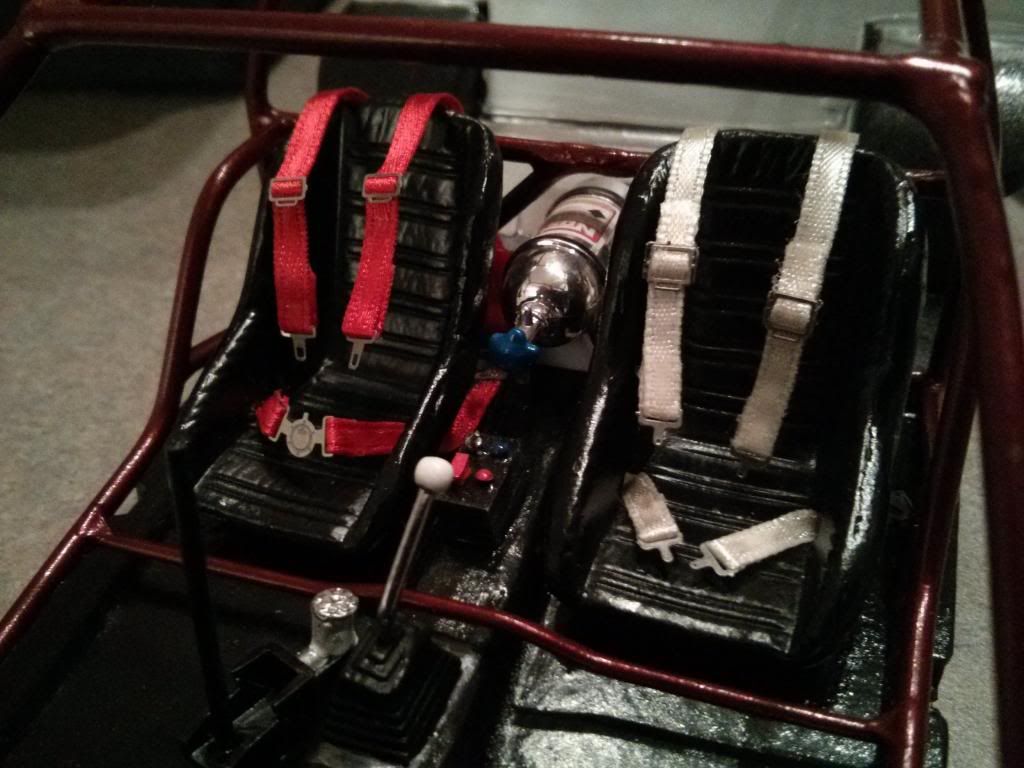
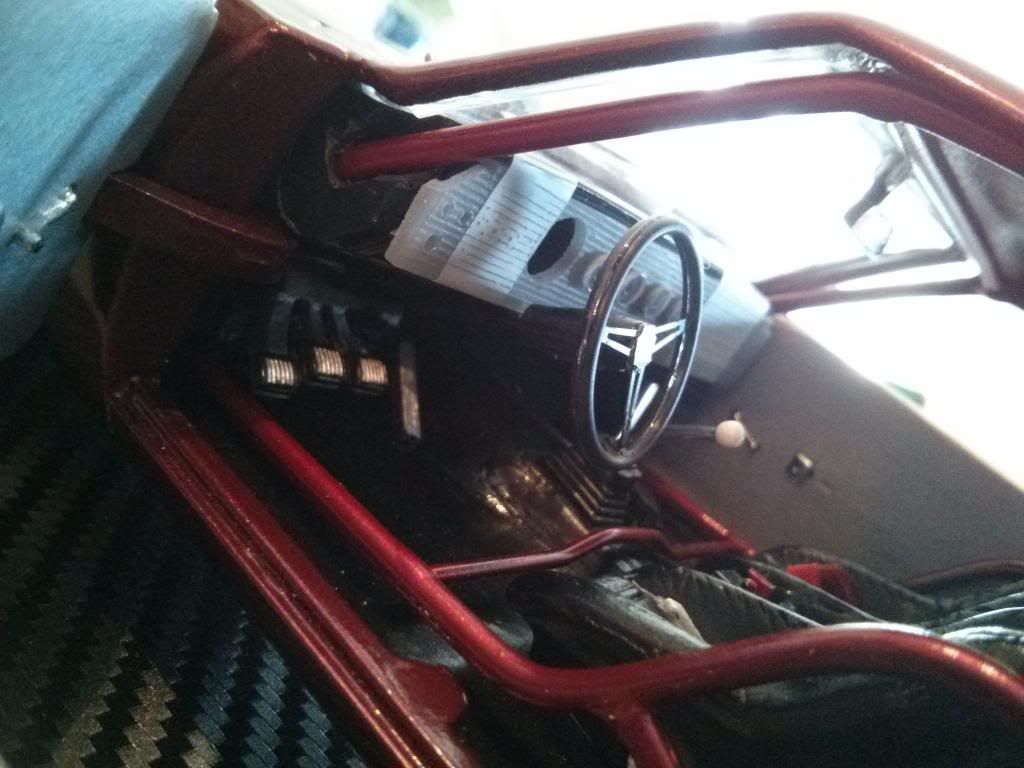
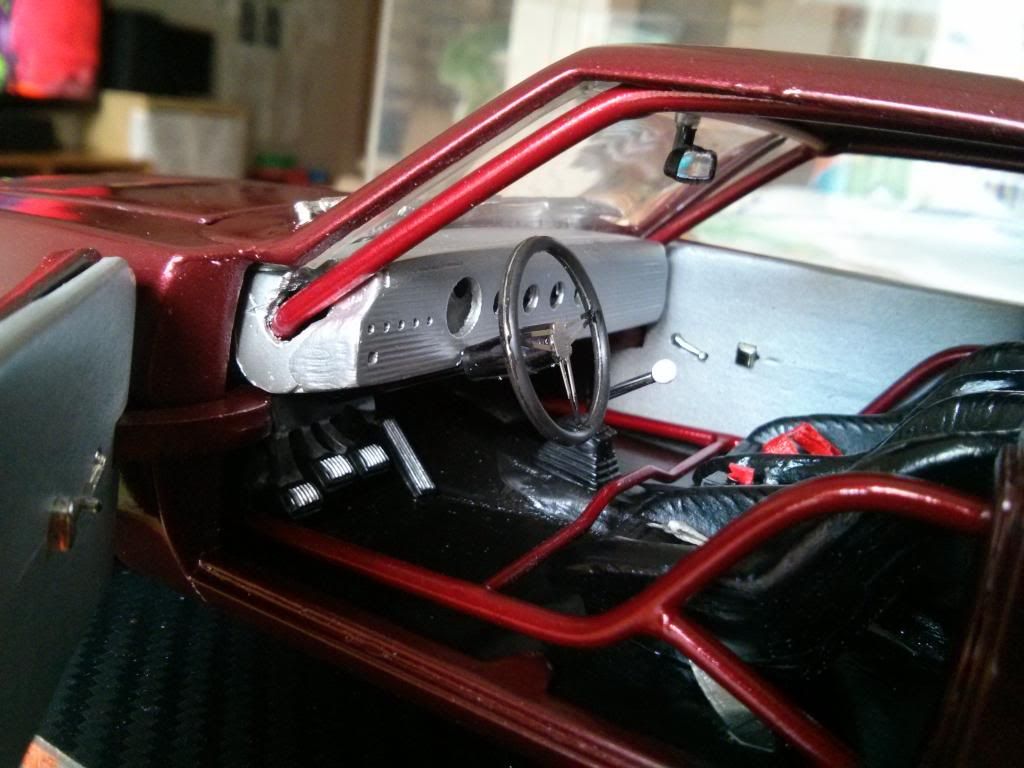
Steering Wheel installed & temporary Dashboard:
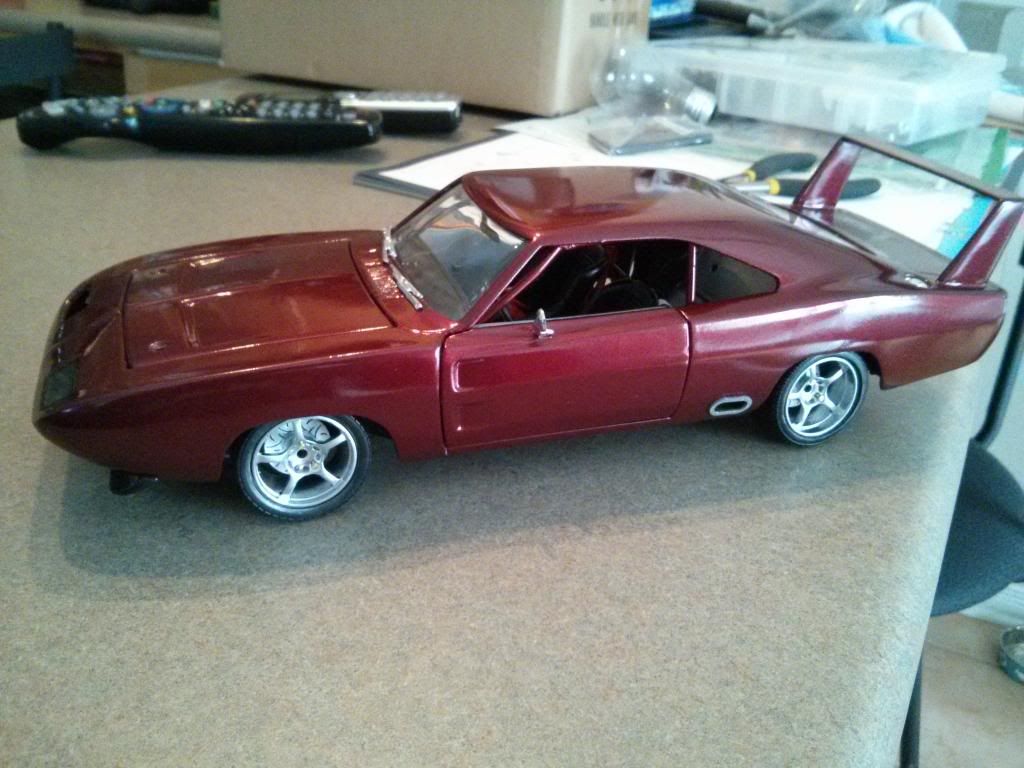
Few extra pics
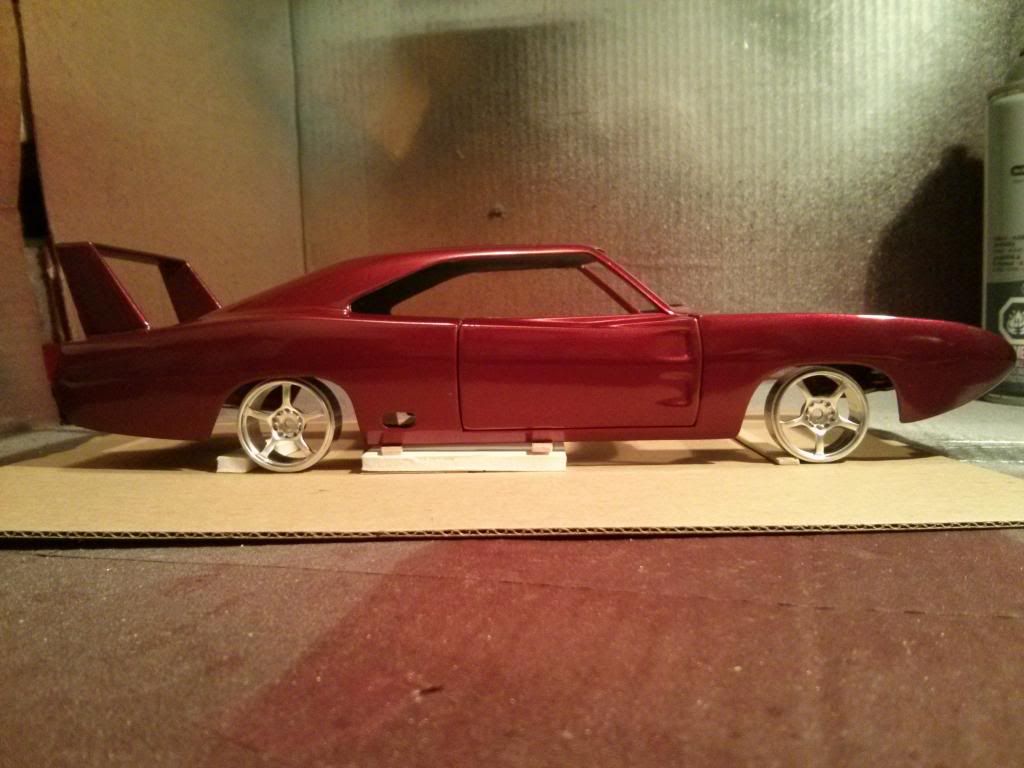
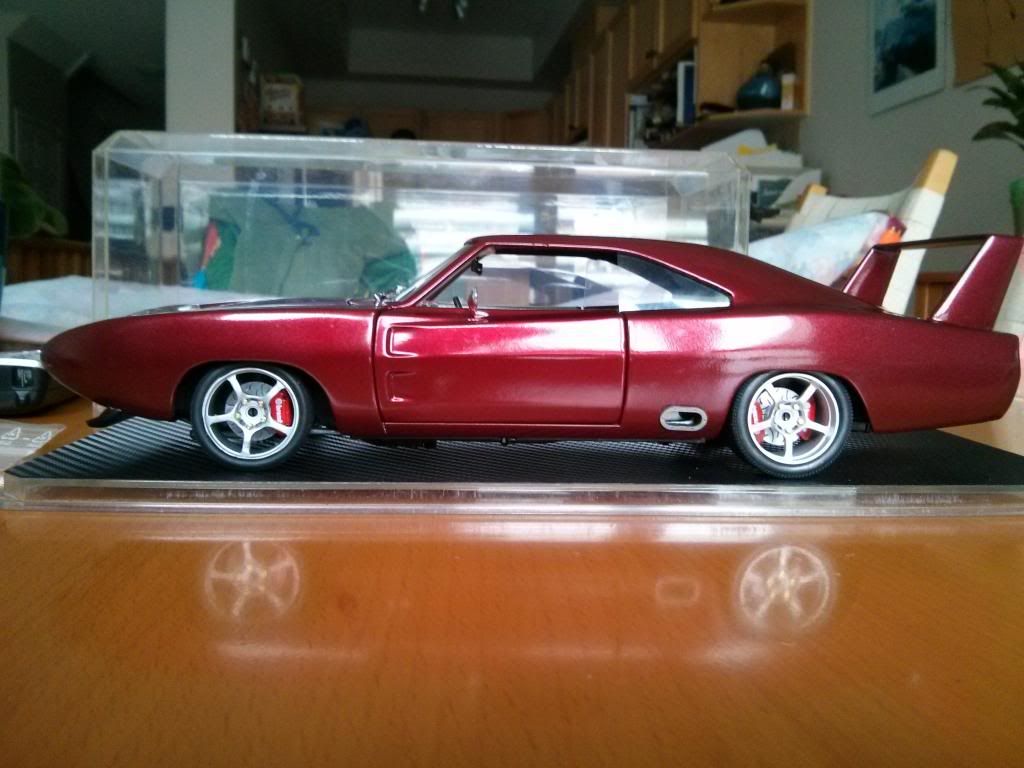
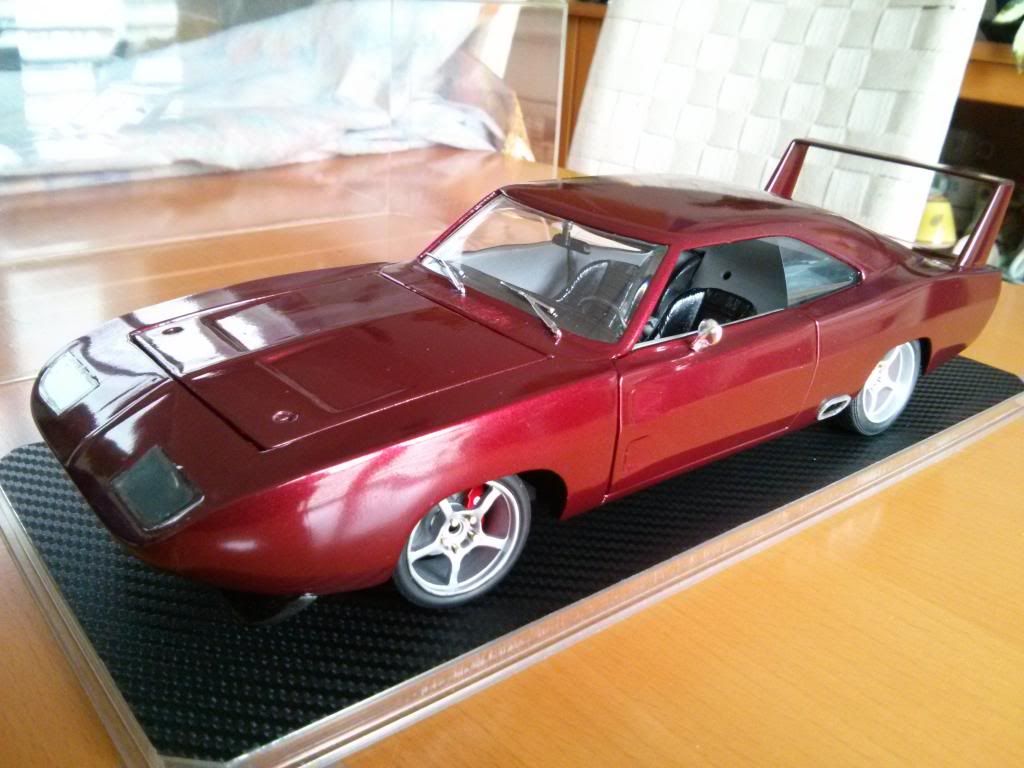
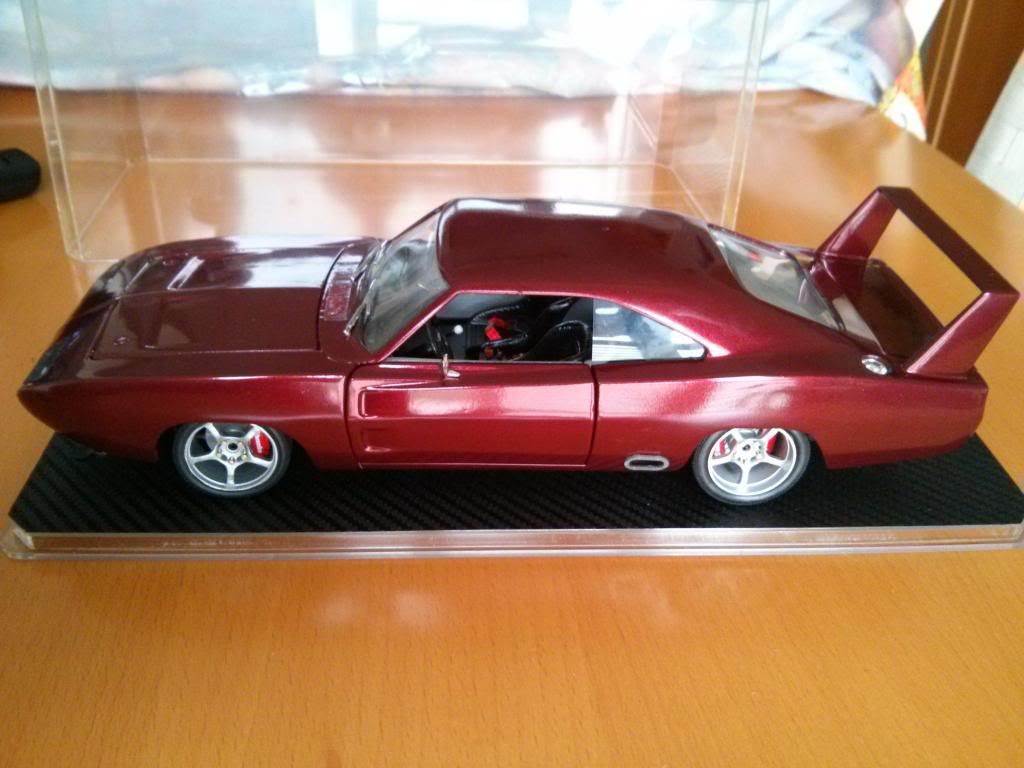
As I wait for remaining parts(including proper tires), I tried some other ones on and took a few teaser shots of what it should look like when it's done.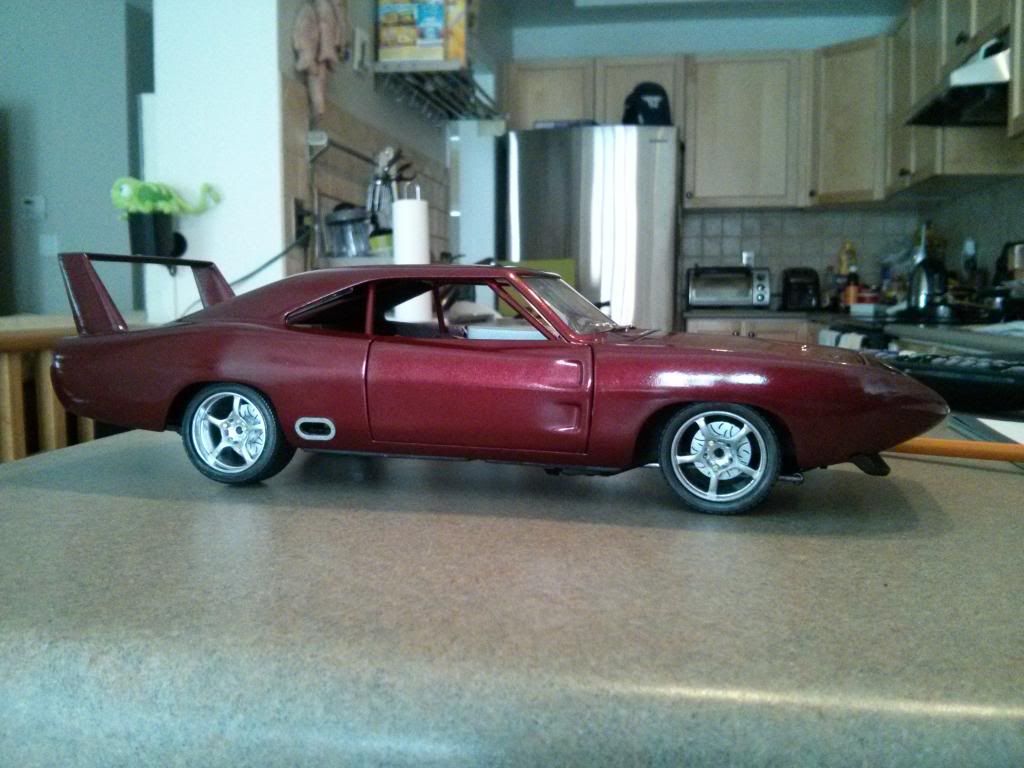
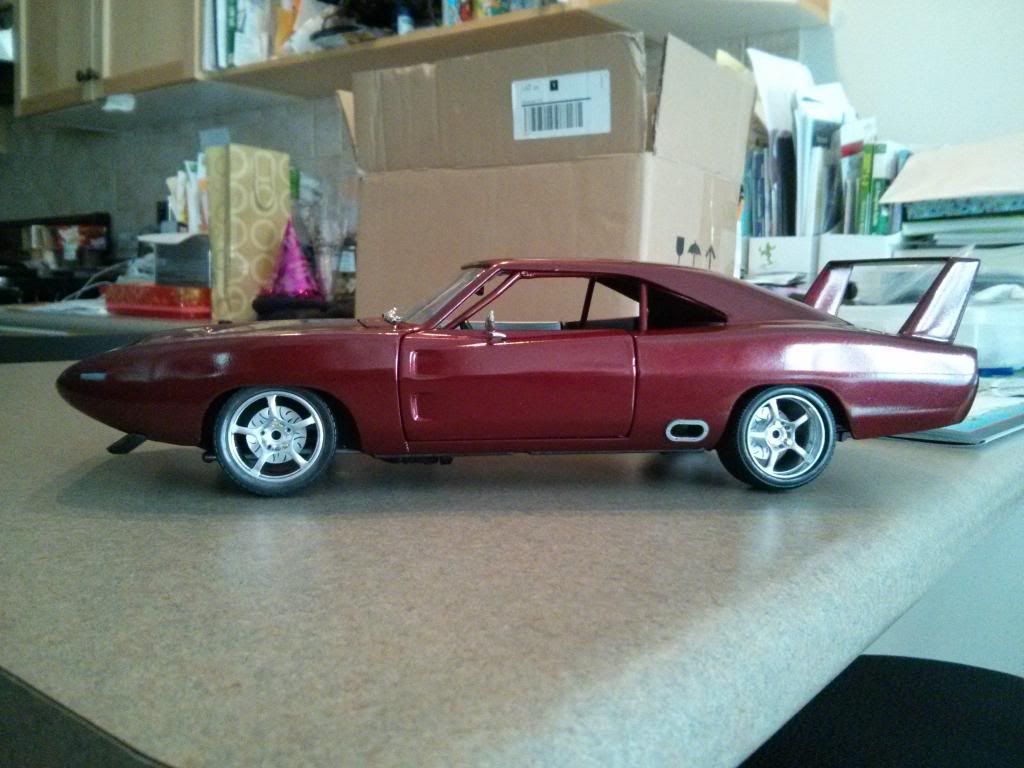
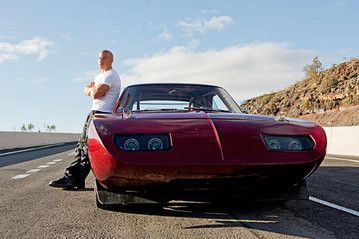
Pretty close to the 1:1?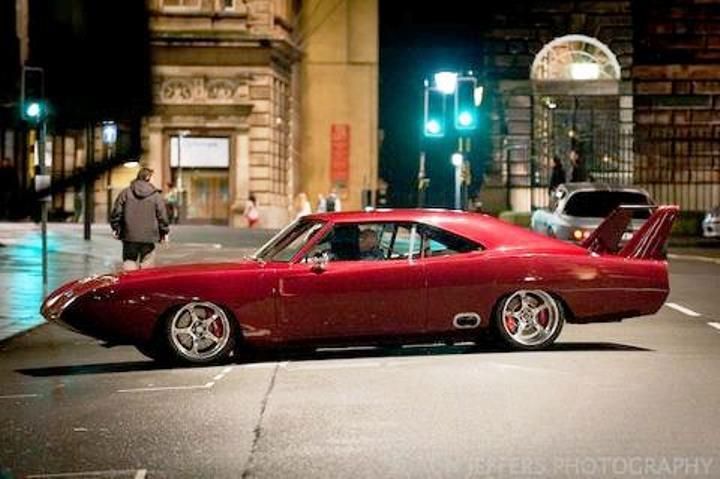
Installed Headlights:
Installed Windows:
Primed,Painted & Cleared Hood:
A little more progress with the a couple of the exterior additions.
I painted the lower front spoiler, and did the rear tailights at the same time(lights will install later).
I then Very cautiously attached the spoiler to the underside using a 5 min epoxy.
I then once again Very cautiously attached the side exhaust rings into place with the glue. Everything seems to be holding.
Painted and installed rear tailights:
Added Front Headlight Covers:
Put together Steering Wheel(PE & Rubber parts on the original shaft):
Installed Seats, Gear Shifter and Nitrous Control Switch Box:Still awaiting news on my remaining parts, but moved forward with the interior details, and have gotten some finished.
Seat Belts installed:
Steering Wheel installed & temporary Dashboard:
Few extra pics
As I wait for remaining parts(including proper tires), I tried some other ones on and took a few teaser shots of what it should look like when it's done.
Pretty close to the 1:1?


Re: Toretto's '69 Daytona Charger F&F 6
THAT IS DAMN SWEET!!!!!!!!!! 
-
StratosWRC

- .

- Posts: 7404
- Joined: Tue Aug 27, 2013 4:56 pm
- Location: Canada
Re: Toretto's '69 Daytona Charger F&F 6
Pretty awesome job. I'm guessing the finished car will sit a smidge lower though?
Re: Toretto's '69 Daytona Charger F&F 6
Thx, and Yes since those pics were taken I have lowered it more.StratosWRC wrote:Pretty awesome job. I'm guessing the finished car will sit a smidge lower though?
Re: Toretto's '69 Daytona Charger F&F 6
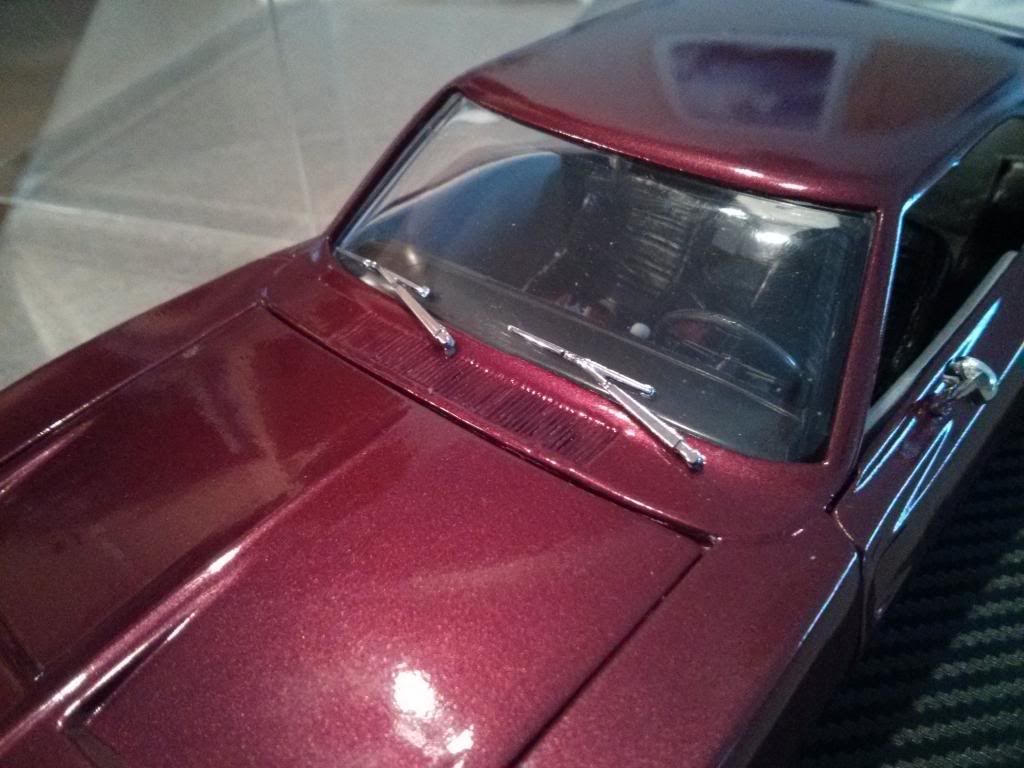
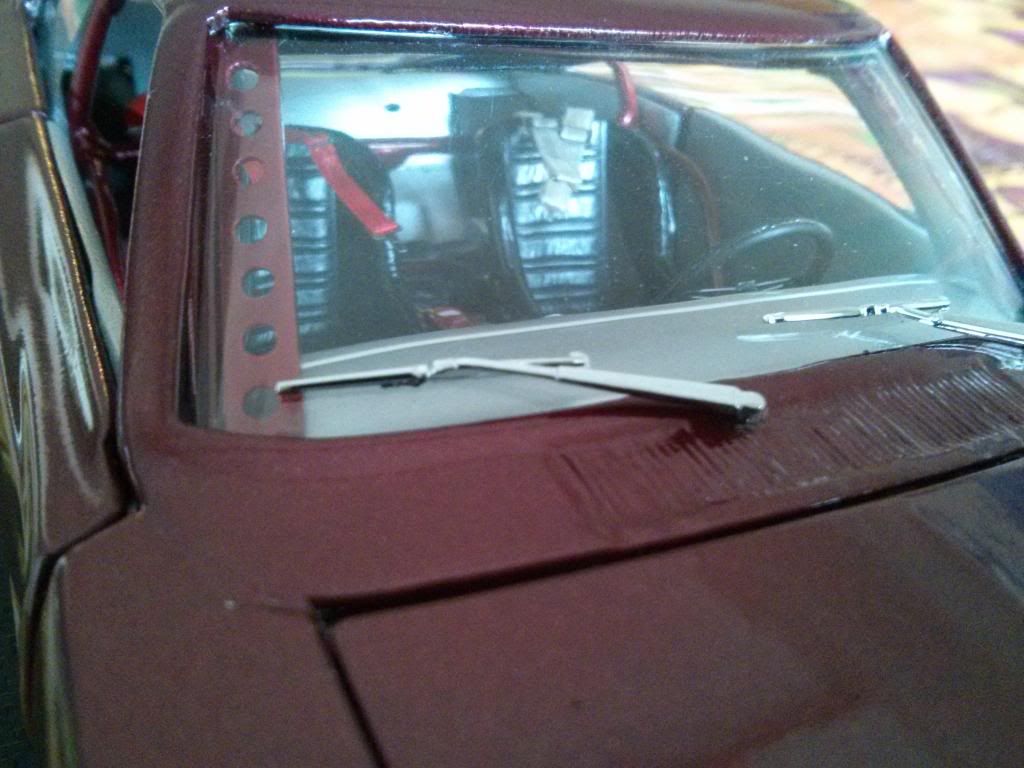
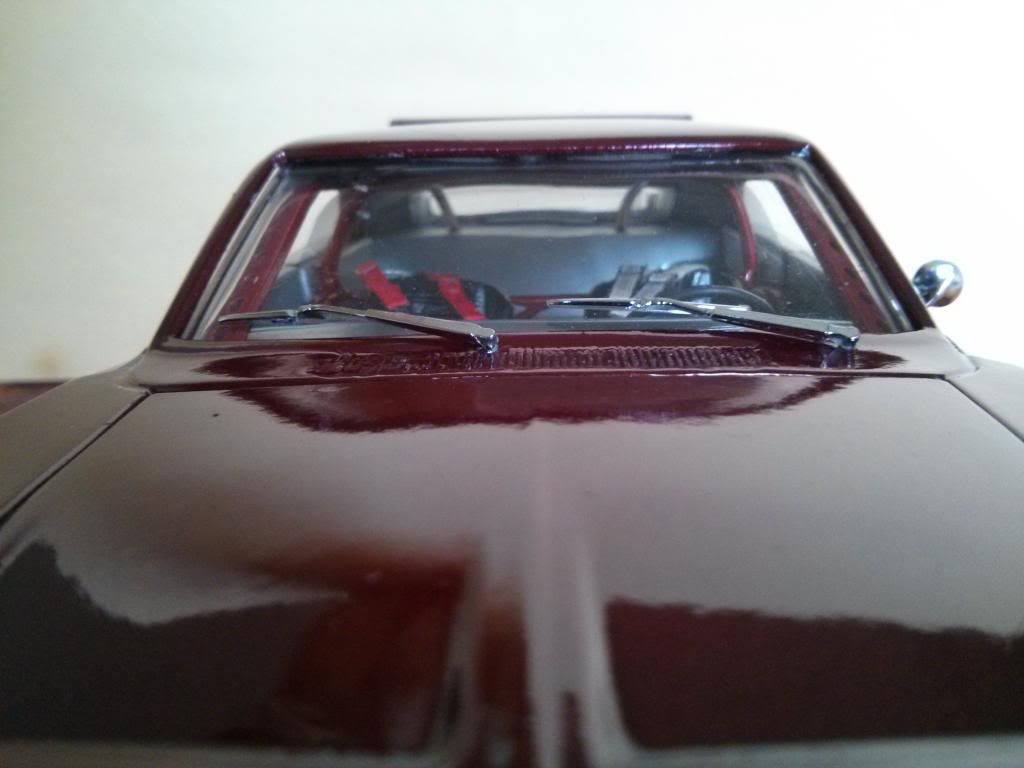
I got ahold of a replacement set of GMP wipers, to replace the awful ertl ones.
Definitely an improvement.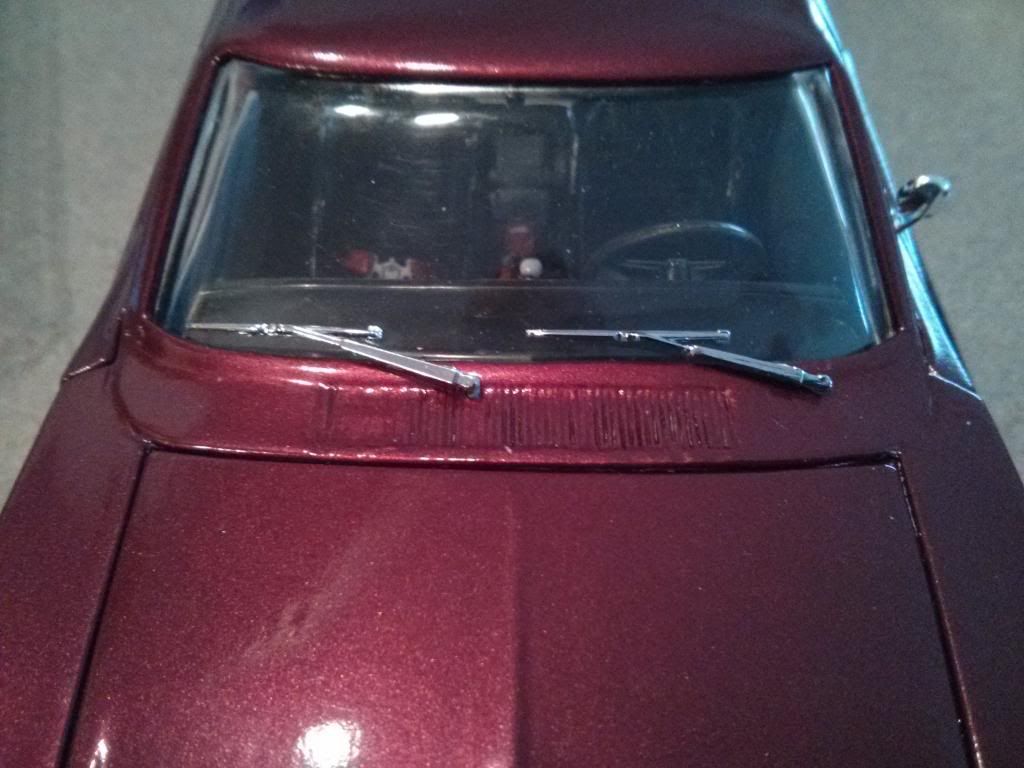
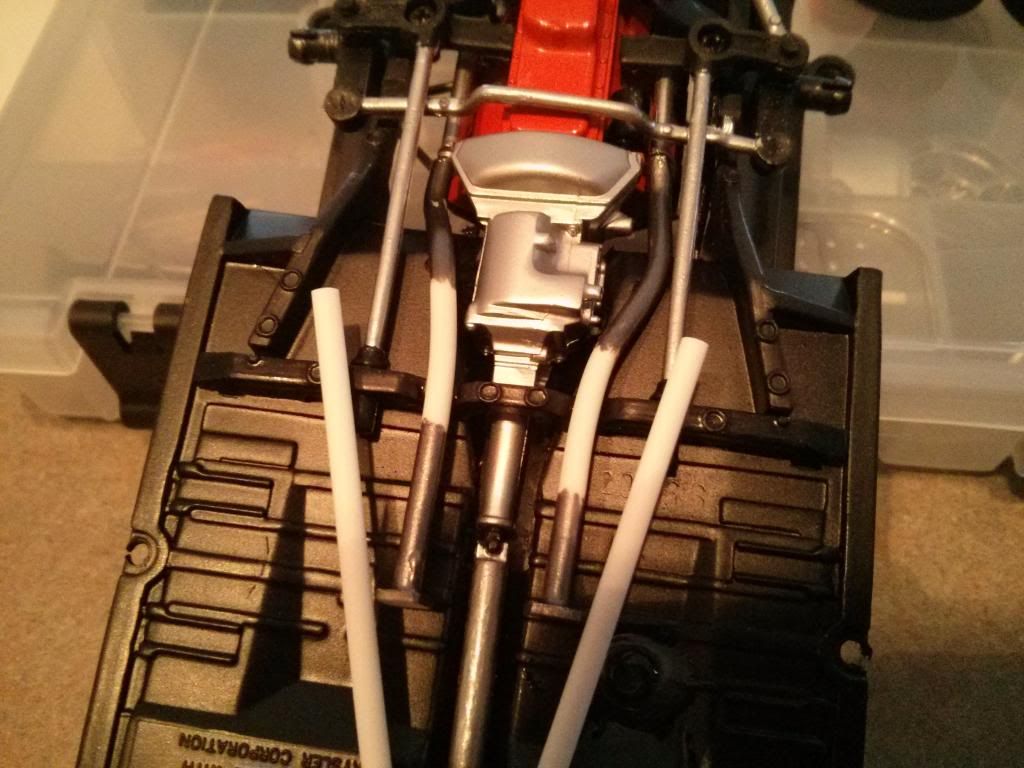
I have added a cross-brace under the hood, as well as an upper rad hose, with some styrene rods. I have also begun work on the exhaust pipe off the headers, which has to run up thru the floor behind the seats, a very tight area to fit it all(more progress pics of exhaust to come).
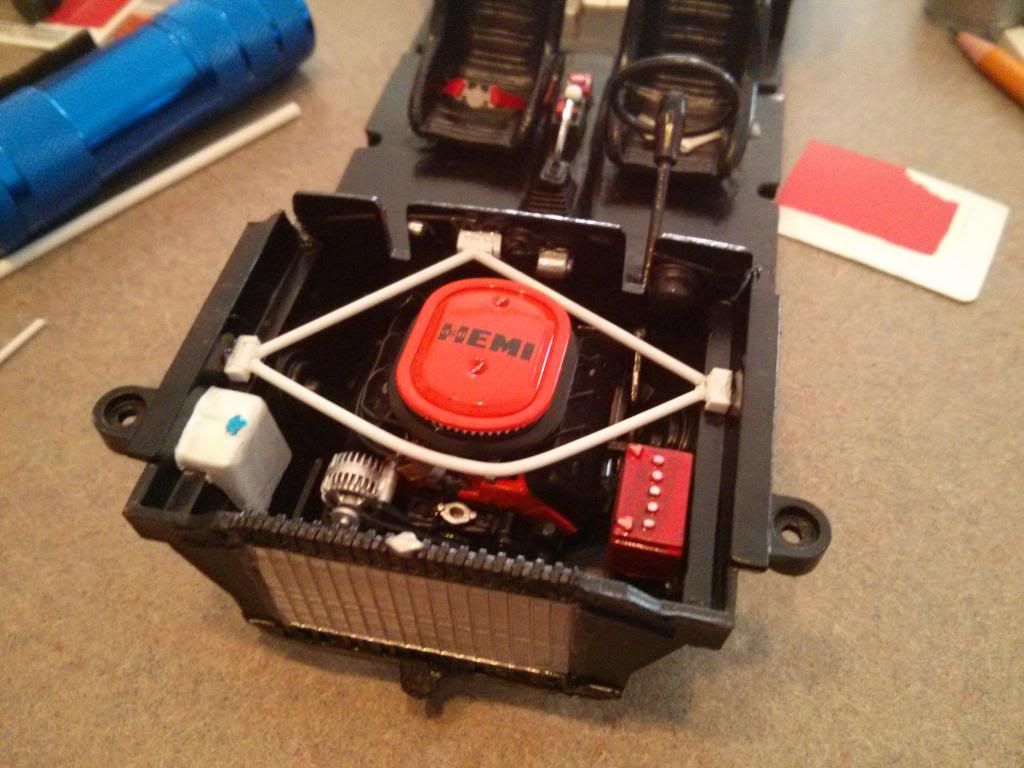
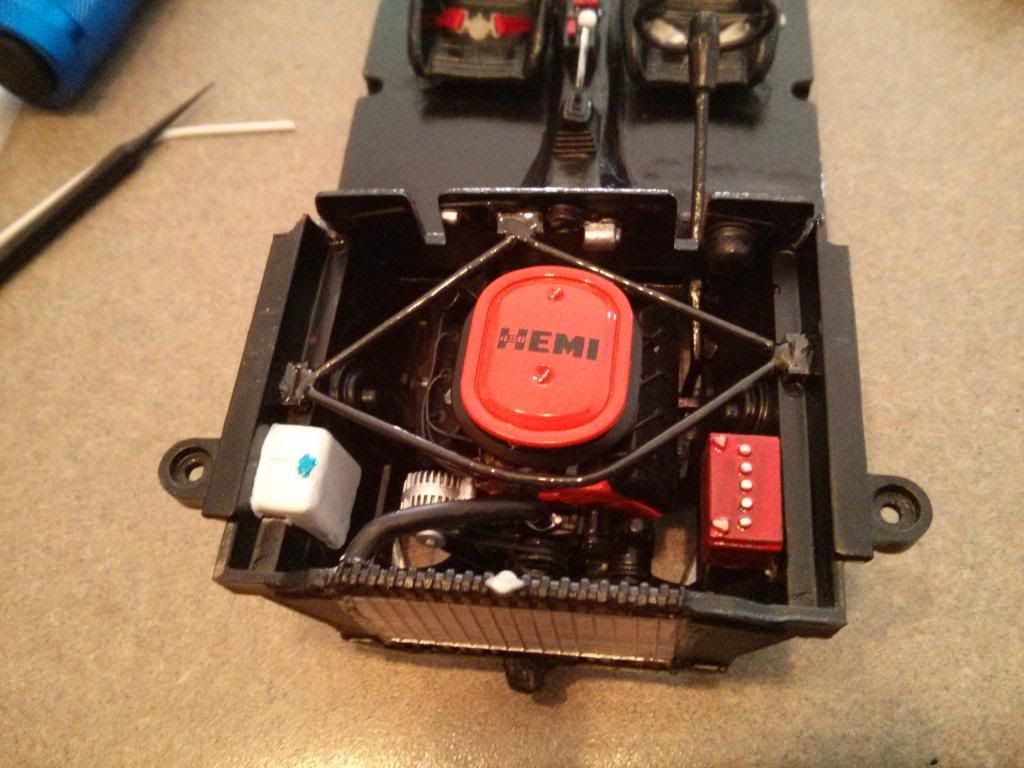
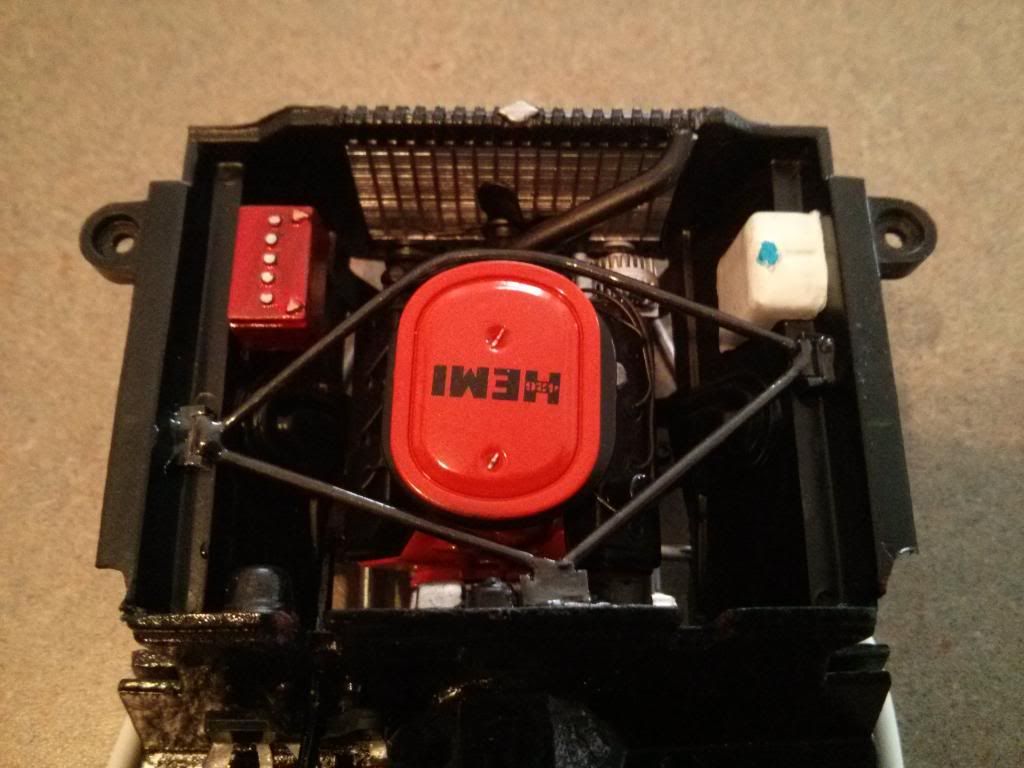
You can see the holes on the floor where the pipe has to come thru(front side of the mufflers).
Pipes off headers done & passed thru floor:
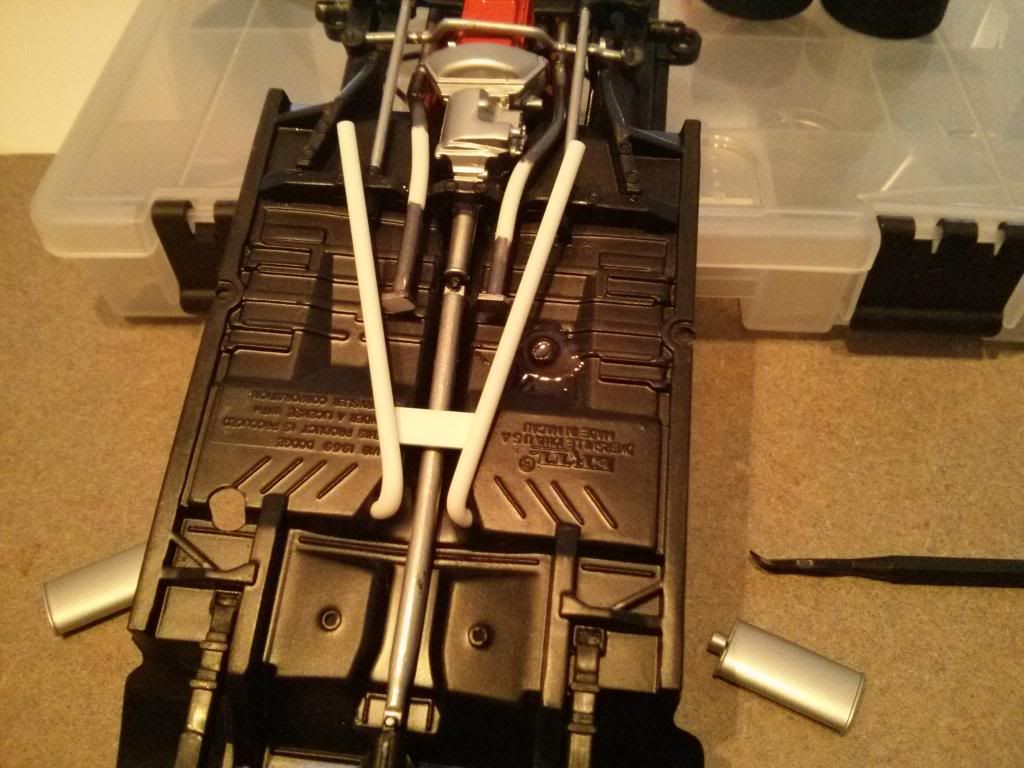
Underside Pipes done & painted:

A little progress update, as I have installed temporary mufflers into place until the final parts arrive from Marco, if not then these will stay in.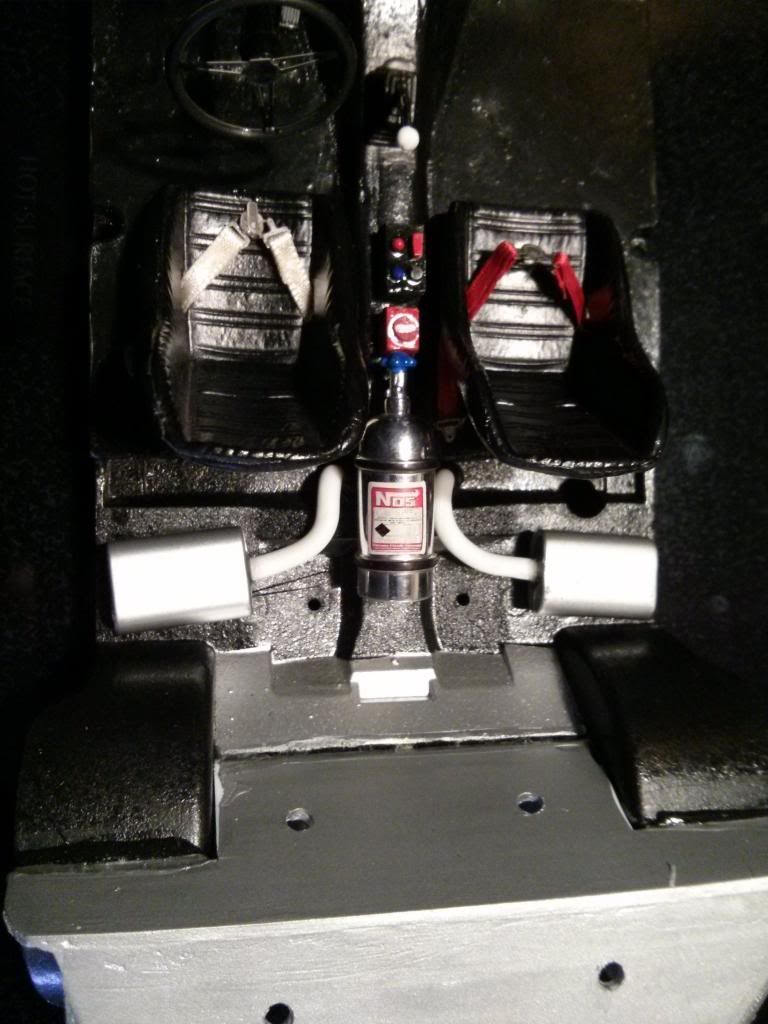
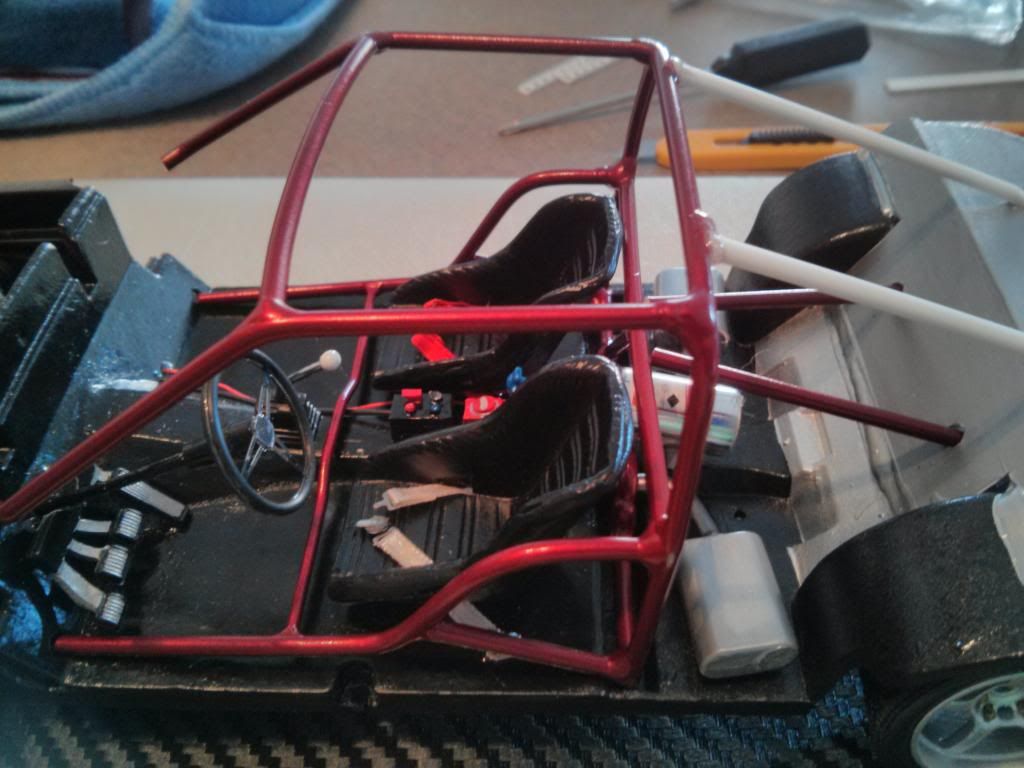
I will have to modify or redo the roll cage, as it seems to be touching the exhaust pipes where they come thru the floor(I should've realized this when I made it).
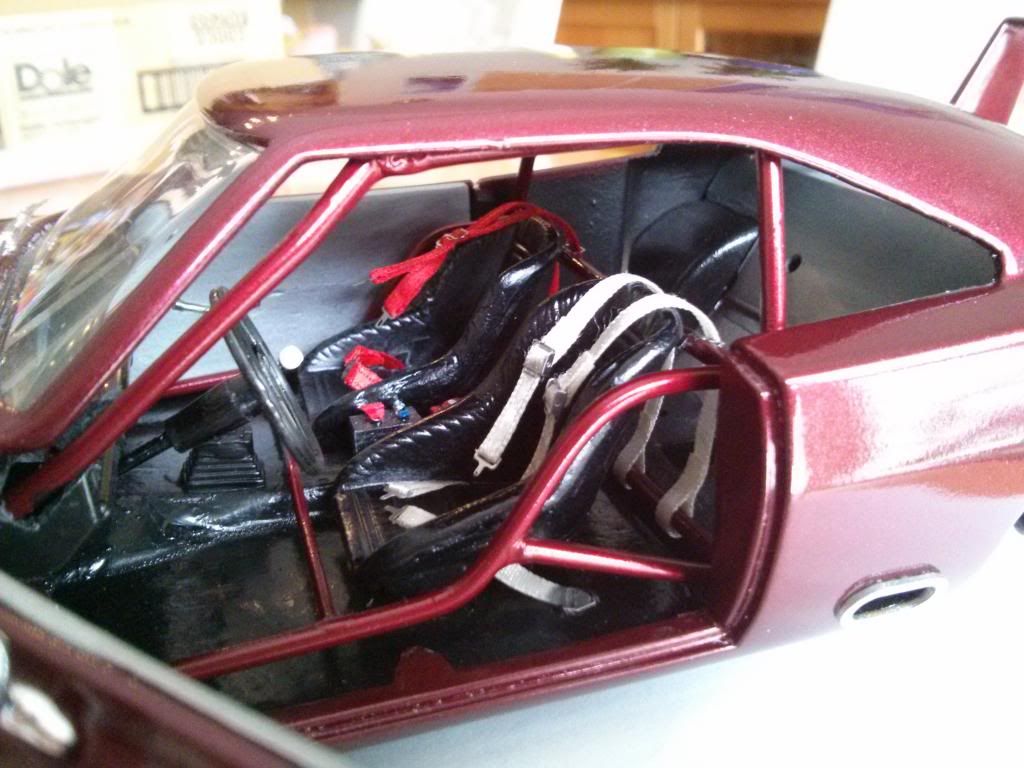
I also added rear side windows using clear transparent sheets, and installed them behind the inner rear quarter panels.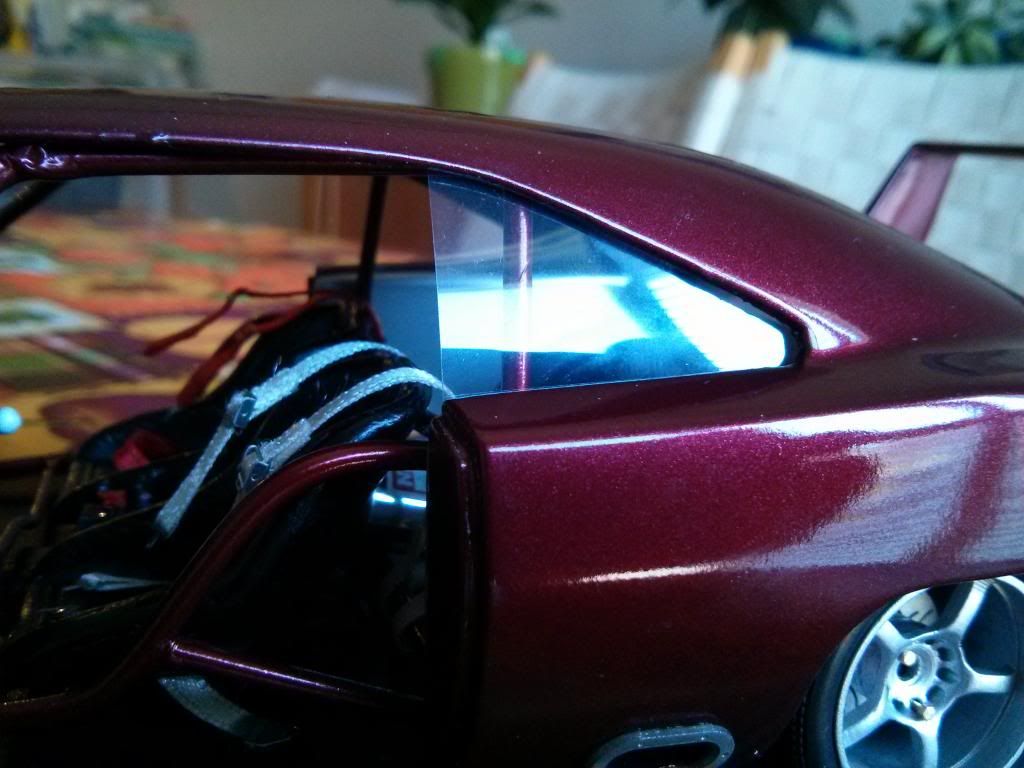
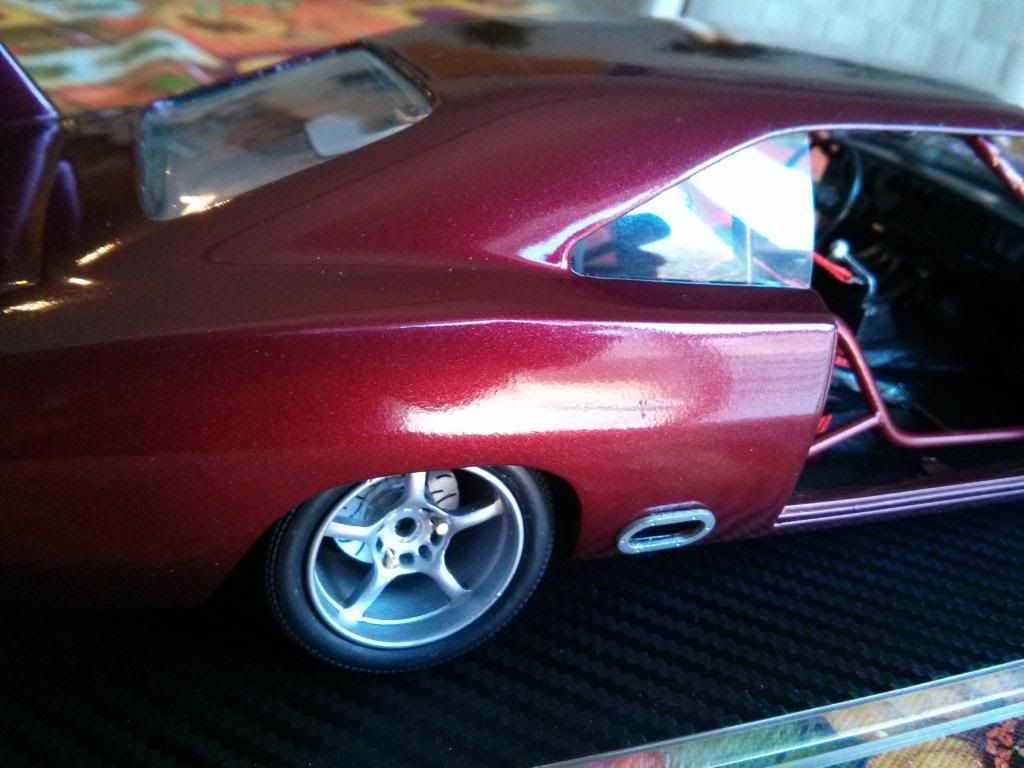
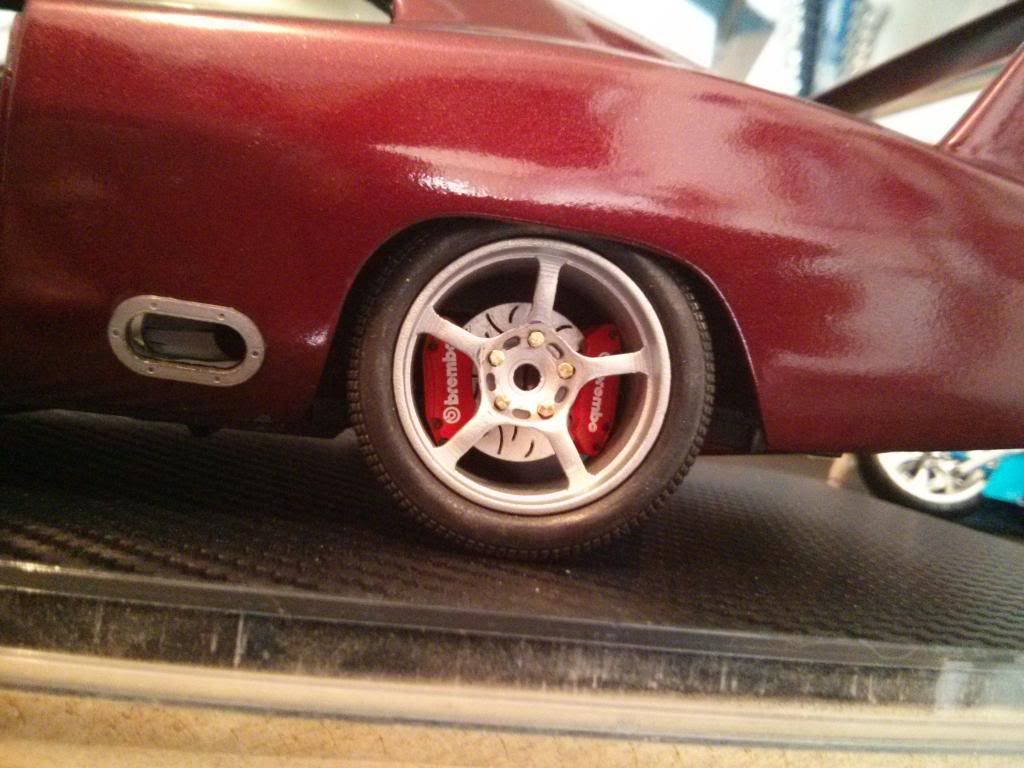
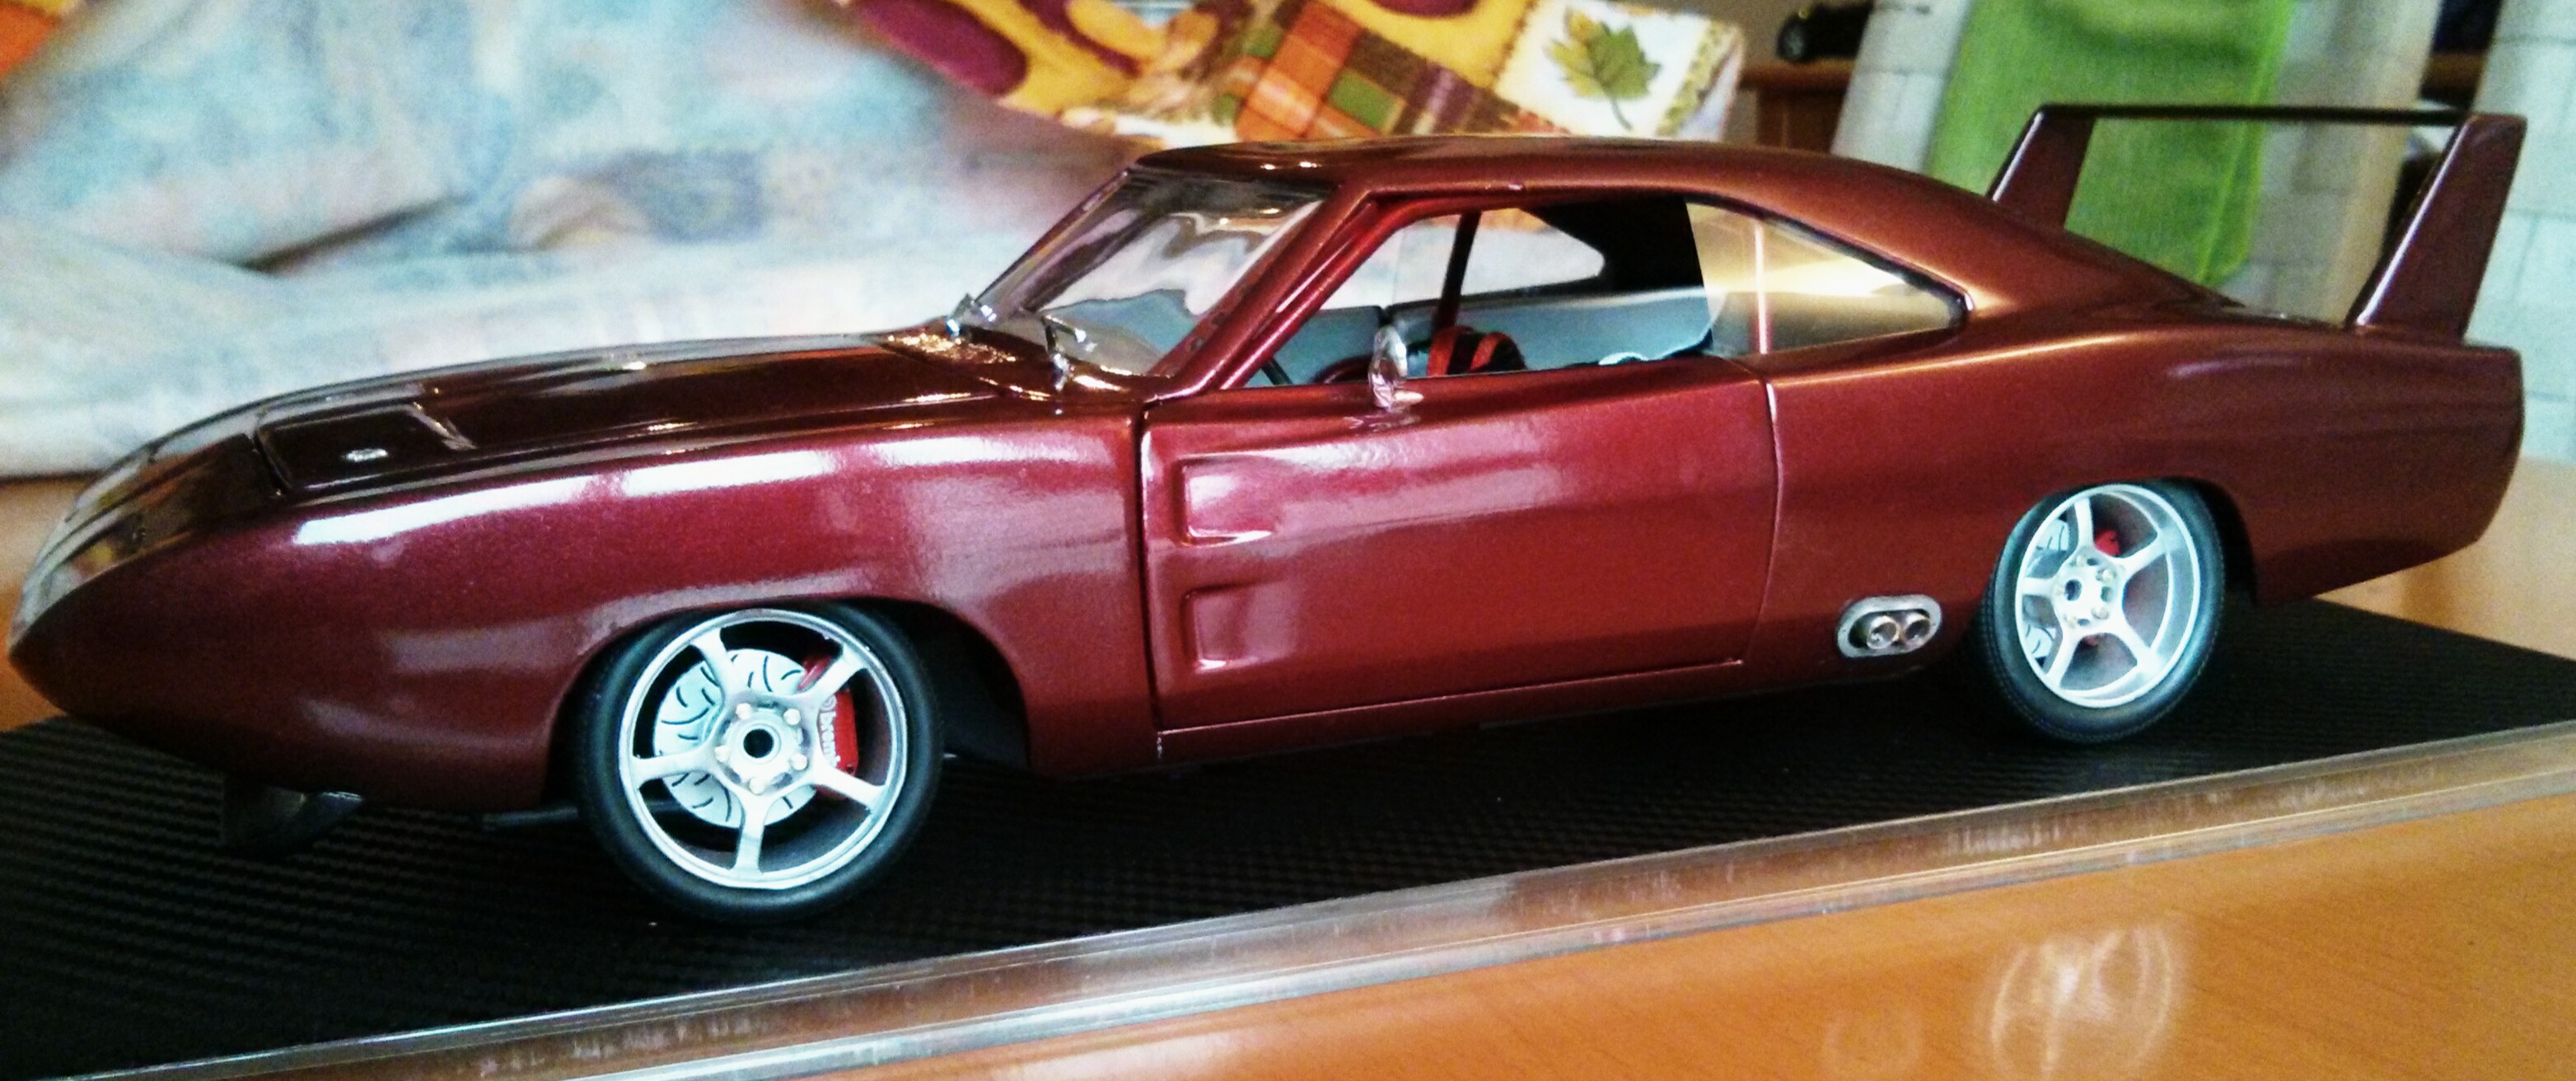
I was able to source front & rear Tires from a friend, as well as some Brembo Calipers that seem to be a perfect fit.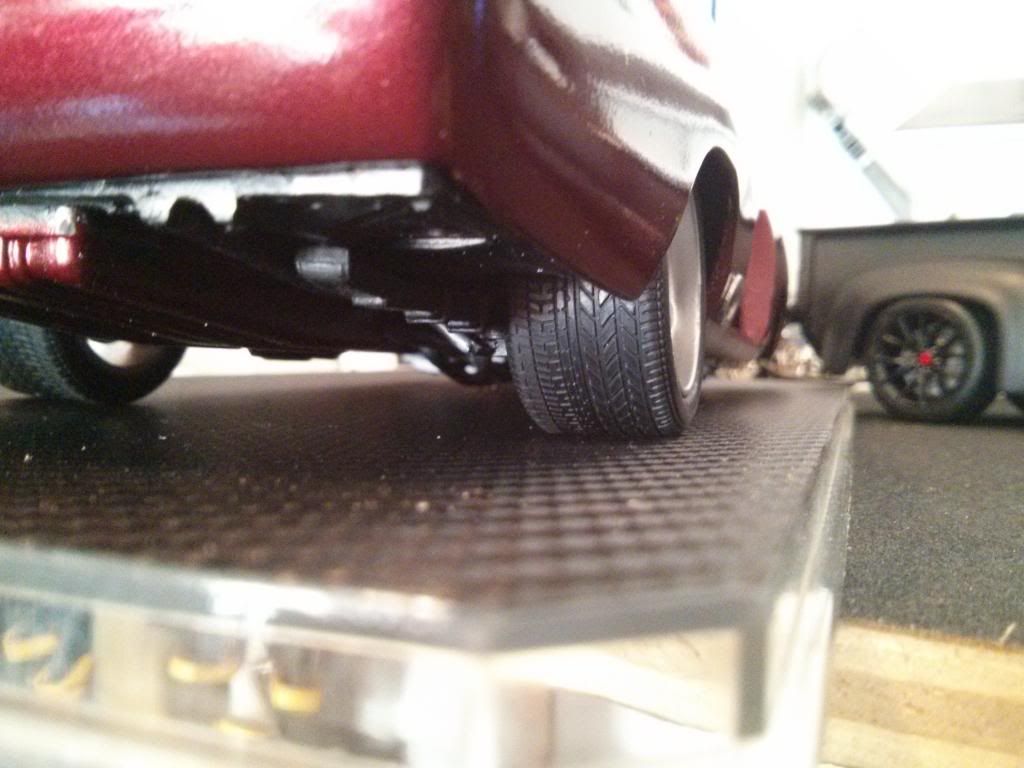
Not much left to do now, she's almost done.
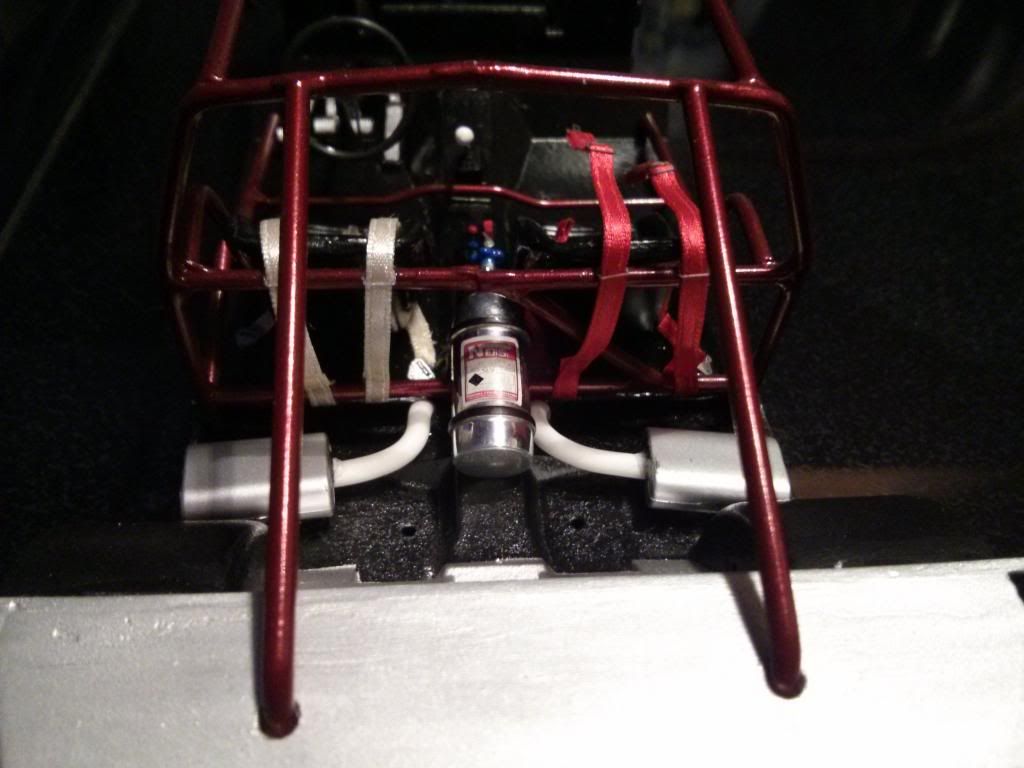
So as mentioned above, I had to build a new roll cage as the lower bar was sitting on the exhaust pipes coming thru the floor. Actually I'm glad I did, as this new cage is much better than the first. I also reused the original rollcage lower side rails/bars.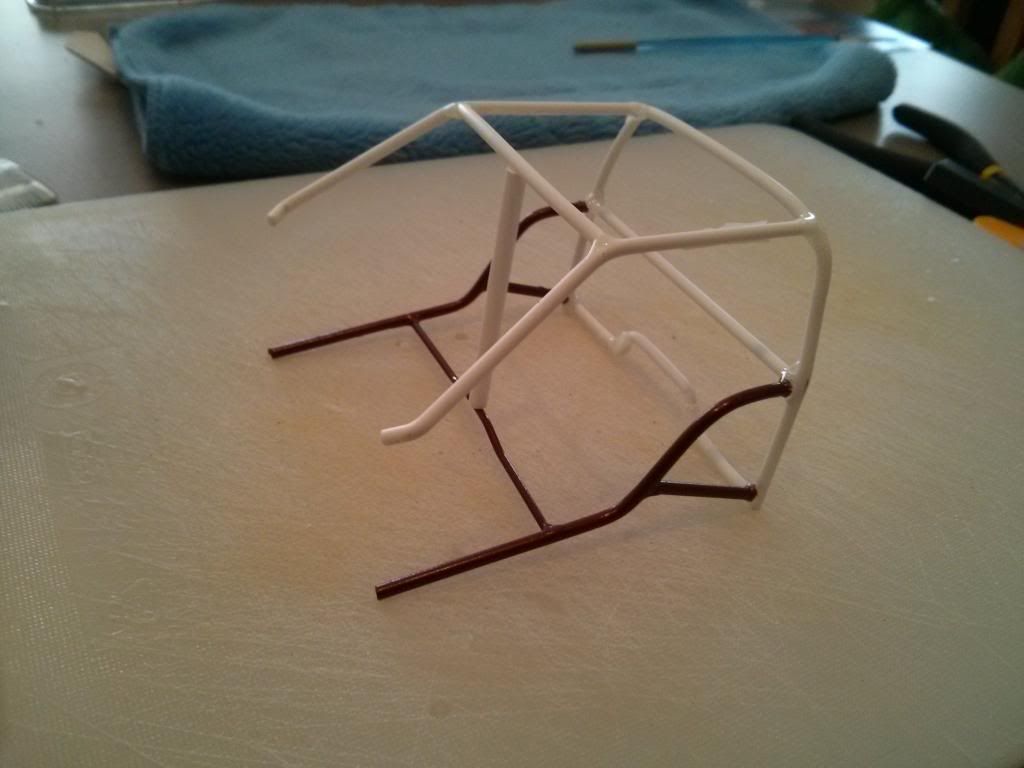
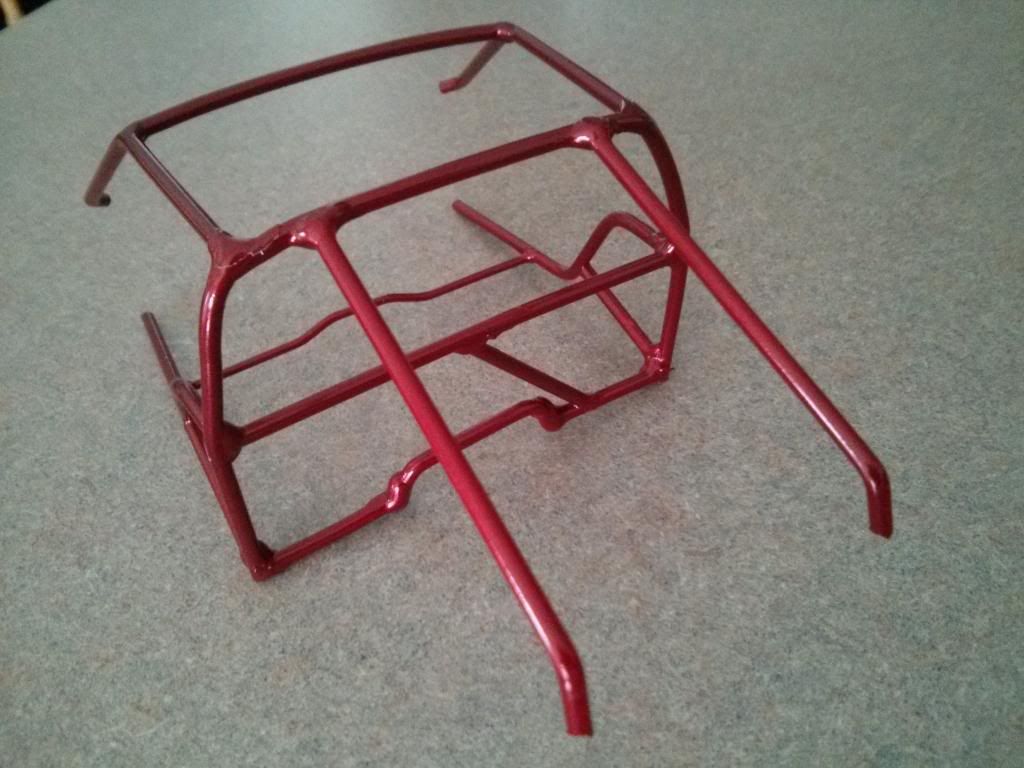
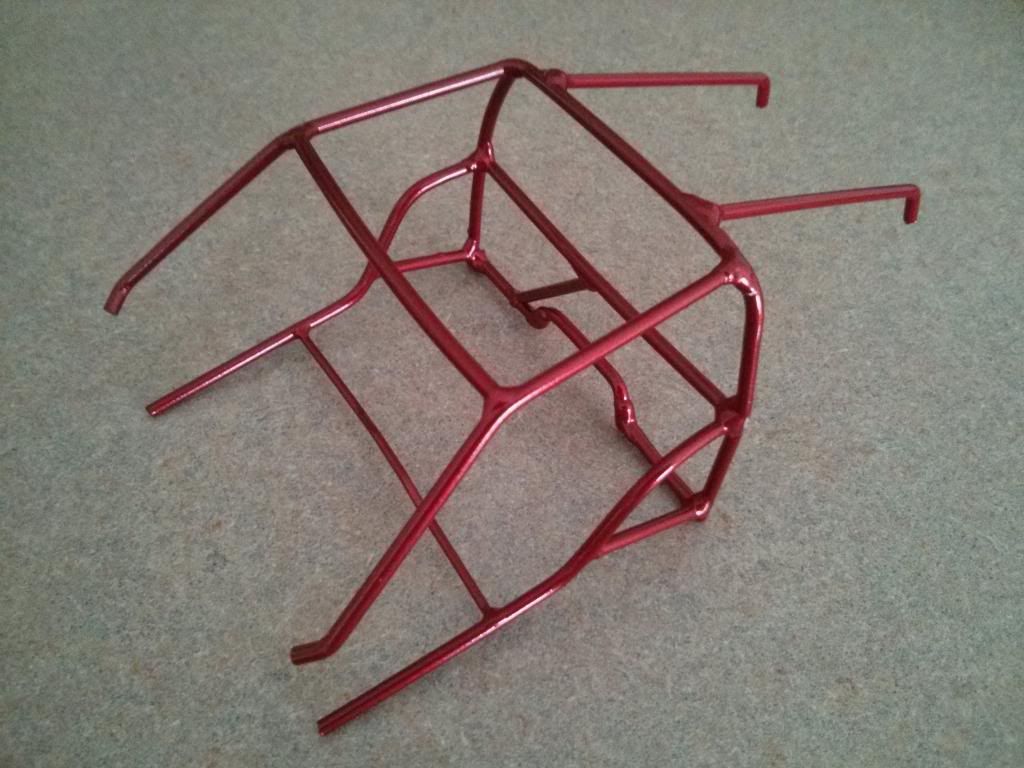

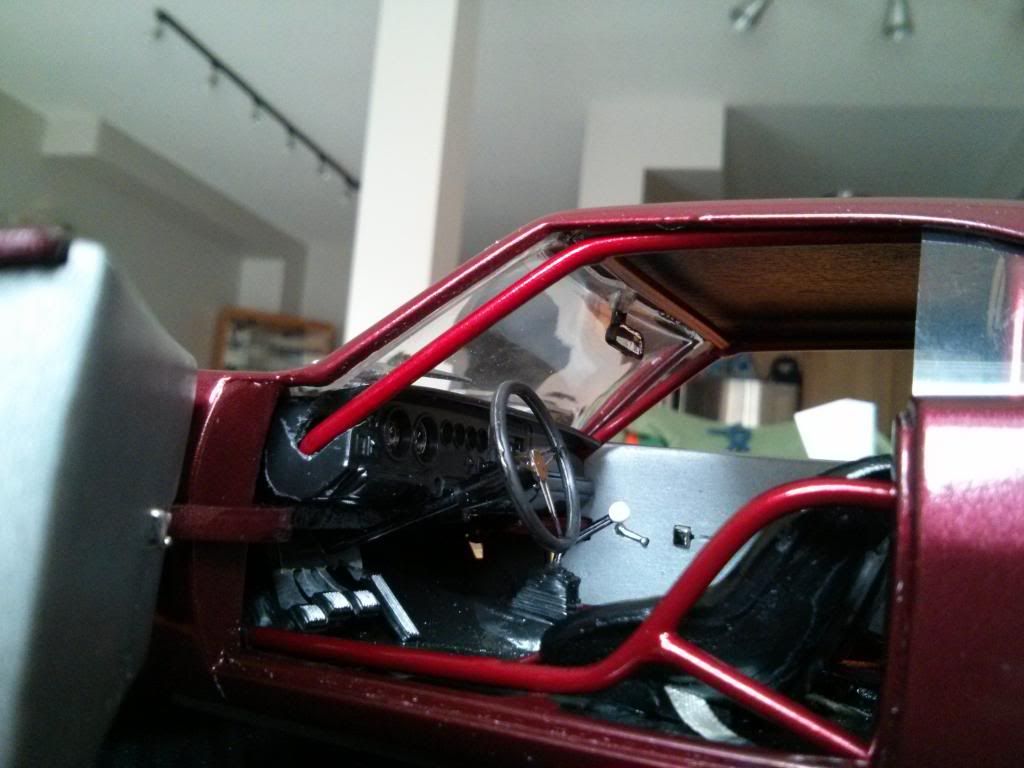
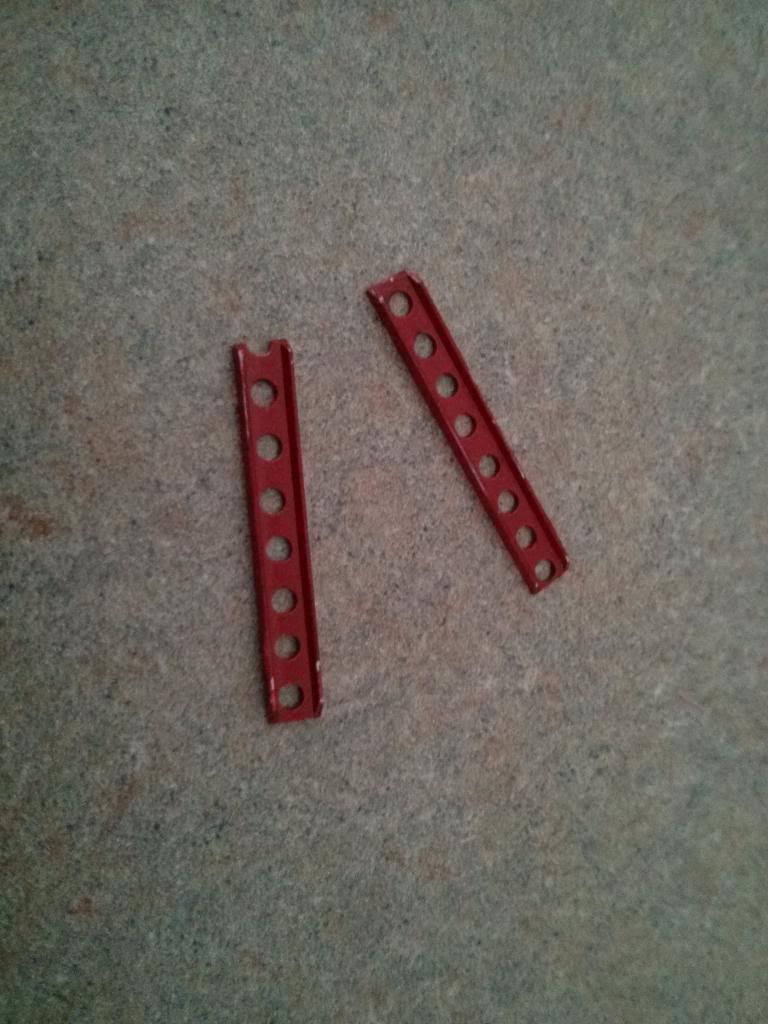
I made these supports as well which I noticed are on the 1:1.
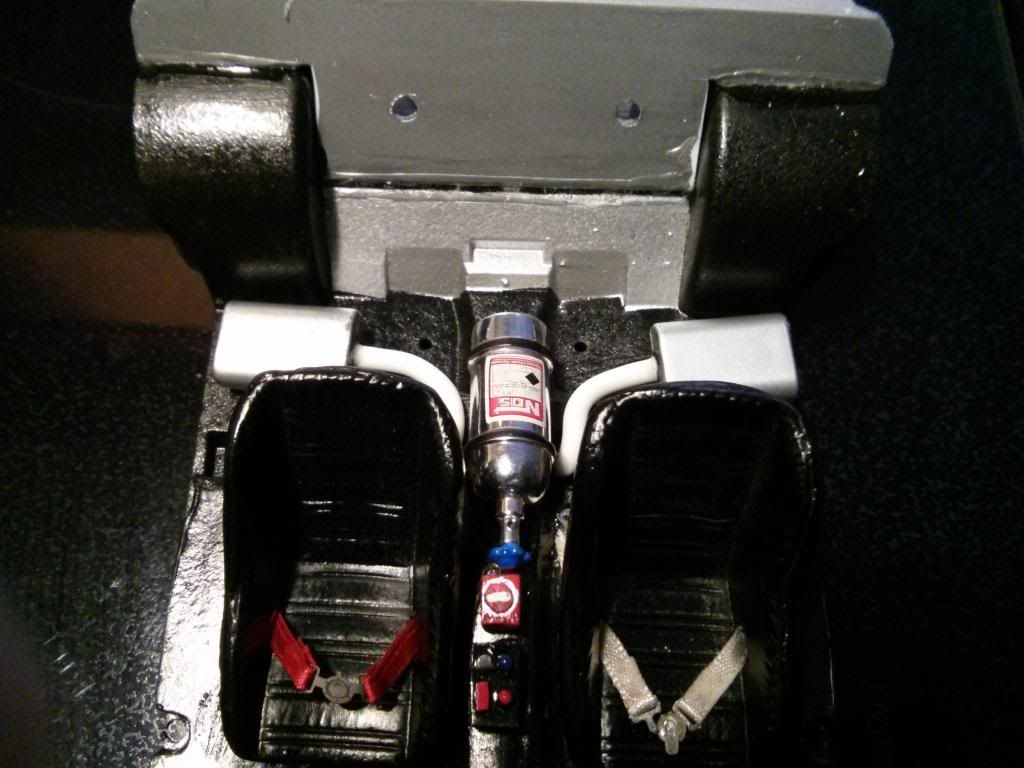
Also ran some wiring for the Nitrous Controller.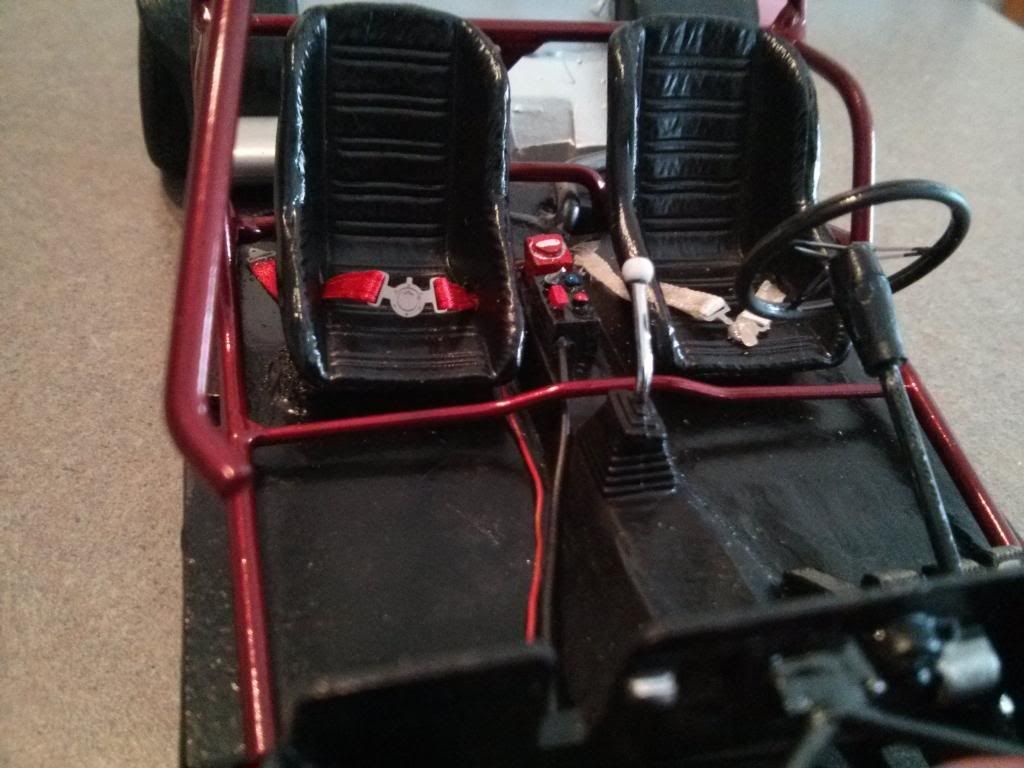
So parts arrived, some issues are being corrected, so certain parts will still be remaining unfinished until the revised parts arrive. But some progress has been made so far.
Hood pin mounts(not sure the precise name), painted and installed in their holes.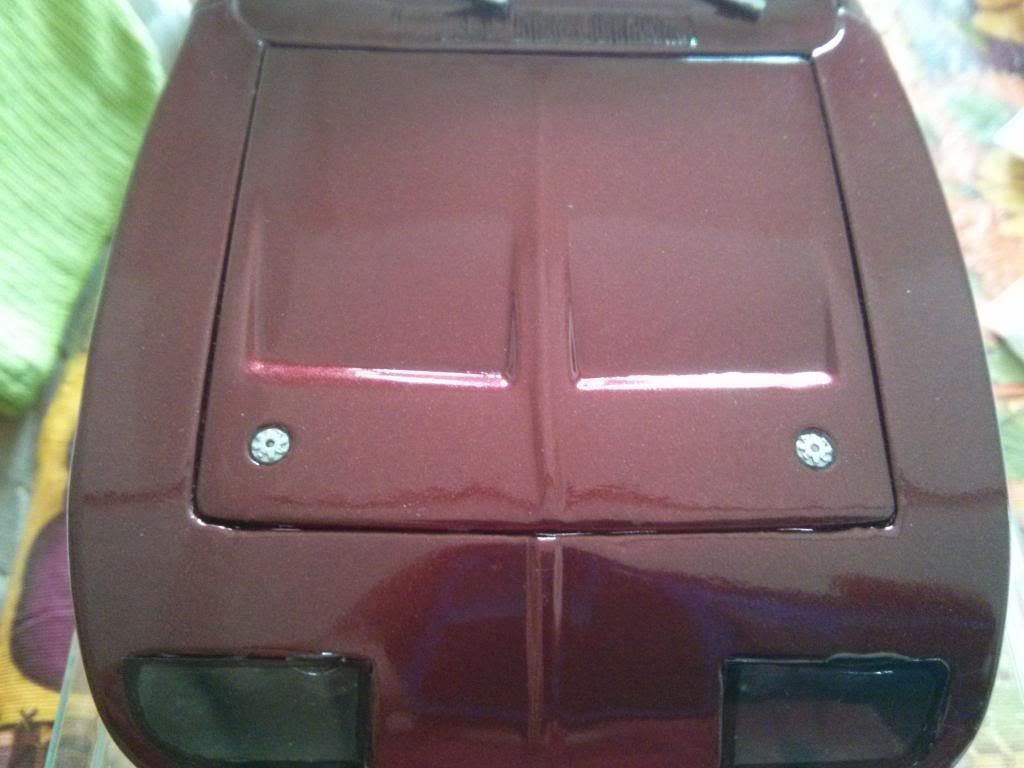
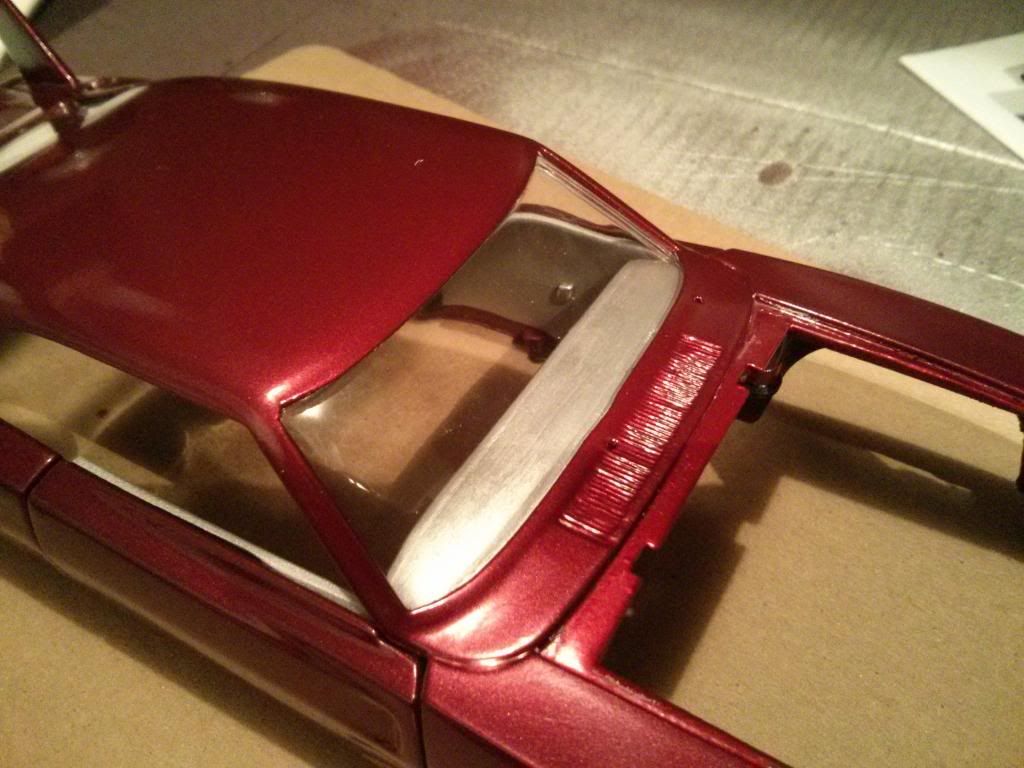
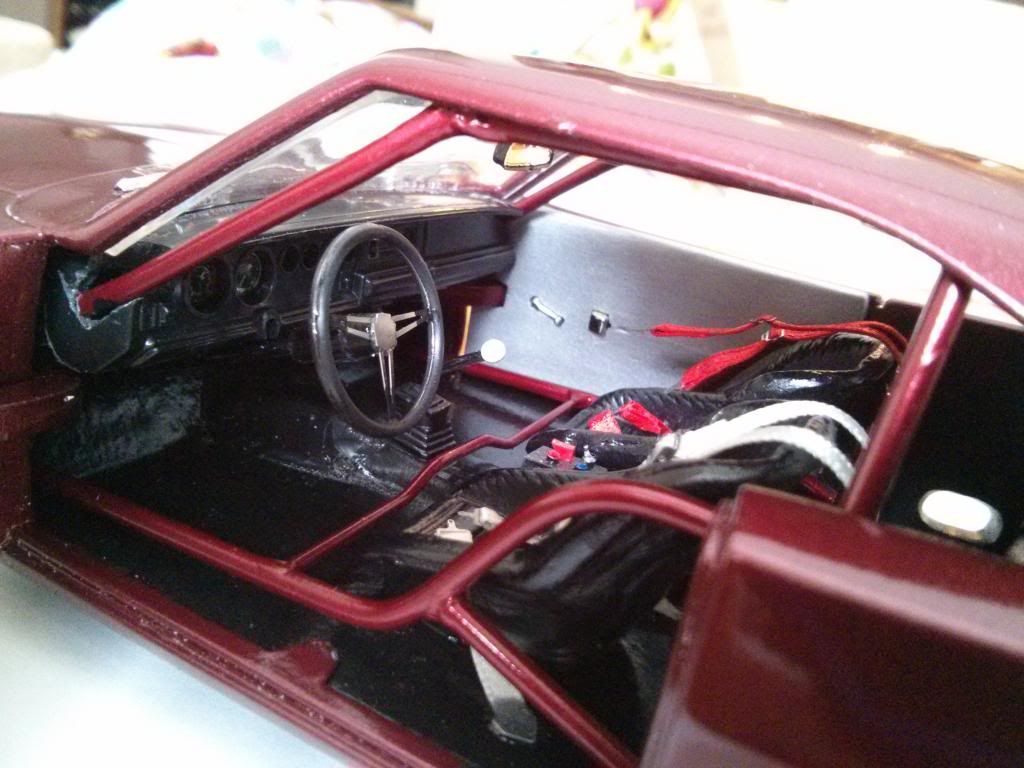
3D printed Dashboard was modified to attach to the original Dash(Moc-up pics).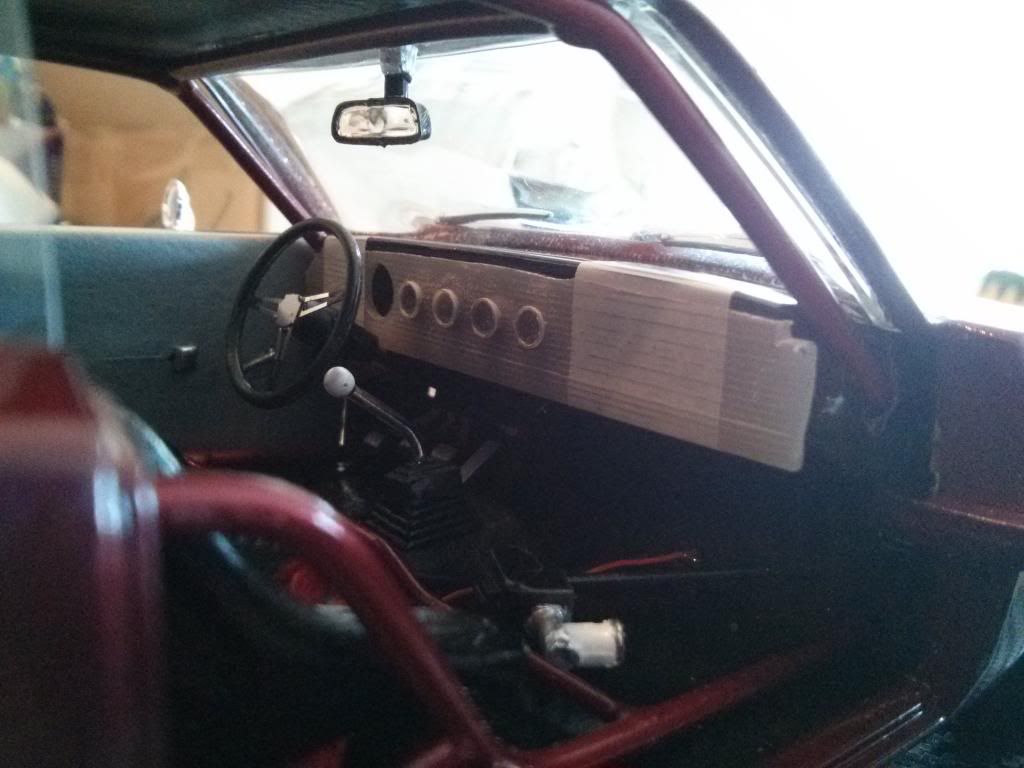
Dash painted and temporarily installed.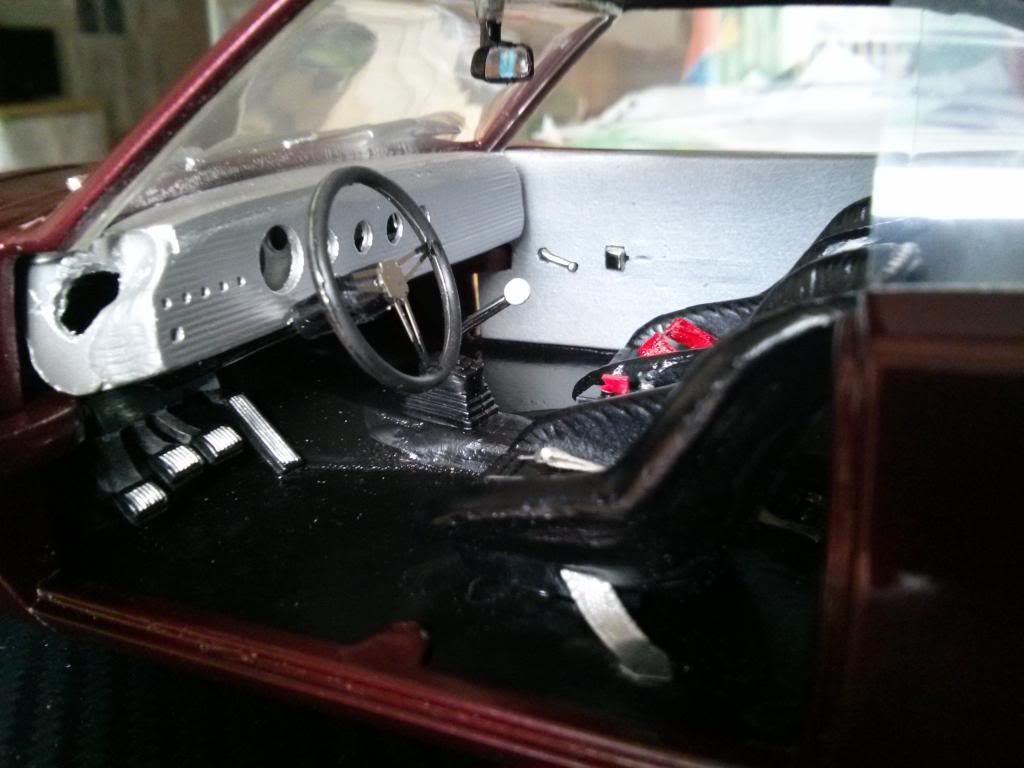
Exhaust Muffler tips attached.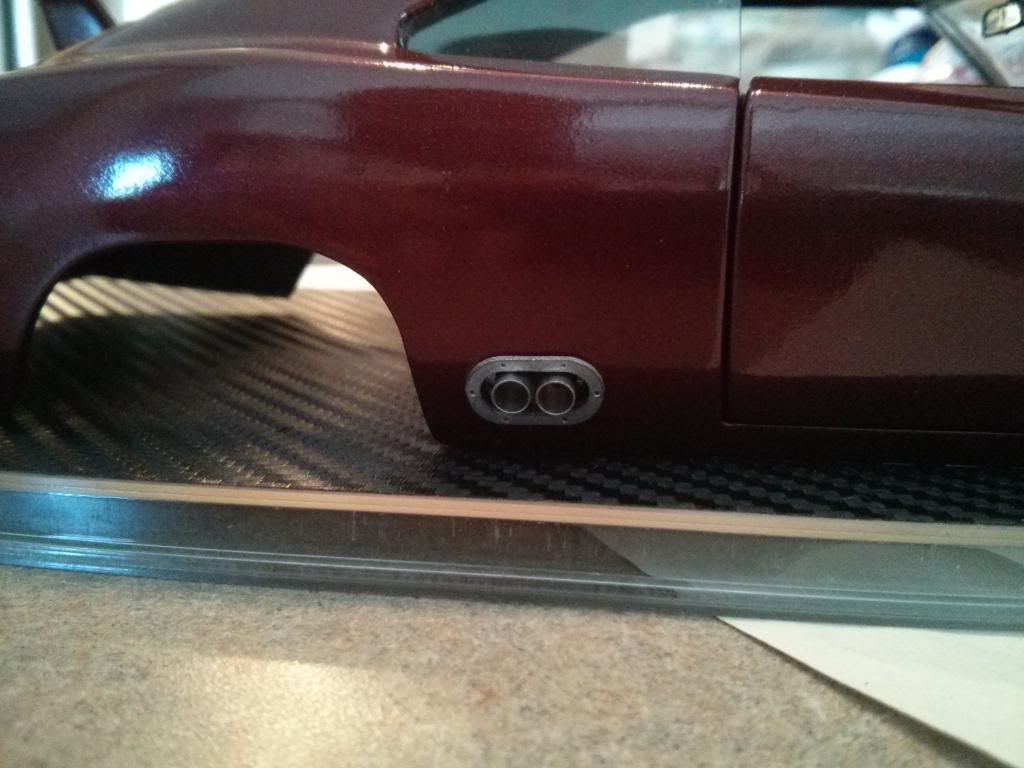
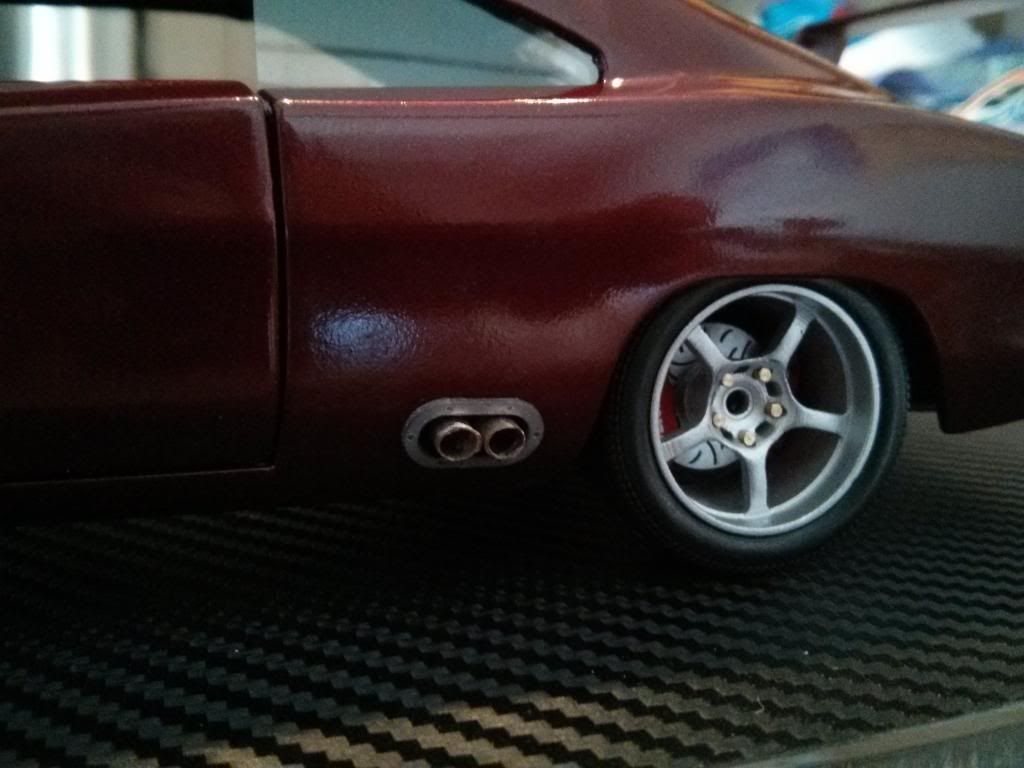
The tips were glued inside the holes of the quarter panel, instead of being glued directly to the mufflers, this allows the body to be separated from the chassis if needed. If glued to the mufflers, then removal of the body would damage/break the exhaust work, and would be next to impossible to permanently mount that way, as there would be no access to do so.
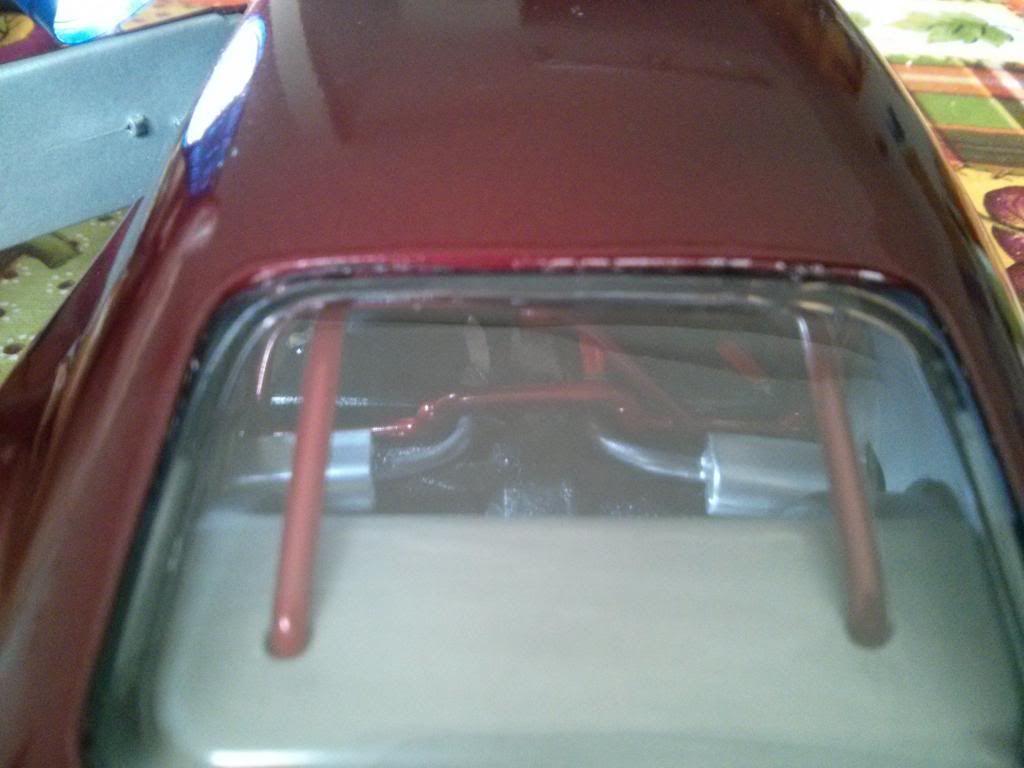
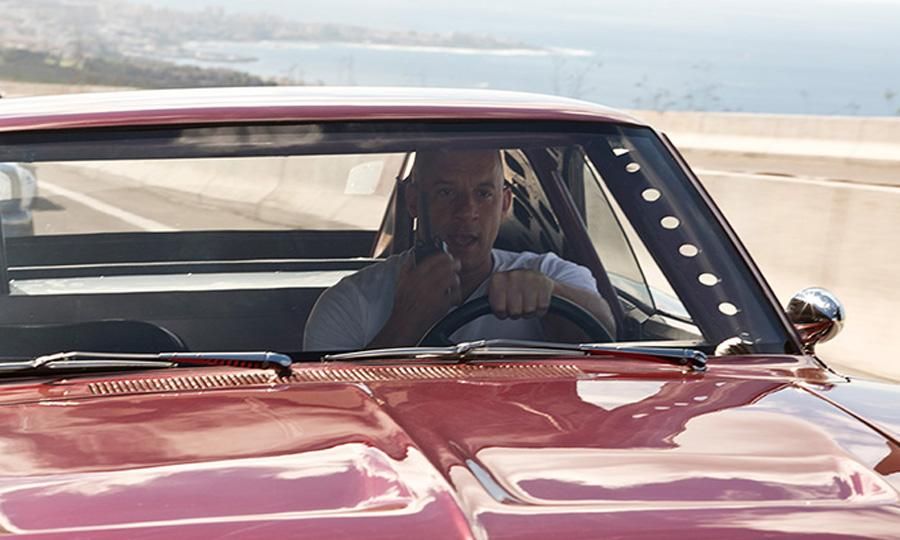
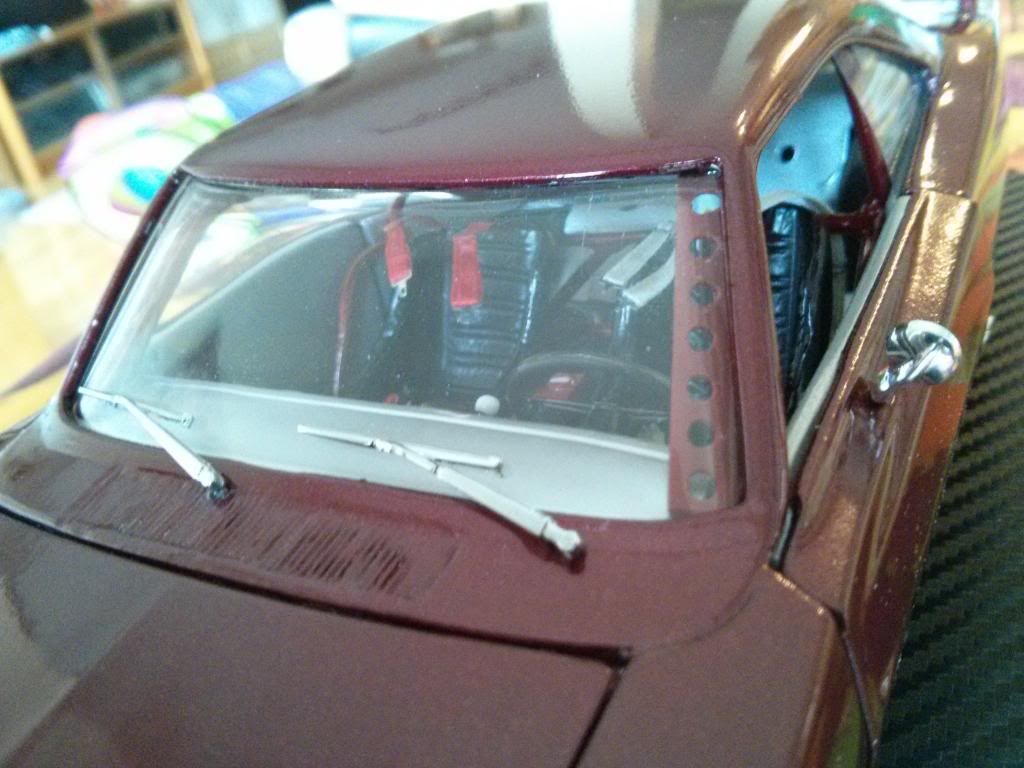
Just a little update, added the supports braces near the front windshield, as well as removed the interior rearview mirror(just realized the 1:1 doesn't have one).
1:1
Definitely an improvement.
I have added a cross-brace under the hood, as well as an upper rad hose, with some styrene rods. I have also begun work on the exhaust pipe off the headers, which has to run up thru the floor behind the seats, a very tight area to fit it all(more progress pics of exhaust to come).
You can see the holes on the floor where the pipe has to come thru(front side of the mufflers).
Pipes off headers done & passed thru floor:
Underside Pipes done & painted:
A little progress update, as I have installed temporary mufflers into place until the final parts arrive from Marco, if not then these will stay in.
I will have to modify or redo the roll cage, as it seems to be touching the exhaust pipes where they come thru the floor(I should've realized this when I made it).
I also added rear side windows using clear transparent sheets, and installed them behind the inner rear quarter panels.
I was able to source front & rear Tires from a friend, as well as some Brembo Calipers that seem to be a perfect fit.
Not much left to do now, she's almost done.
So as mentioned above, I had to build a new roll cage as the lower bar was sitting on the exhaust pipes coming thru the floor. Actually I'm glad I did, as this new cage is much better than the first. I also reused the original rollcage lower side rails/bars.
I made these supports as well which I noticed are on the 1:1.
Also ran some wiring for the Nitrous Controller.
So parts arrived, some issues are being corrected, so certain parts will still be remaining unfinished until the revised parts arrive. But some progress has been made so far.
Hood pin mounts(not sure the precise name), painted and installed in their holes.
3D printed Dashboard was modified to attach to the original Dash(Moc-up pics).
Dash painted and temporarily installed.
Exhaust Muffler tips attached.
The tips were glued inside the holes of the quarter panel, instead of being glued directly to the mufflers, this allows the body to be separated from the chassis if needed. If glued to the mufflers, then removal of the body would damage/break the exhaust work, and would be next to impossible to permanently mount that way, as there would be no access to do so.
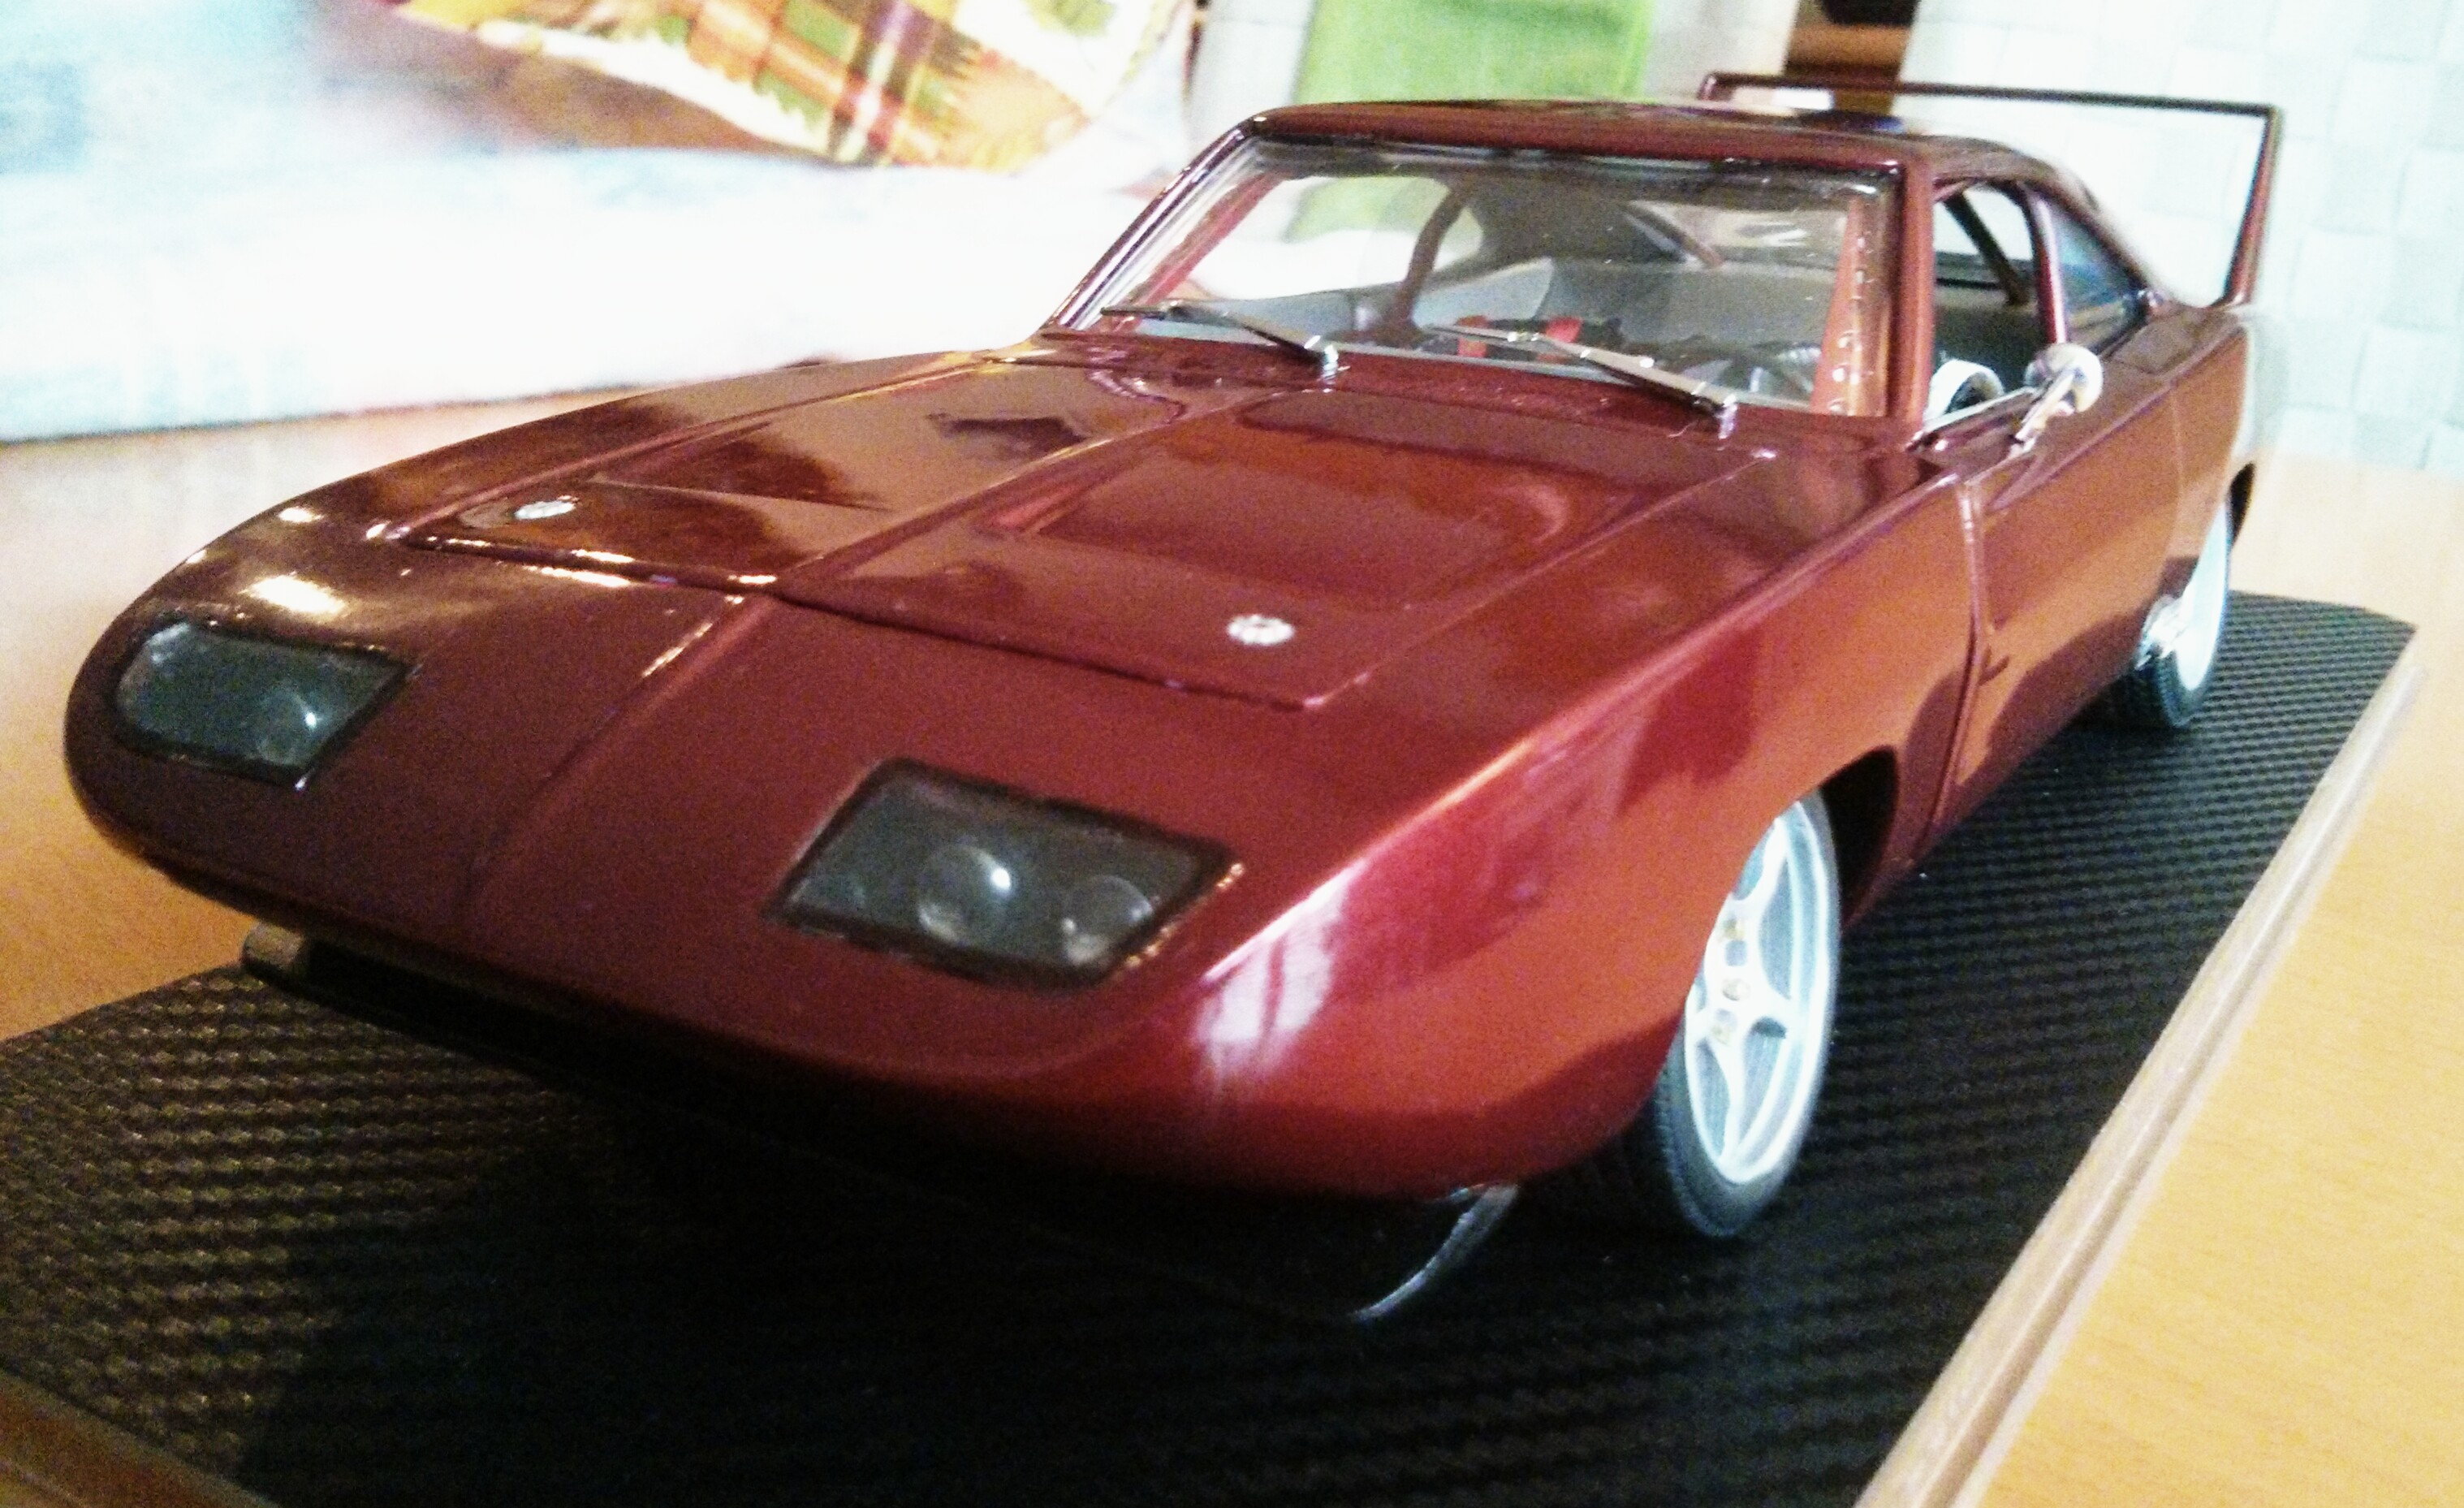
Just a little update, added the supports braces near the front windshield, as well as removed the interior rearview mirror(just realized the 1:1 doesn't have one).
1:1
Re: Toretto's '69 Daytona Charger F&F 6
Amazing, attention to detail is suburb!
Re: Toretto's '69 Daytona Charger F&F 6
Thx alot Kraftig, I am just awaiting a few parts still for the interior, once I get those(hopefully soon), I will finally get her finished, been going on for 9 months now.[KRAFTIG] wrote:Amazing, attention to detail is suburb!
-
StratosWRC
- .
- Posts: 7404
- Joined: Tue Aug 27, 2013 4:56 pm
- Location: Canada
Re: Toretto's '69 Daytona Charger F&F 6
Yeah that looks outstanding. Really great work


Re: Toretto's '69 Daytona Charger F&F 6
One word ...... awesome, I'm really impress with the work you have done, I am speechless. 
Re: Toretto's '69 Daytona Charger F&F 6
Thank you SirStratosWRC wrote:Yeah that looks outstanding. Really great work
Re: Toretto's '69 Daytona Charger F&F 6
Thx alot GP246, much appreciatedGP246 wrote:One word ...... awesome, I'm really impress with the work you have done, I am speechless.
Re: Toretto's '69 Daytona Charger F&F 6
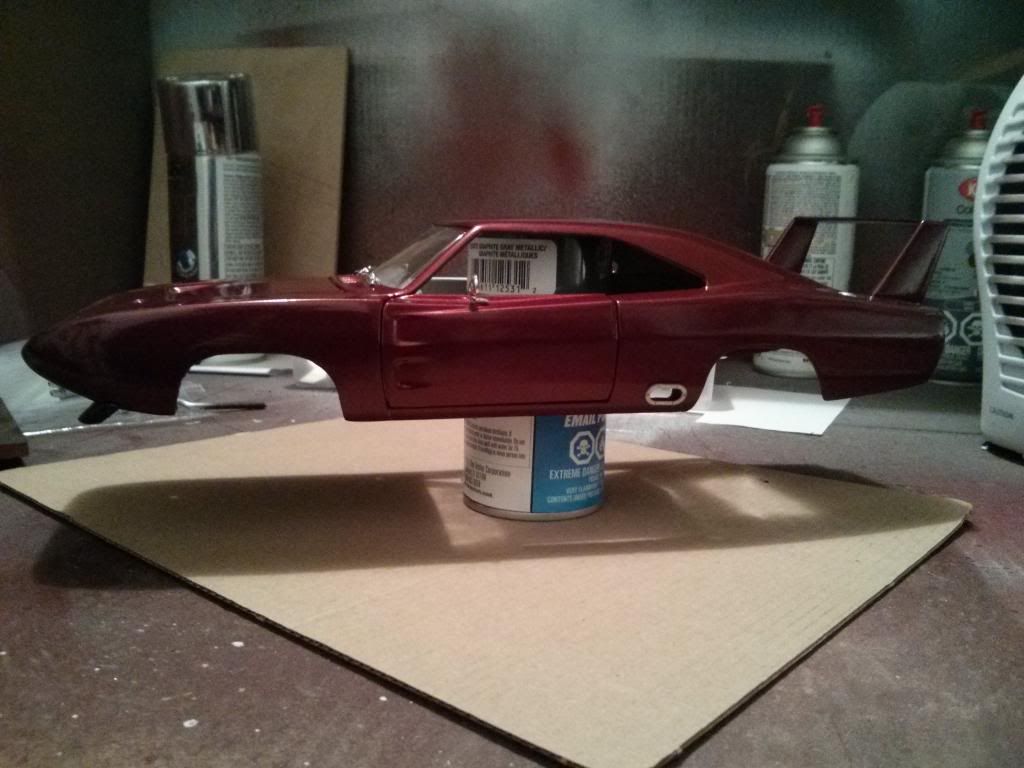
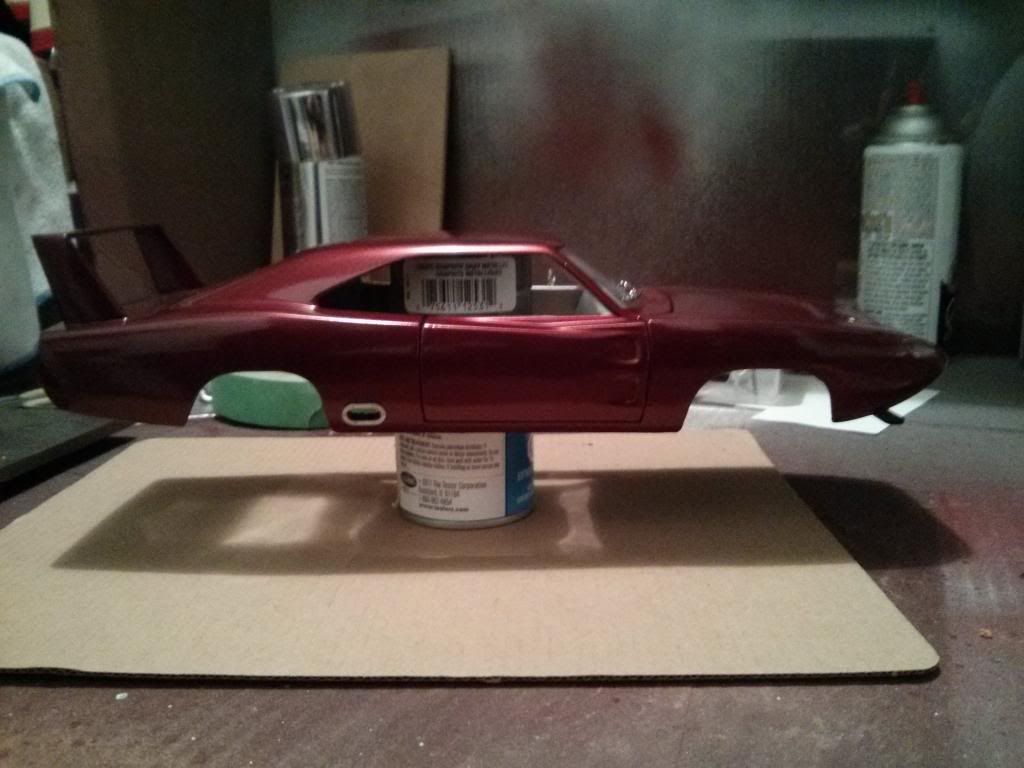
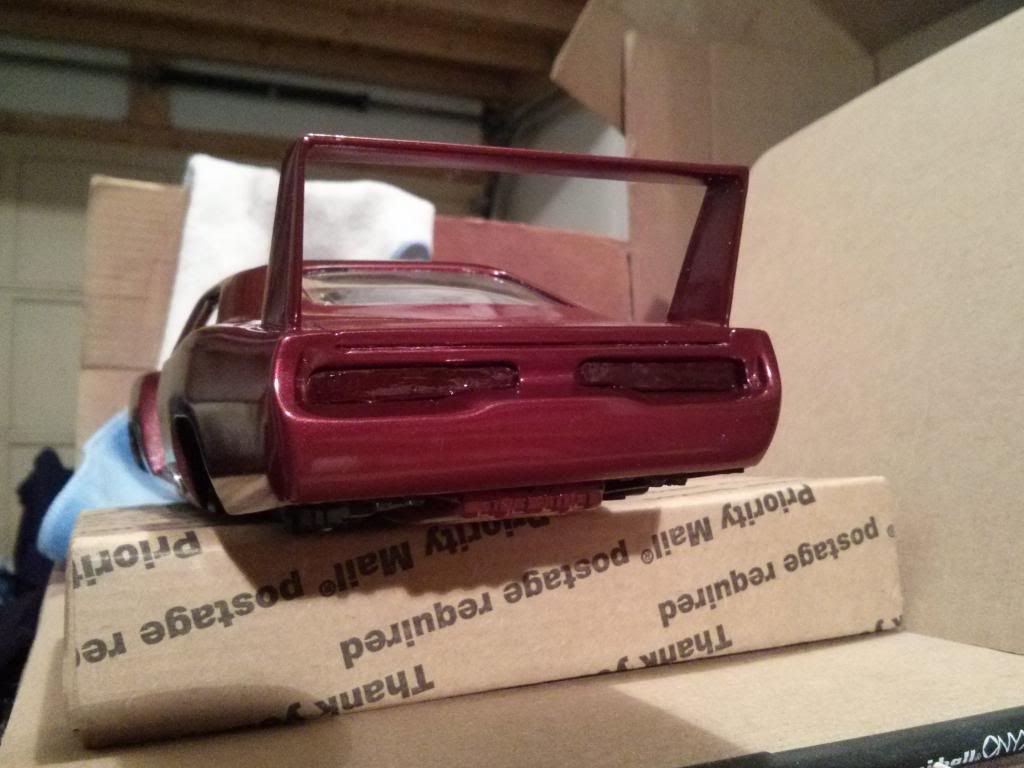
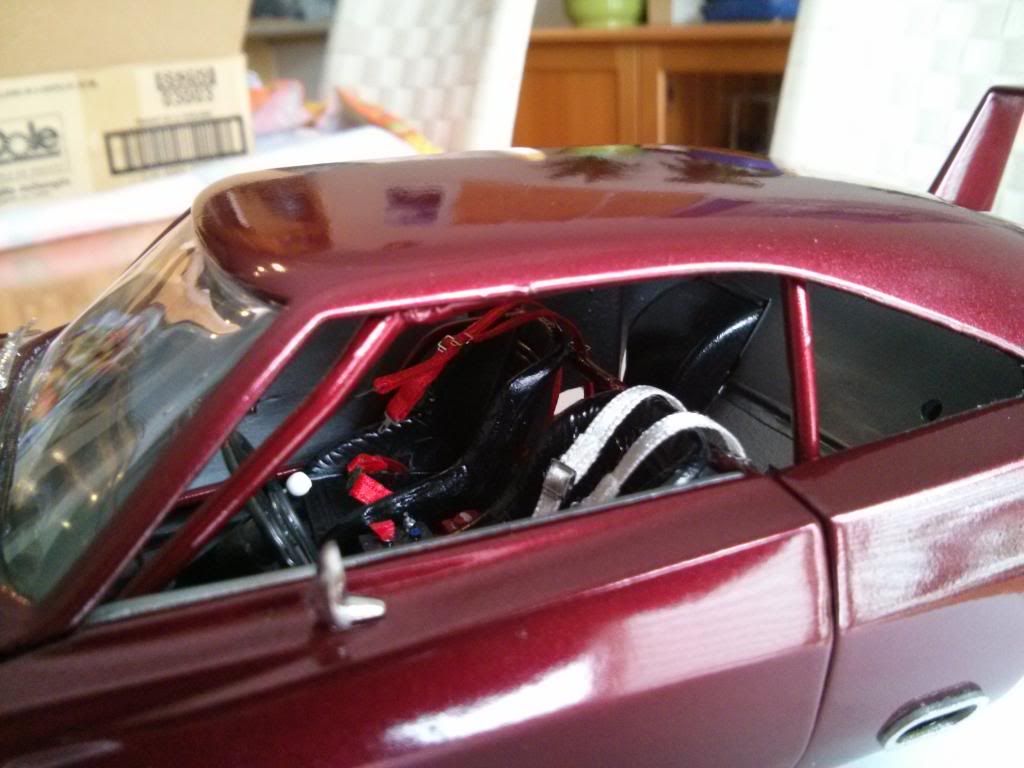
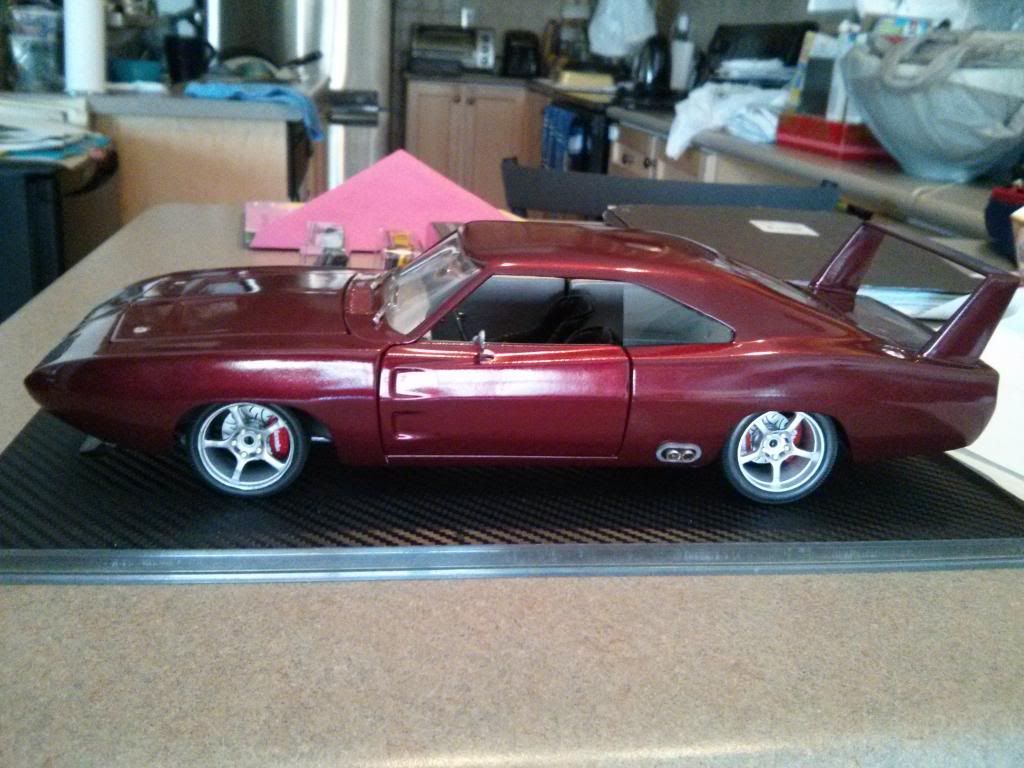
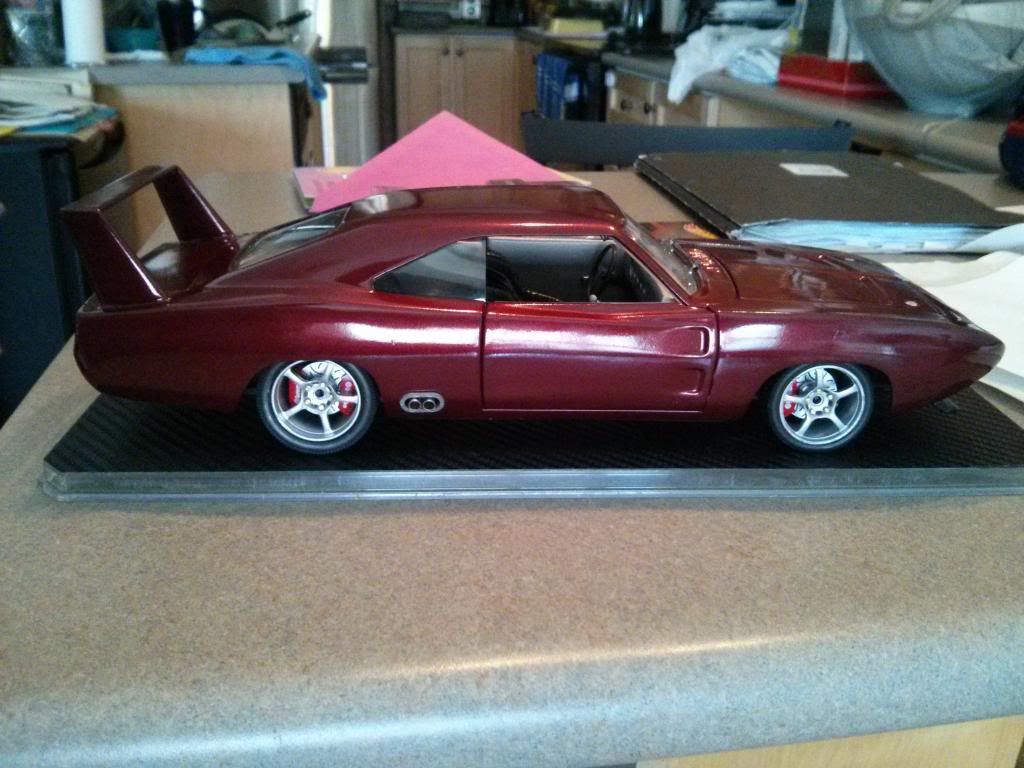
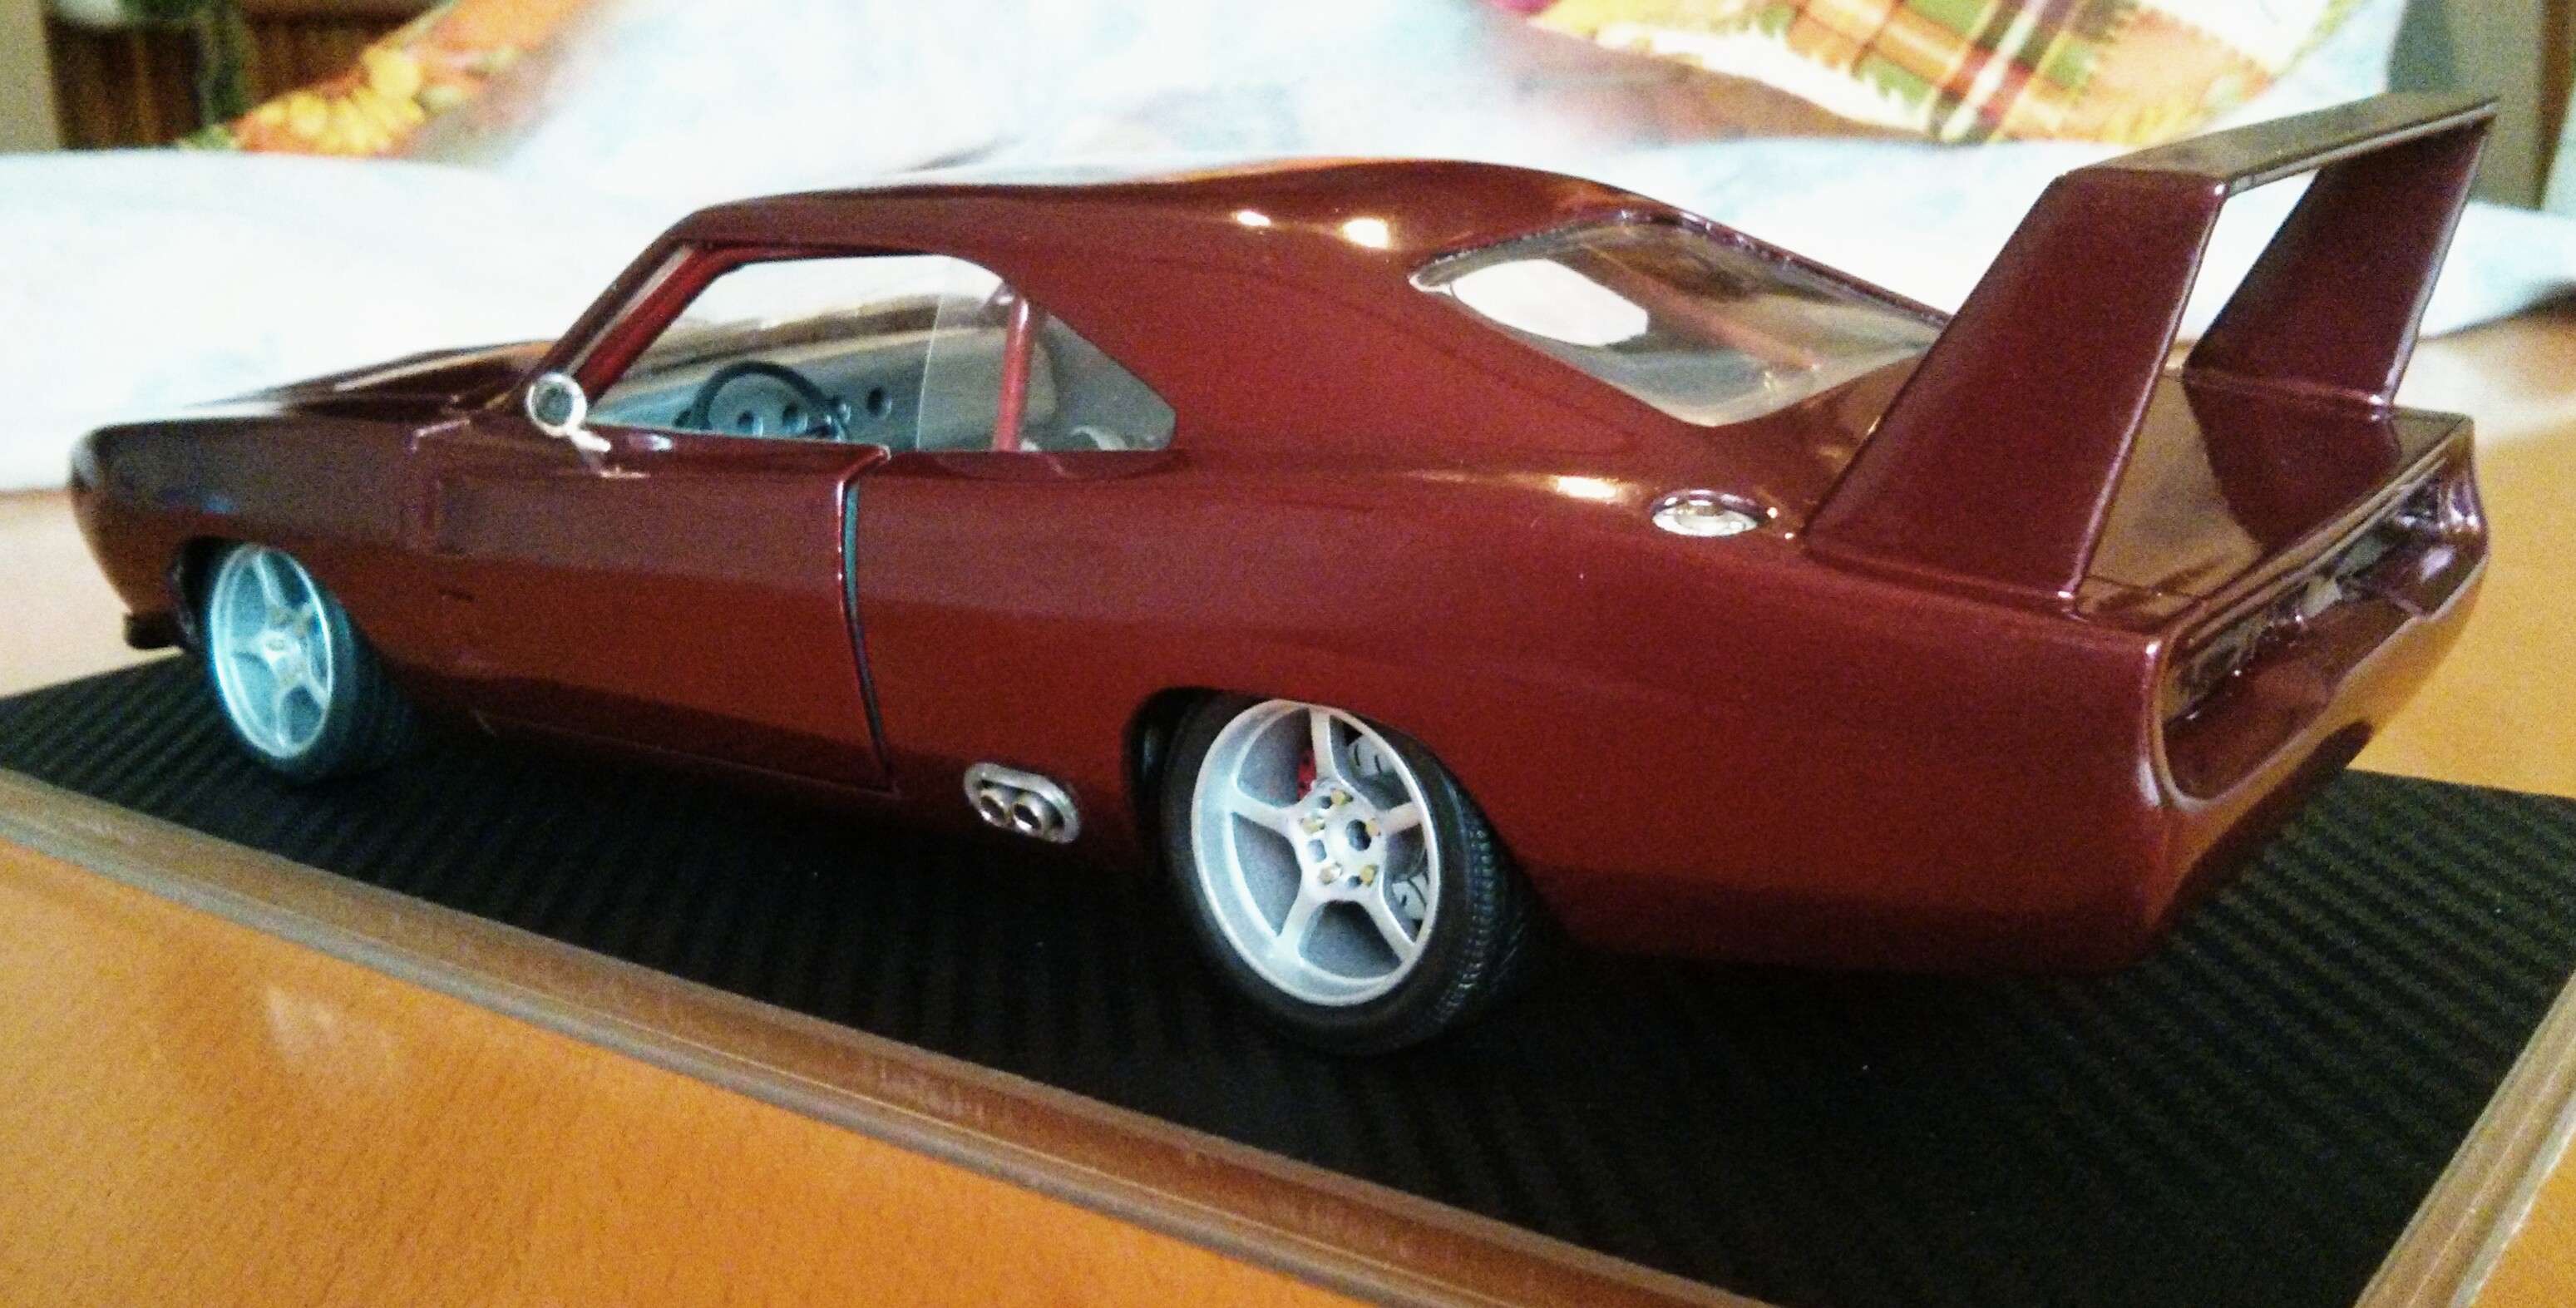
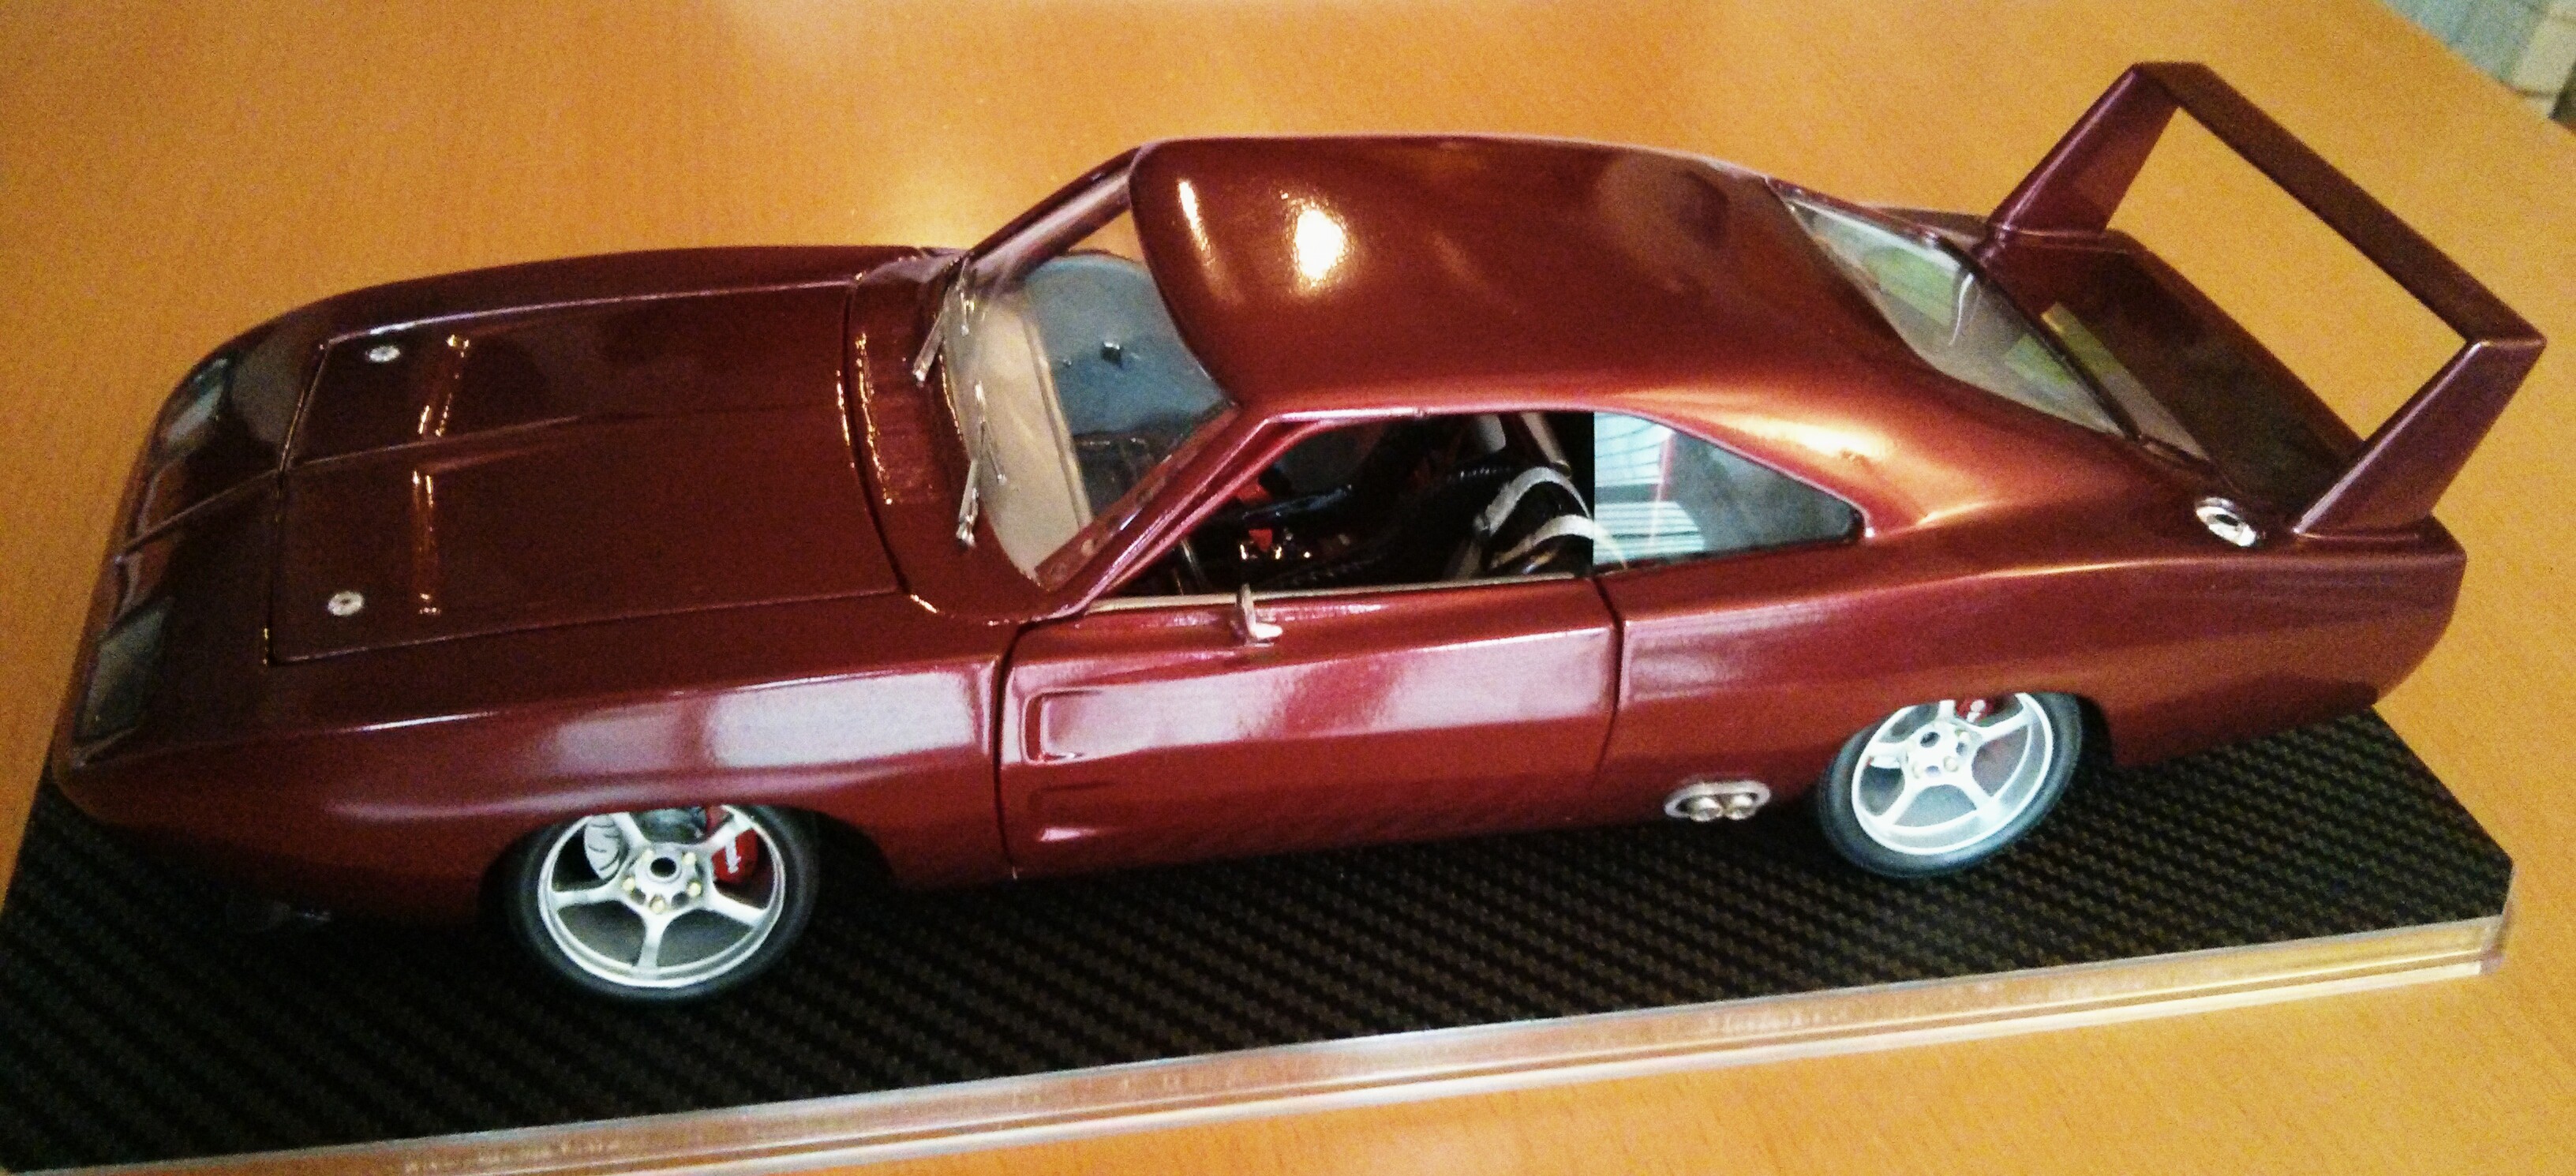
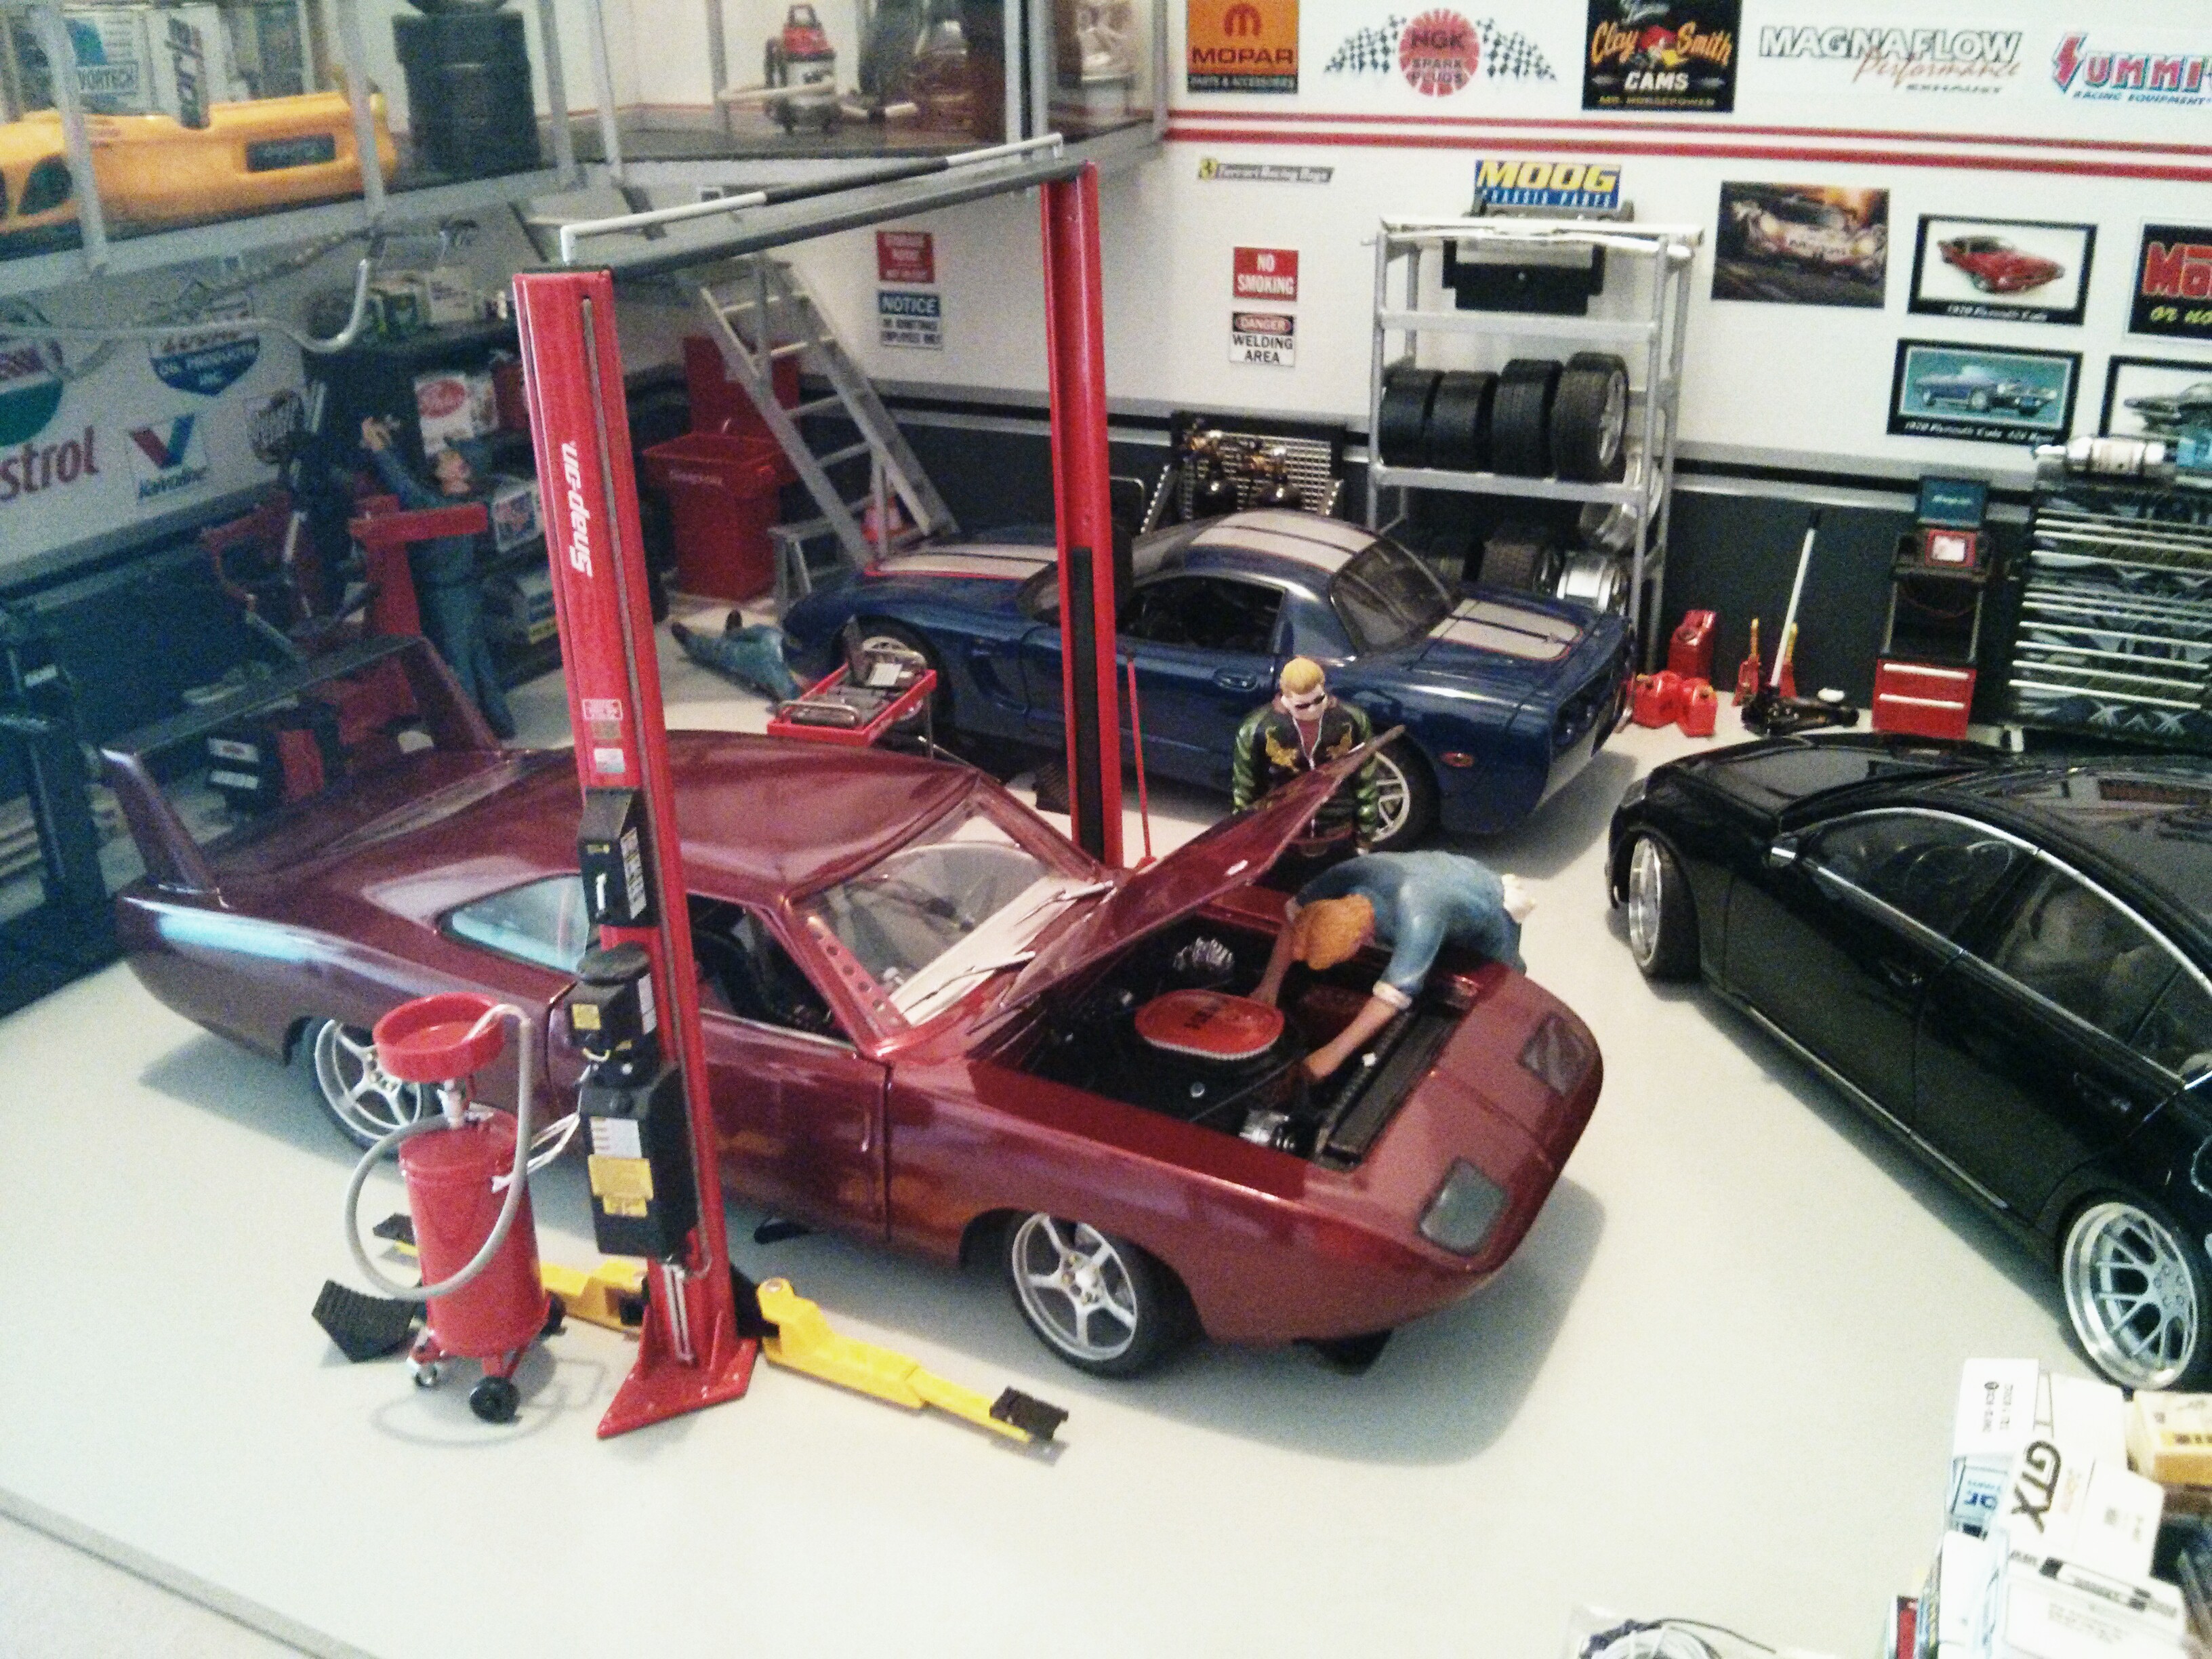
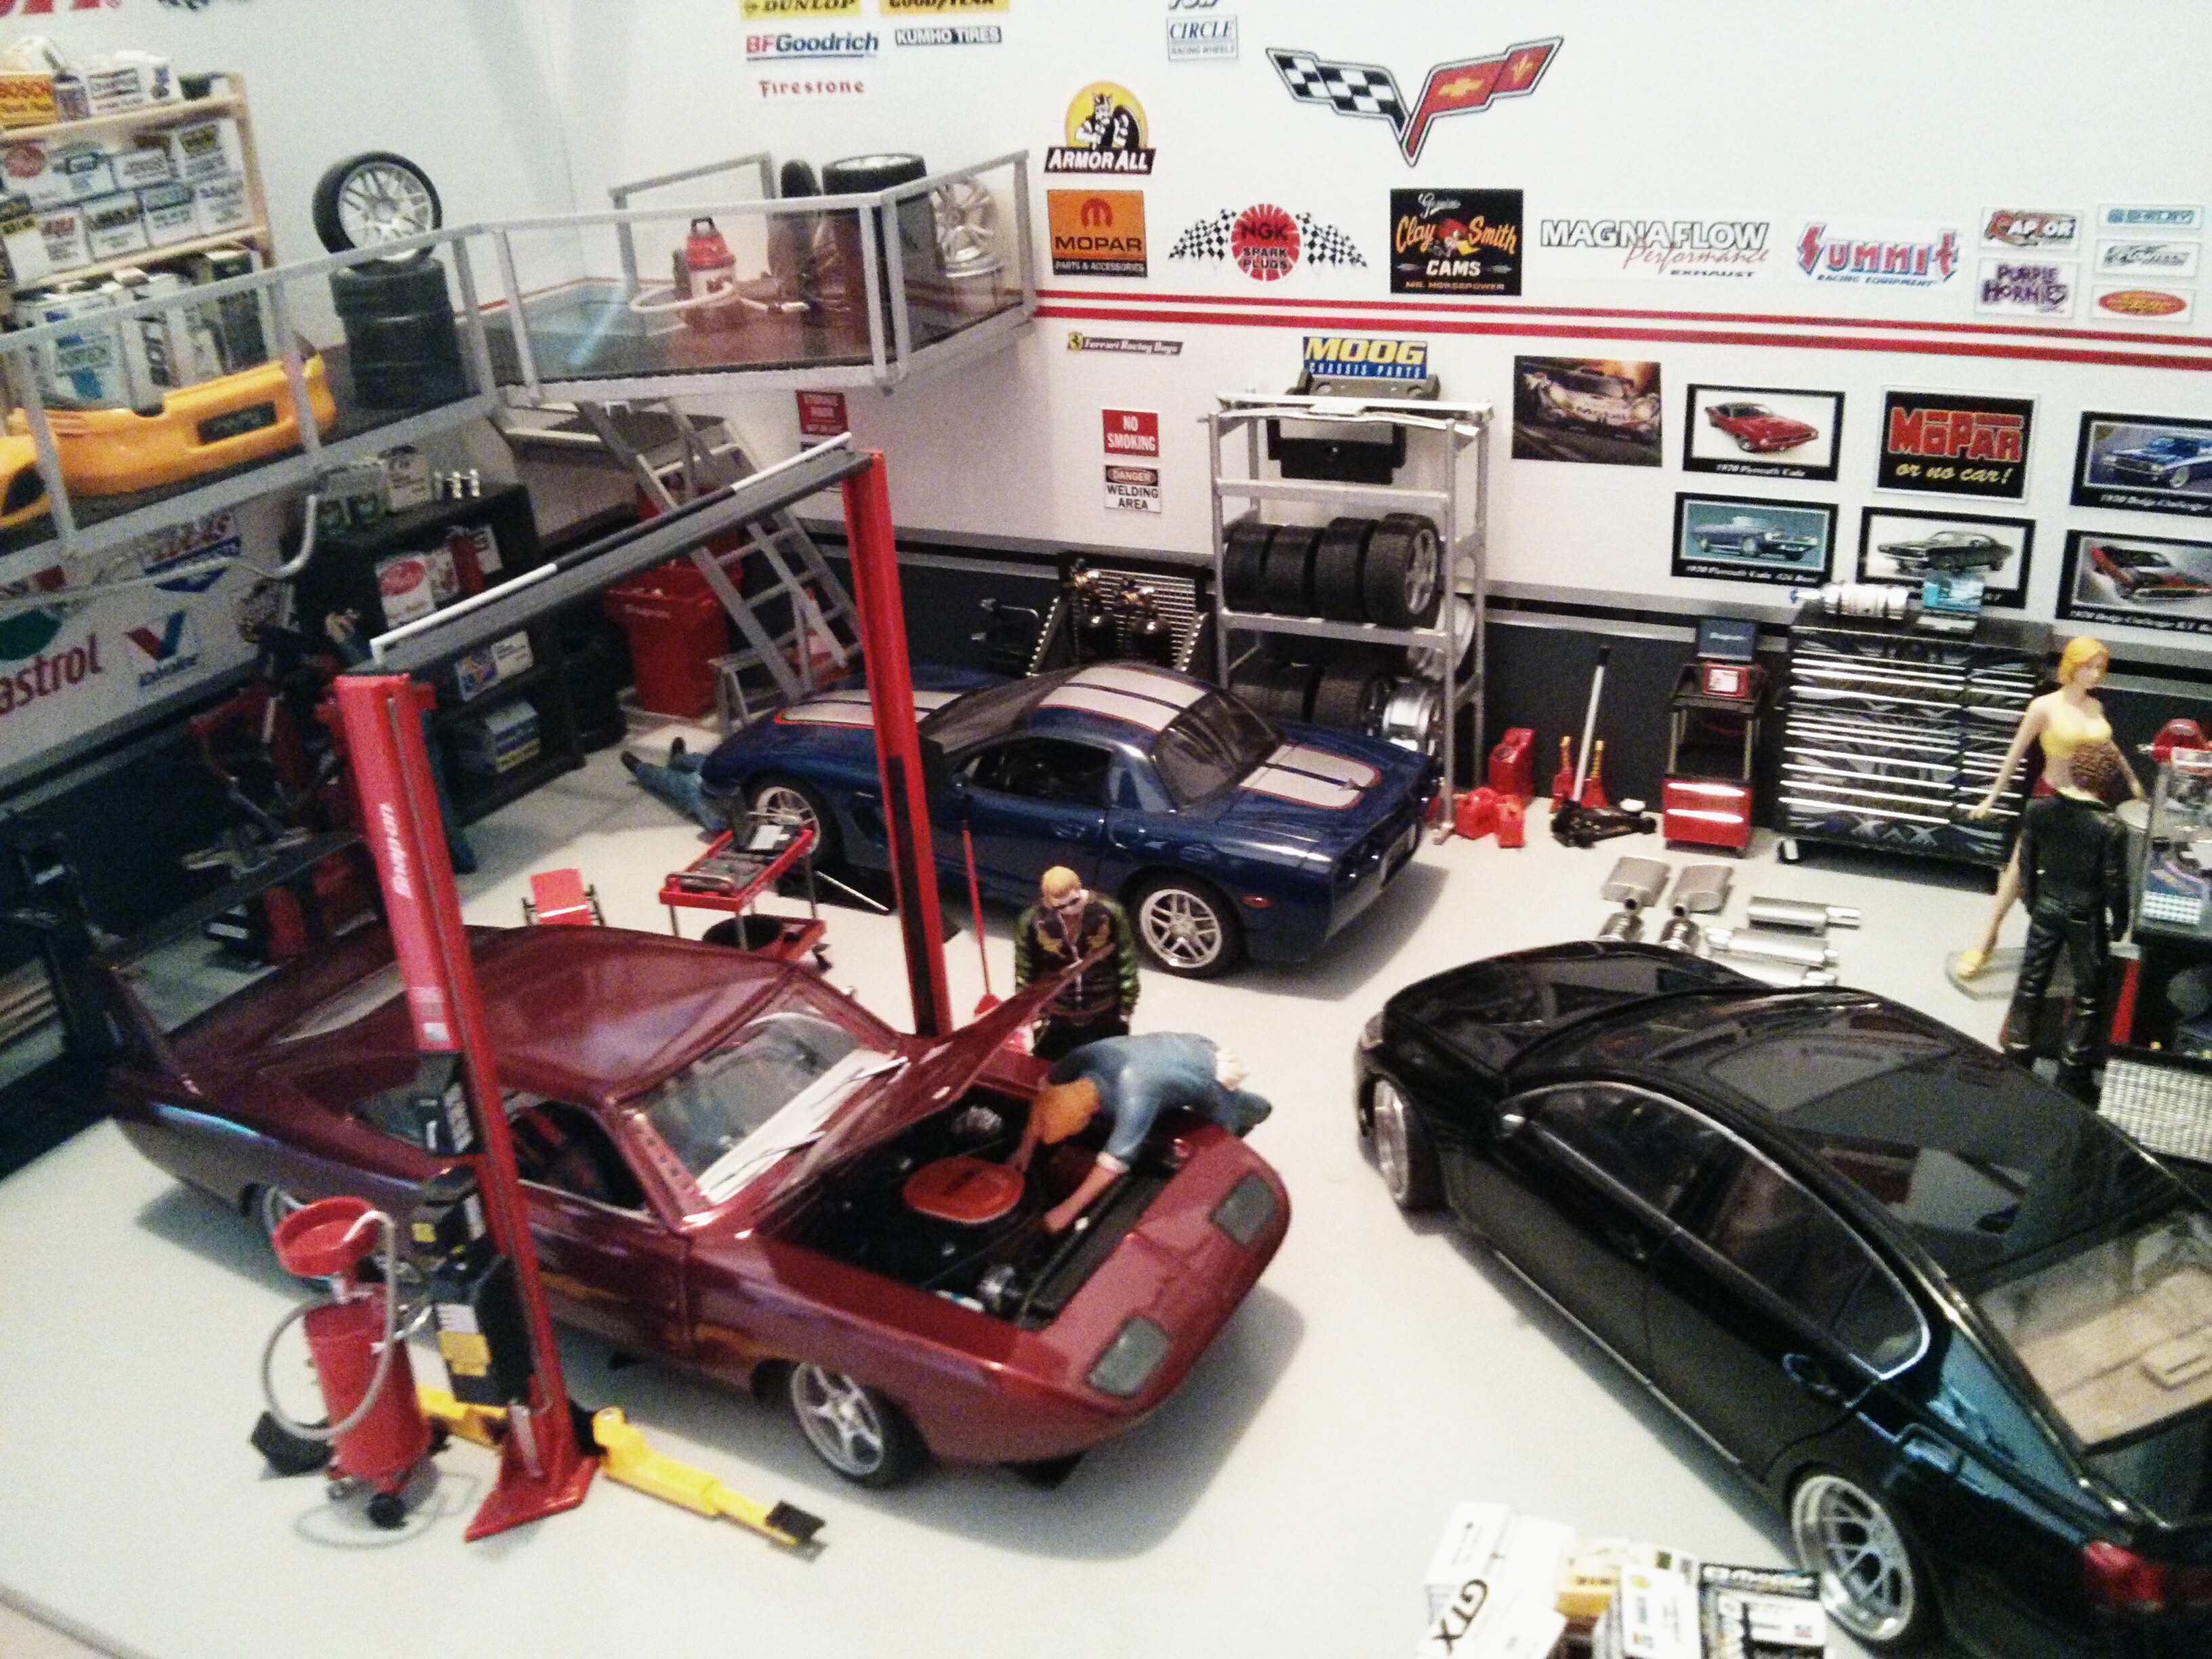
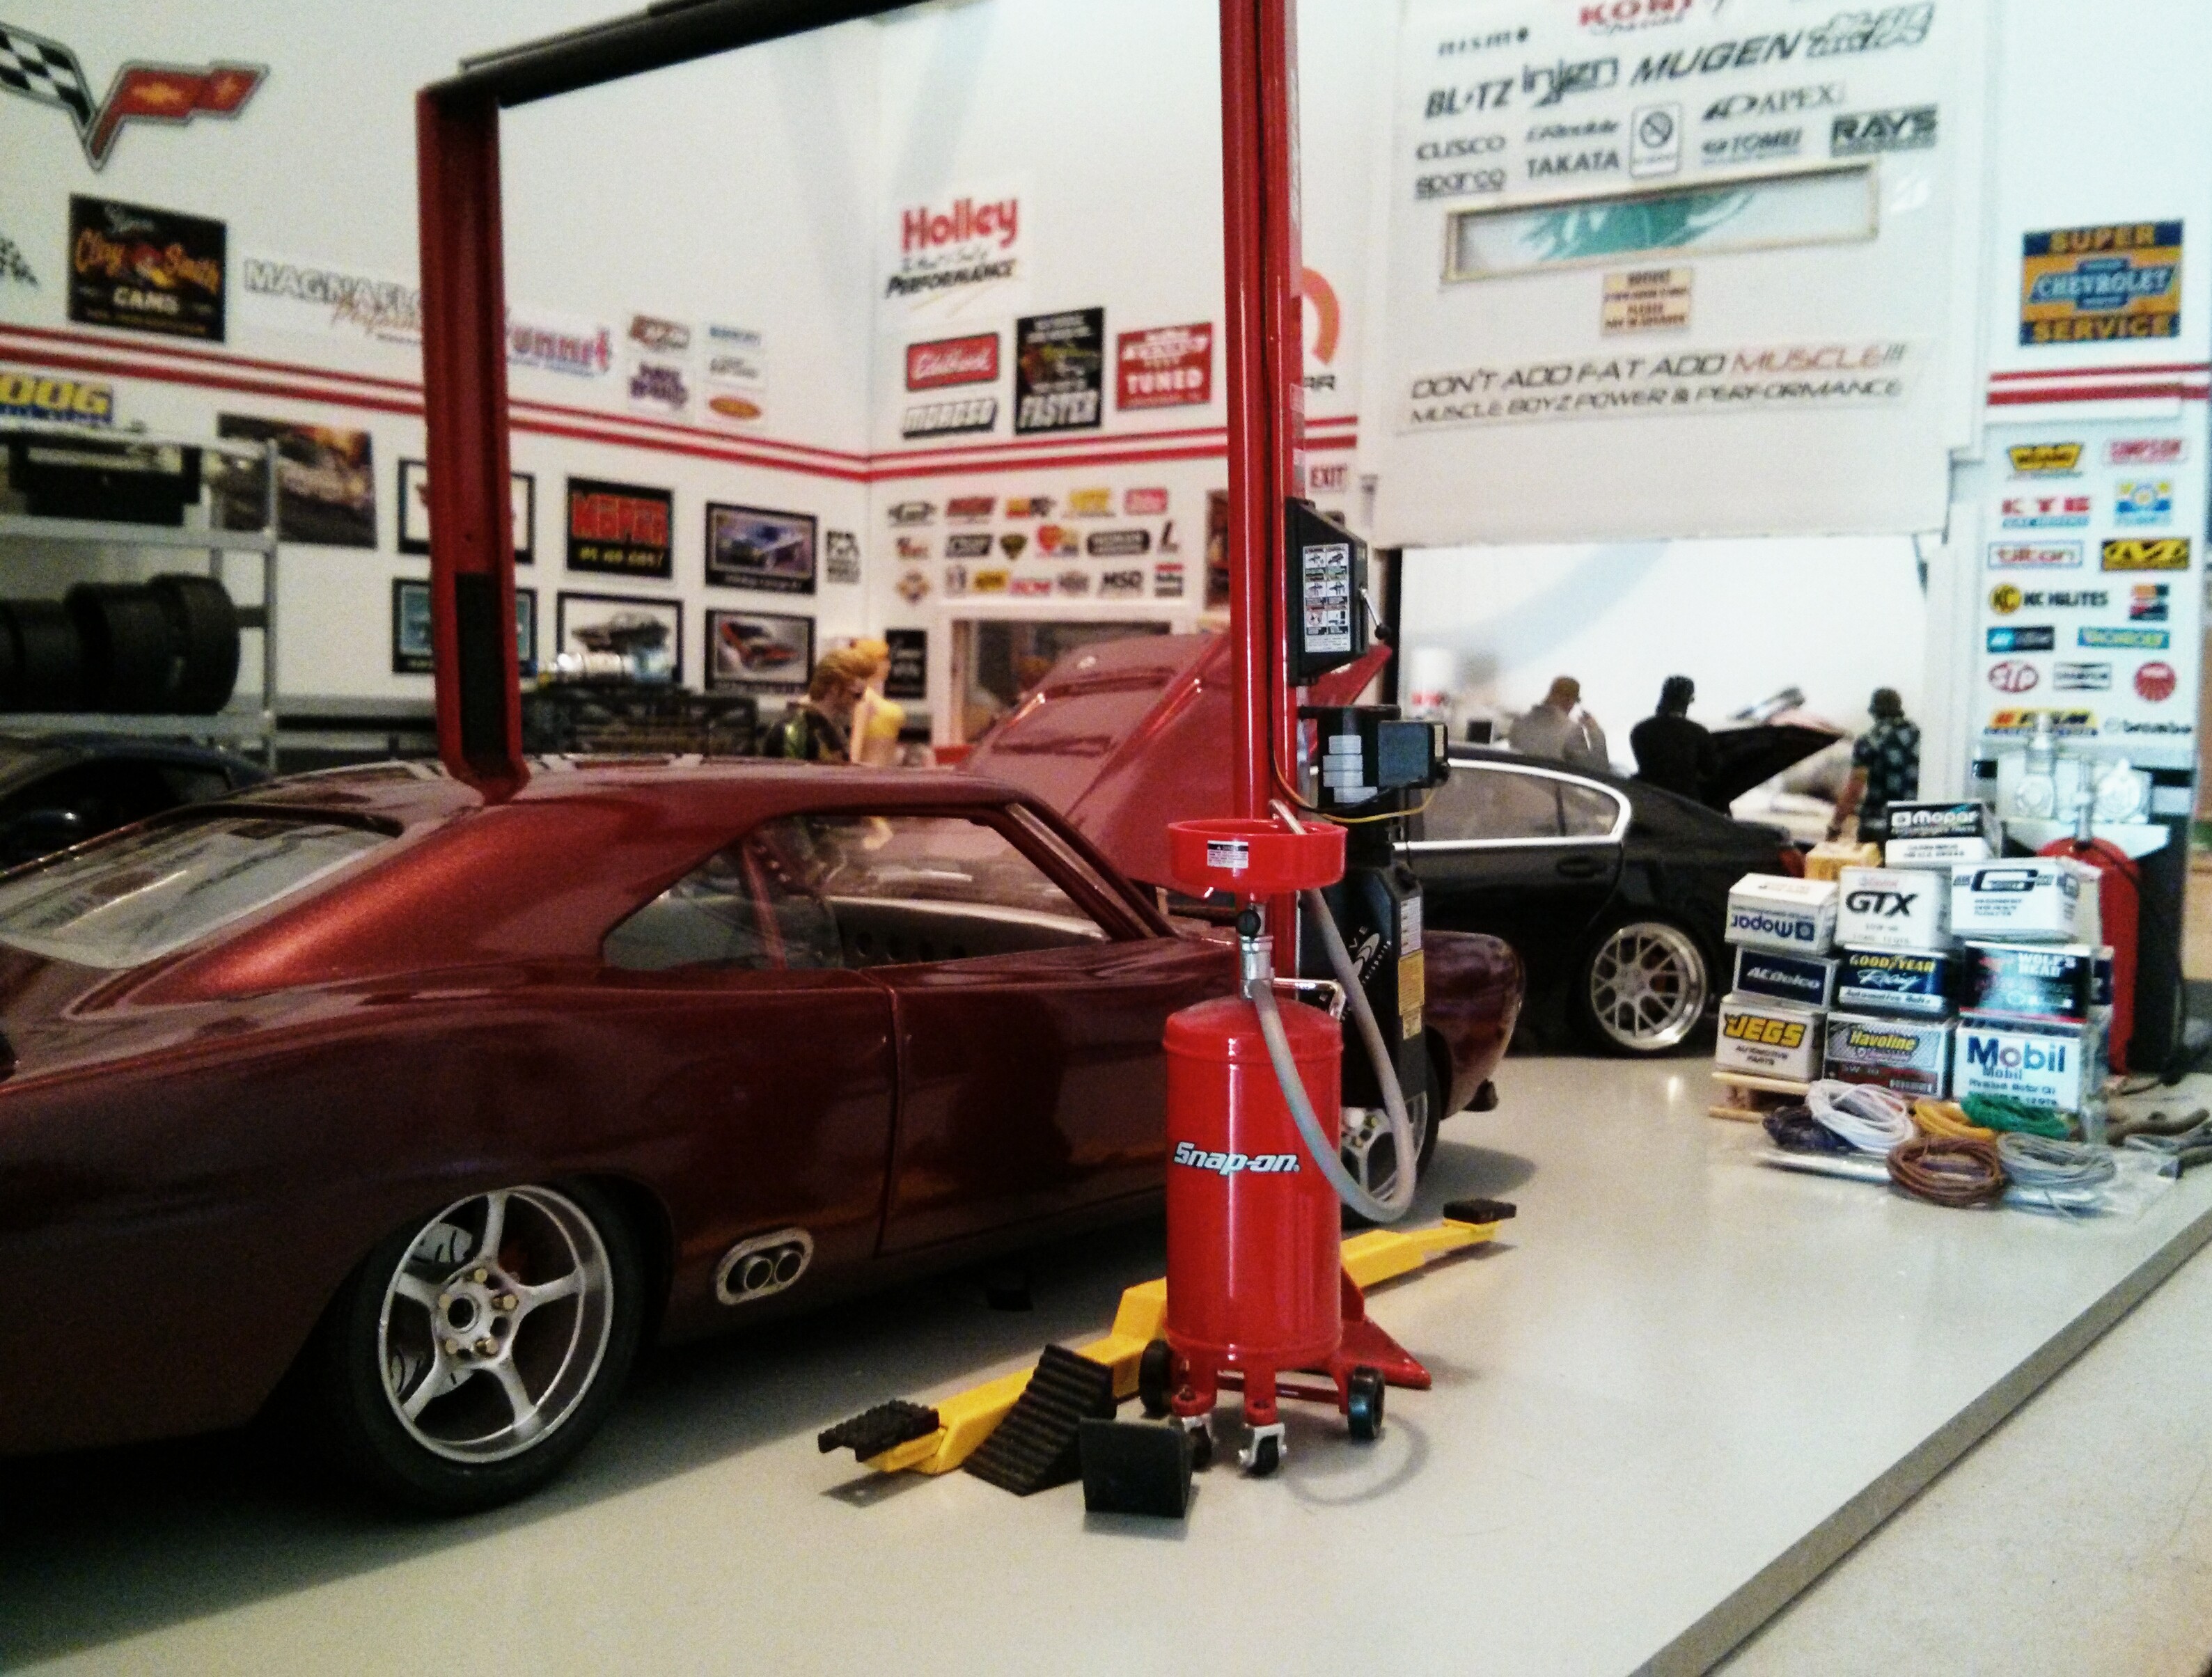
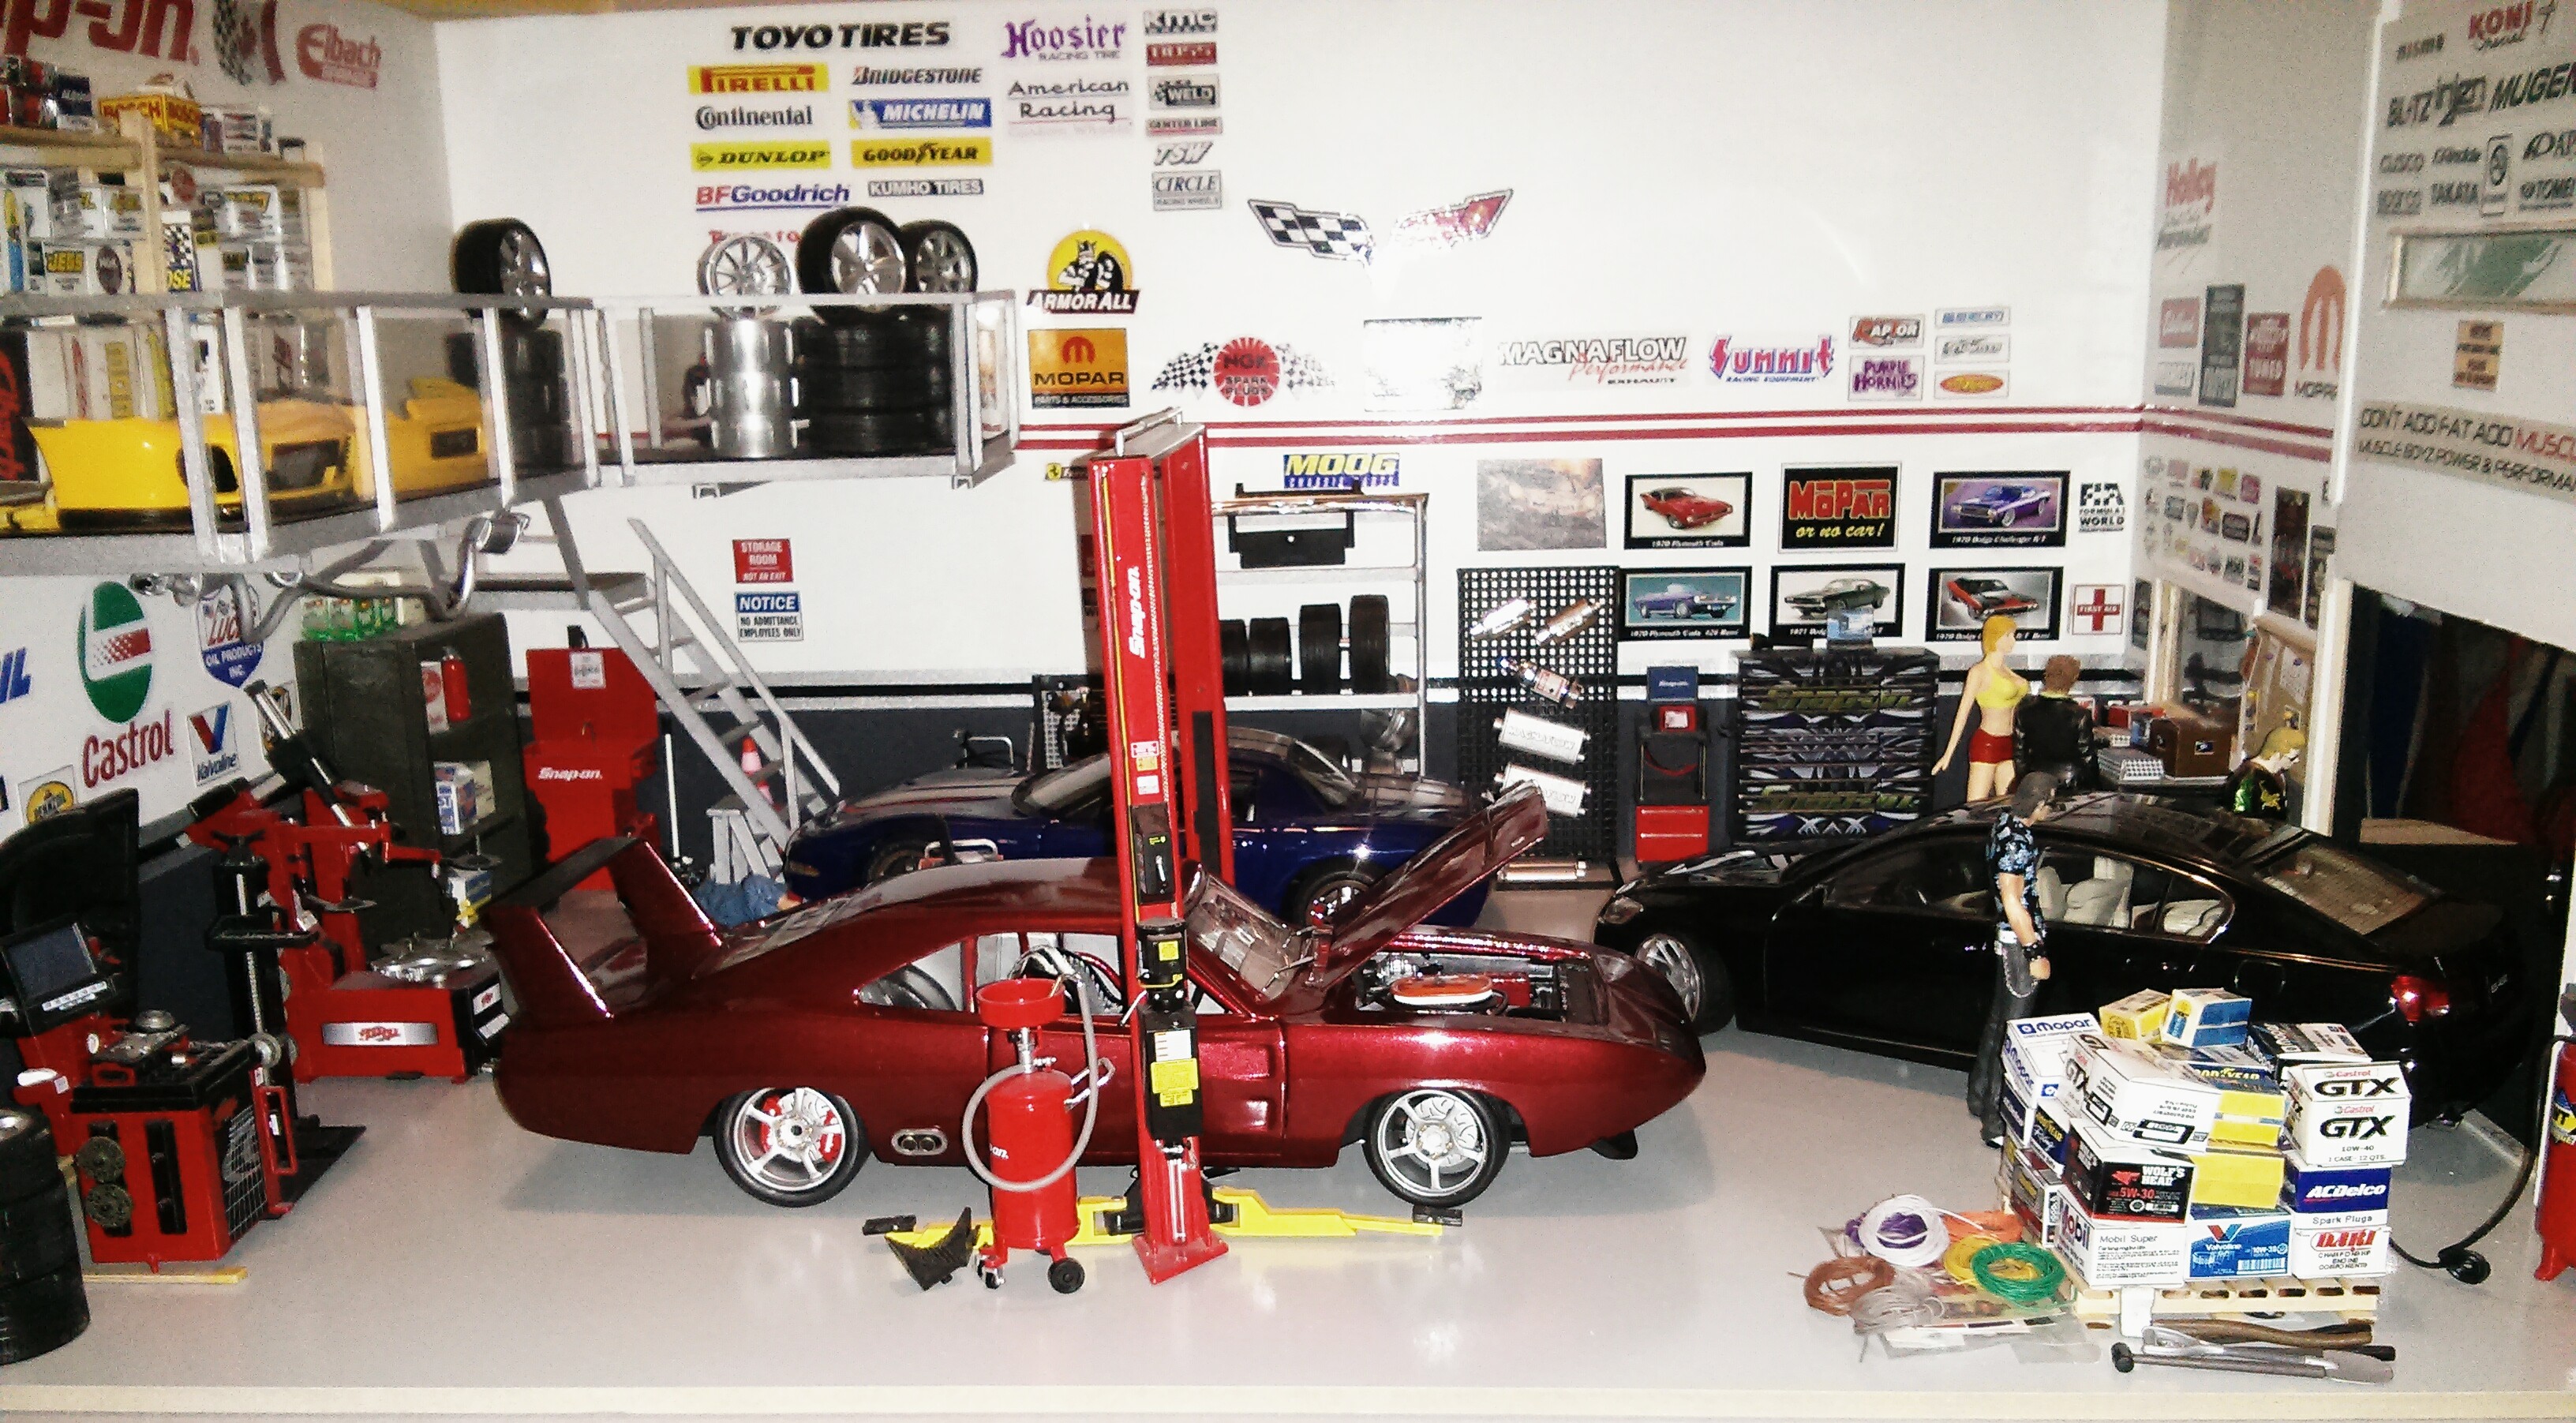
Just a few candid pics as I await my final parts
IMG_20140521_180401 by lewisf1fan, on Flickr
IMG_20140430_093438 by lewisf1fan, on Flickr
IMG_20140430_093616 by lewisf1fan, on Flickr
IMG_20140430_093710 by lewisf1fan, on Flickr
IMG_20140608_213023 by lewisf1fan, on Flickr
IMG_20140616_203830 by lewisf1fan, on Flickr
IMG_20140620_083926 by lewisf1fan, on Flickr
IMG_20140620_083746 by lewisf1fan, on Flickr
IMG_20140620_084407 by lewisf1fan, on Flickr
IMG_20140705_224240 by lewisf1fan, on Flickr
-
StratosWRC
- .
- Posts: 7404
- Joined: Tue Aug 27, 2013 4:56 pm
- Location: Canada
Re: Toretto's '69 Daytona Charger F&F 6
So cool. What are the final parts by the way?
Re: Toretto's '69 Daytona Charger F&F 6
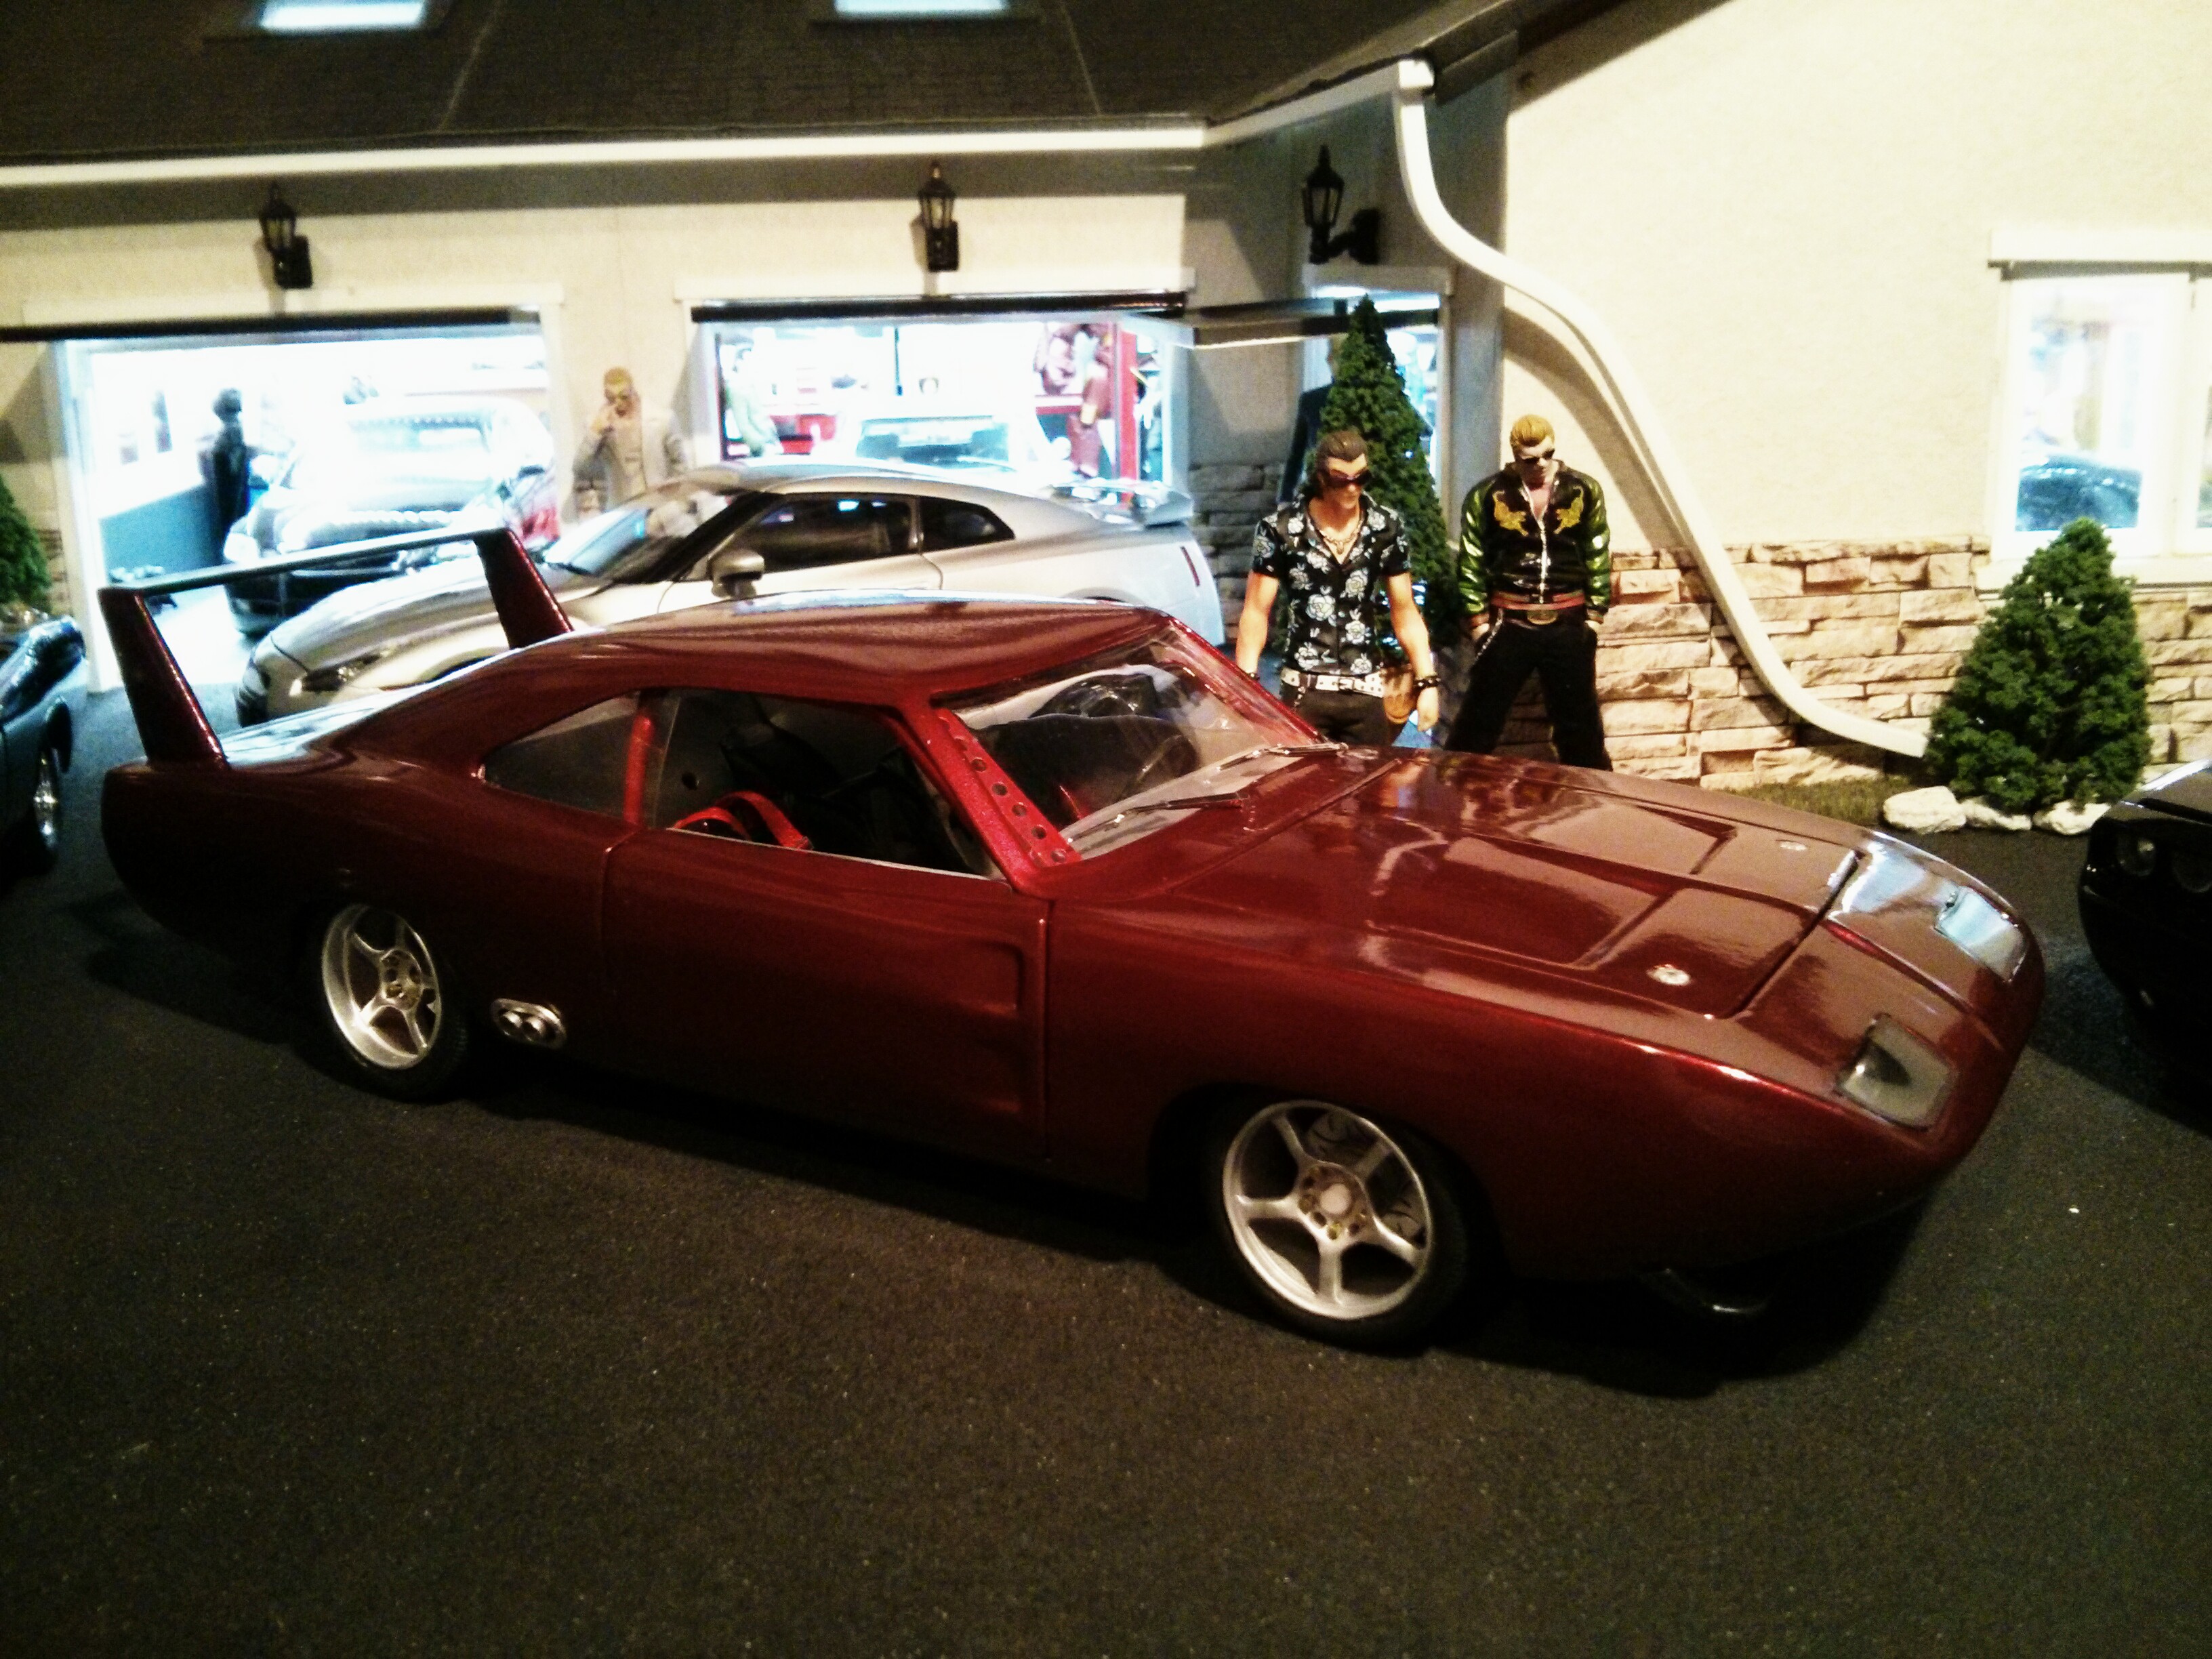
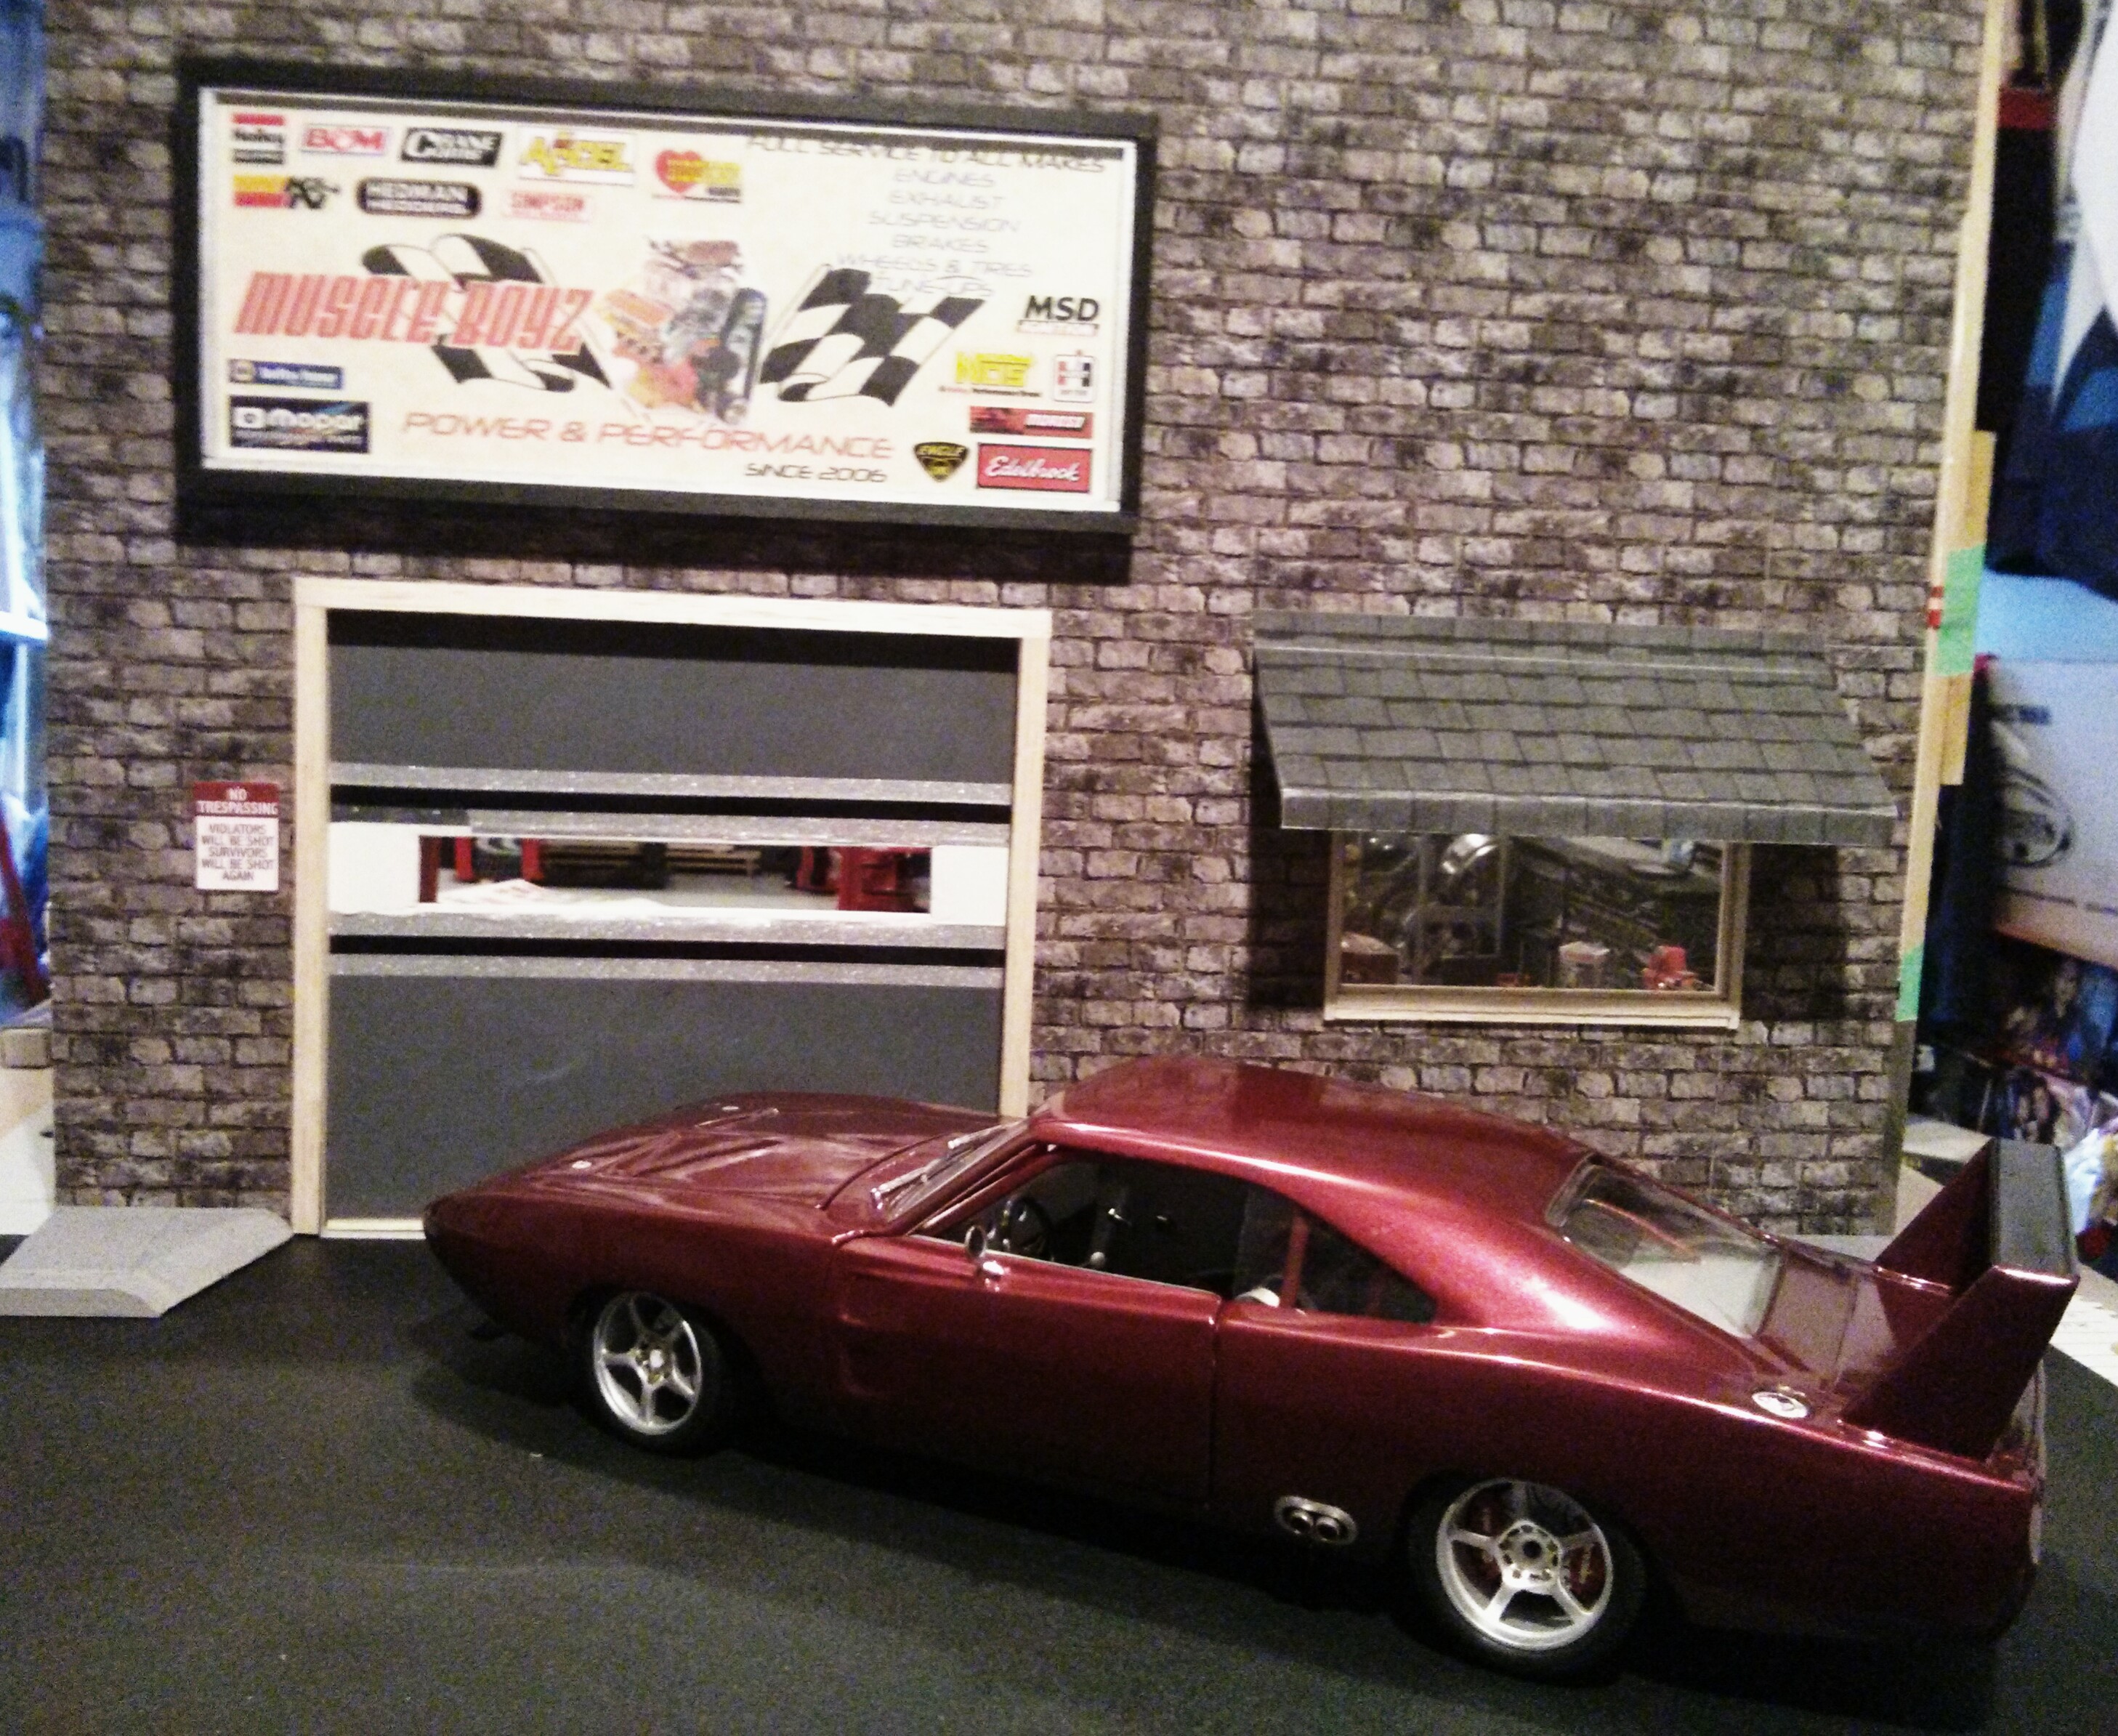
The dioramas shots are priceless! How long did it take you to put that together? 