


How it started.
One day I found this car on internet and immediately fell in love with it:

I wanted a 1/18 model of it, but it didn't exist. That's why I bought a few Mondo Motors models for modding. My plan is to build 4 Zonda's:
1) this now completed roadster
2) pearl white F coupe, under constuction, see my other thread
3) 760RS
4) not sure yet, Cinque, Cinque roadster or 760 roadster.
Original Mondo Motors model

Since this build I have made a few improvements during my new build. So also check the build thread of my Zonda F coupe. For carbon decaling check out my carbon decaling tutorial on the front page of this site: http://www.diecastsociety.com/apply-carbon-decals/
Bodywork.
After stripping the Mondo Motors models in brake oil I started with the front
Thinned bonnet lip to create the air slot:

Opened the front grille and thinned the upper edge (it runs in a curve):

Drilled the indicator light hole and made a "housing" of microputty


NOTE: the V-shape and lower lip of the nose is wrong, check the coupe build for rectification.
At the back I removed the rear support beam, also the engine cover hinges are now gone. The engine cover won't open when I am finished since the engine is a rubbish piece of plastic. I will detail the engine mufflers which will be visible through the rear mesh. On future builds I may have the rear clamshell opened and a detailed engine installed.

I changed the engine cover openings. On the roadster I enlarged the opening:

center strut

The front fenders were reprofiled so they are in line with the doors:

The doors and structure were reprofiled until decent gaps appeared. A rubber band will hold the doors shut.

I removed the carbon grid from the sills. It should be smooth like glass:

The side intakes were cut:


These were later filled in with microputty, sanded and primed:


Front fender vent holes were opened (picture after priming)

On the rear clamshell a new fuel filler cap hole was drilled and the old hole filled:

The vent holes were opened

Filled, sanded and primed

Doorlocks and side indicators were removed from the doors, Then priming and flat black base coat of all metal parts

(on this pic doorlocks and side indicator still visible. They were removed later and the doors primed and painted again)
Plastic body parts rework
Creation of engine shields from styrene plate


Carbon decaled

Spoiler brackets were opened

Later they were detailed with styrene plate and putty


Central bonnet piece was reprofiled and carbon decaled

Mirrors were thinned and carbon decaled

Radiators

Undertrays scratch built from styrene card and decaled:

Bottom plate given a slight camber with stringers

Back end rework
Carbon grid was removed and all holes opened:

Templates for the carbon decals:

And carbon decaled

Gearbox was cut from perspex:

And finished in alu paint and details added as oil lines

Exhaust made from parts from Mondo Motors,styrene pipe, electrical cable and microputty.


And painted

New lights

 ]
]Rear foglights

Logo sheets were printed on decalpaper

When placing on bare metal foil metal logo's could be made

Final assembly of back end (note photoetched mesh, 2 sizes) with undertrays

Wheels and suspension
Brakes filled (the hole pattern is for steel brakes, not carbon)

Painted and decaled

Wheels adjusted. Front suspension lowered with a shim

Rear suspension higher by repositioning wheels.


Gap between wheels and body front and rear now equal

Modifying the rear rims by extending the edge with a 2mm strip from a lego wheel


Taking 2mm out of the centre of the wheel (to compensate for extra width on the outside)

Trial fit


Opening the spokes

Painted and decaled

Extender ring from an electric toothbrush,places the brakes closer to the wheel. Works without mod on the front wheels, require removing of a bit of material from the rear wheel to make them fit. Requires longer screws for fitting!

Later (not visible on this pic.) the internal six sided hole was changed to have the front caliper droop 30 degrees downwards (on the standard MM model it's vertical placed which is wrong)

Window frame
Cut and wind deflectors added (made from a plastic bowl)

Beefed inside with microputty

Carbon decaled

Interior
Rear bulkhead cut and rebuilt


Roll over bars added


roll over bar struts

Steering wheel and seats raised


Back of seats and base carbon decaled

Loudspeakers cut from plastic marble and decaled

Carbon decaling interior parts


Note the raised speaker housing:


Clearcoated,polished and testfitting


Painting, testing with fine powder sugar to get a ostrich leather effect.

Painted


small details

decals added and switches made from byoux pins


Loudspeaker facia (door handle is wrong, will be rectified on coupe)


Real versus model

Engine and compartment
Opened and alcladded


Cam covers and injection system made, painted and decaled


Carbon decaling of body


clearcoated and polished


Final assembly and detailing
Guerney flaps

Vanes

Mesh


New fuel filler cap made from styrene

Decals
doorsills

New logo

Modena Design logo

Pagani logo on rear clamshell

Front lights

Scratchbuilt pods


Leather straps made from painted decal sheet

Windscreen, masking,sunvisor strip and rearview mirror


Doors assembly
Windows lowered, lower edge painted green for tinted look, doorlock and indicator light added.


Windows are a bit too thick,will be replaced by thinner plastic on the coupe.
Doors finished

Mirrors in place

Spoiler added,clamshell finished

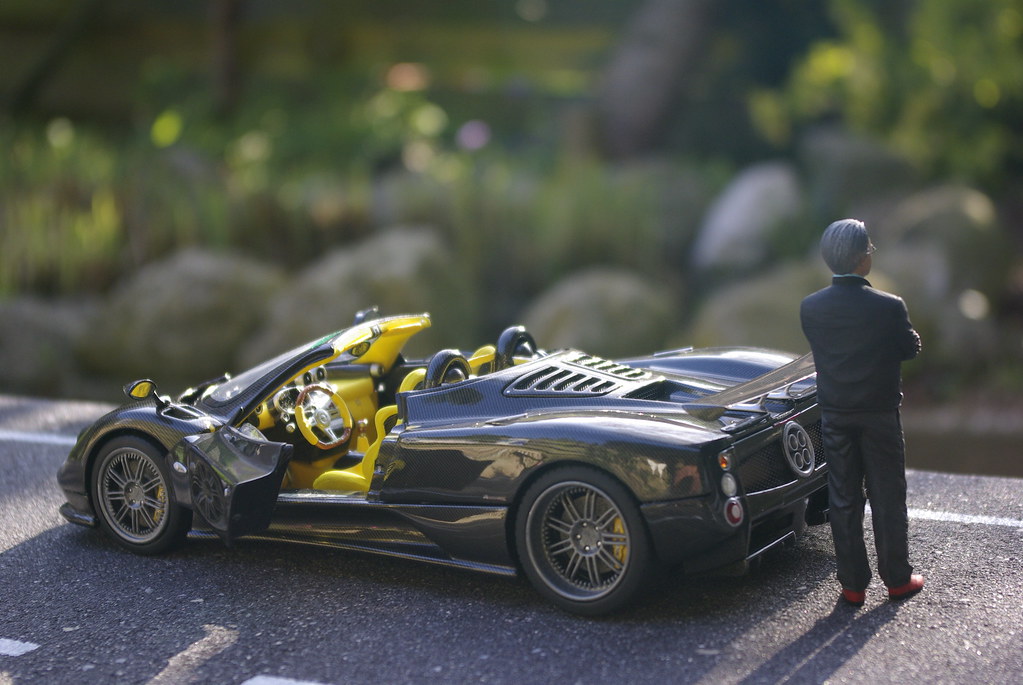
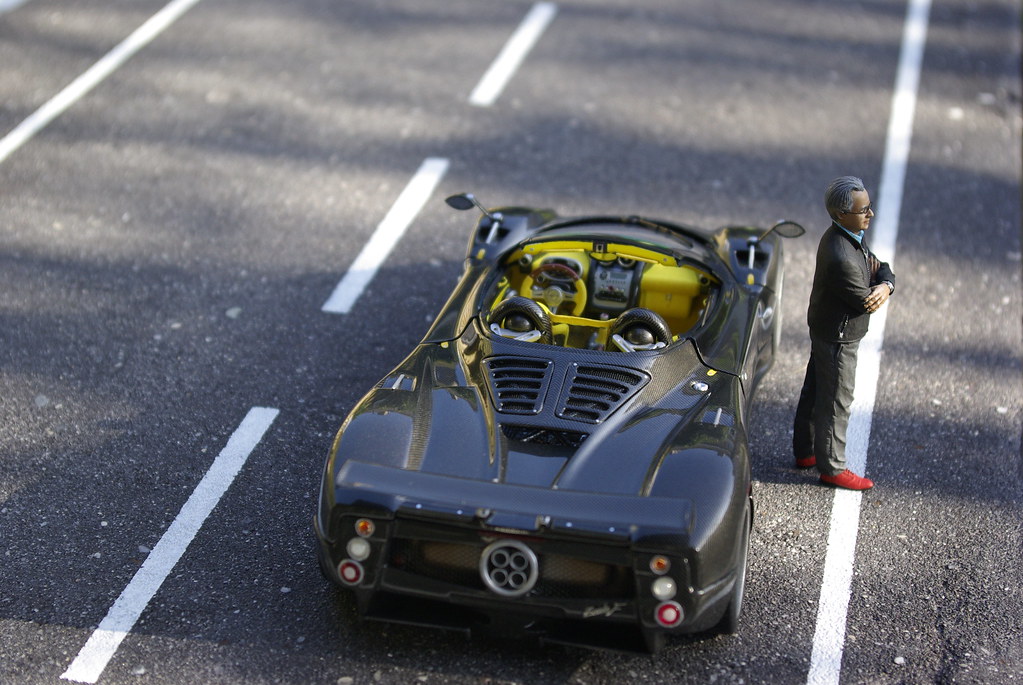
Big boss checking

Last minute mayhem, edge sticking out, casting error. needs to be removed on finished car.


Glueing sticking out edges of back end

Wheels in place

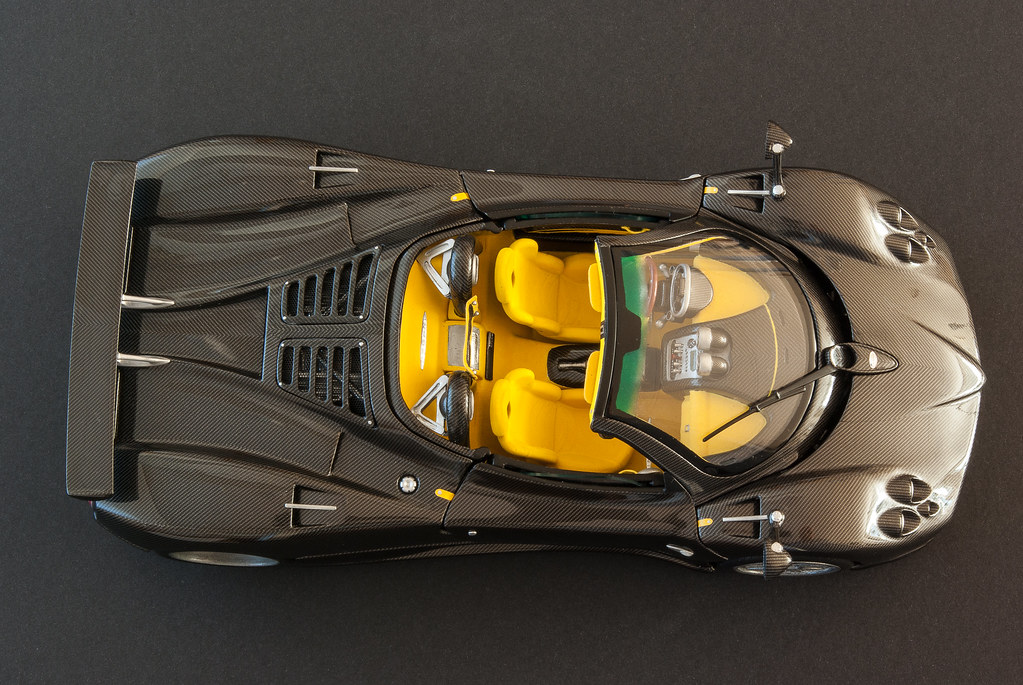
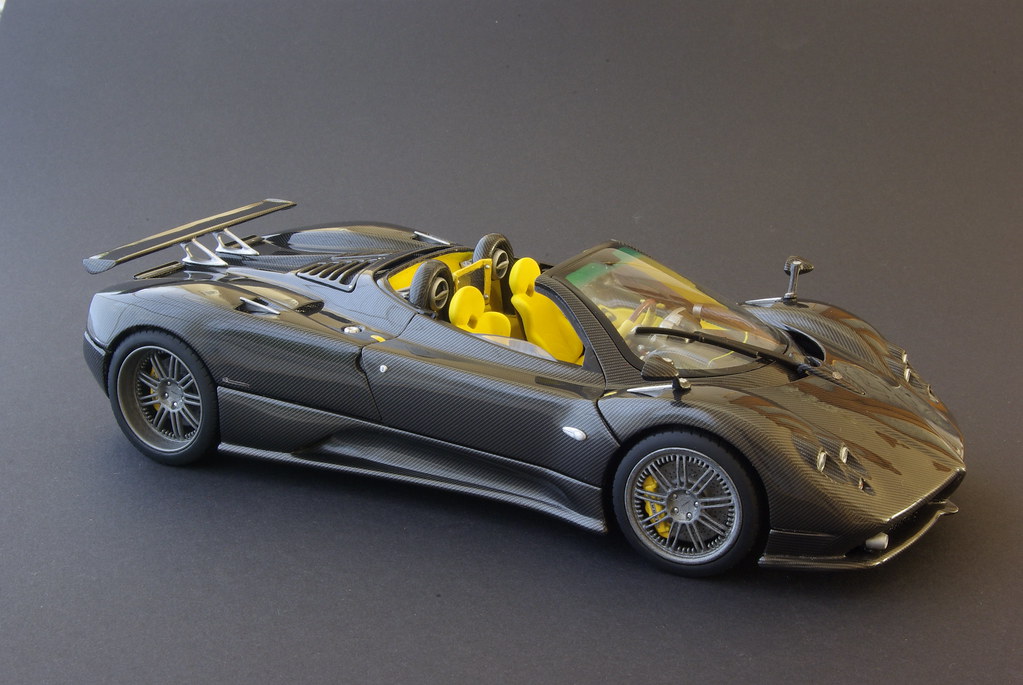
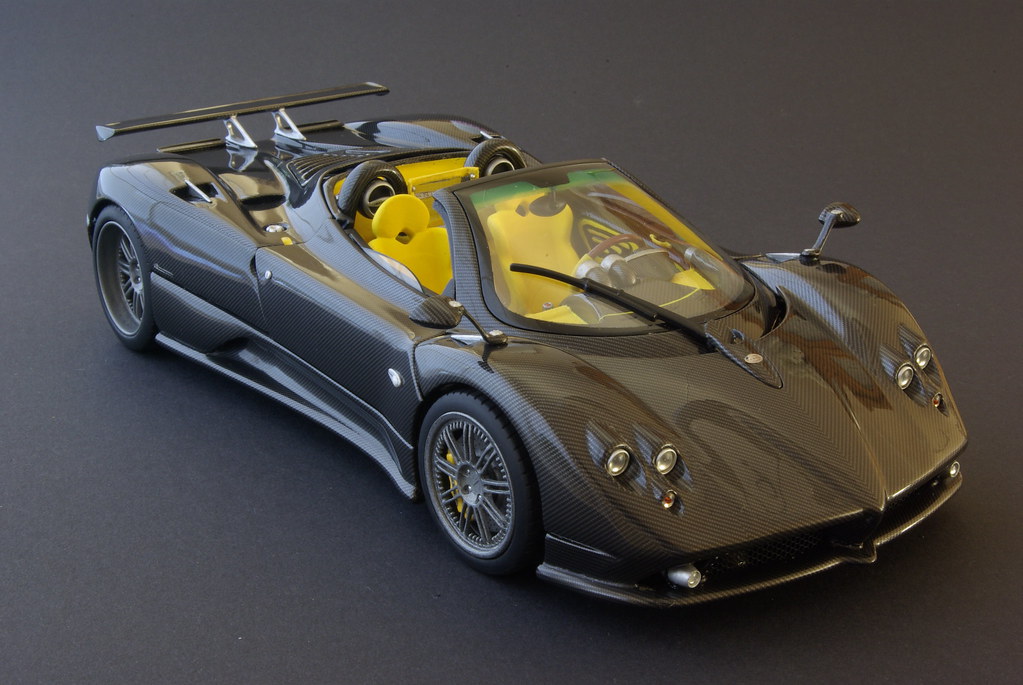
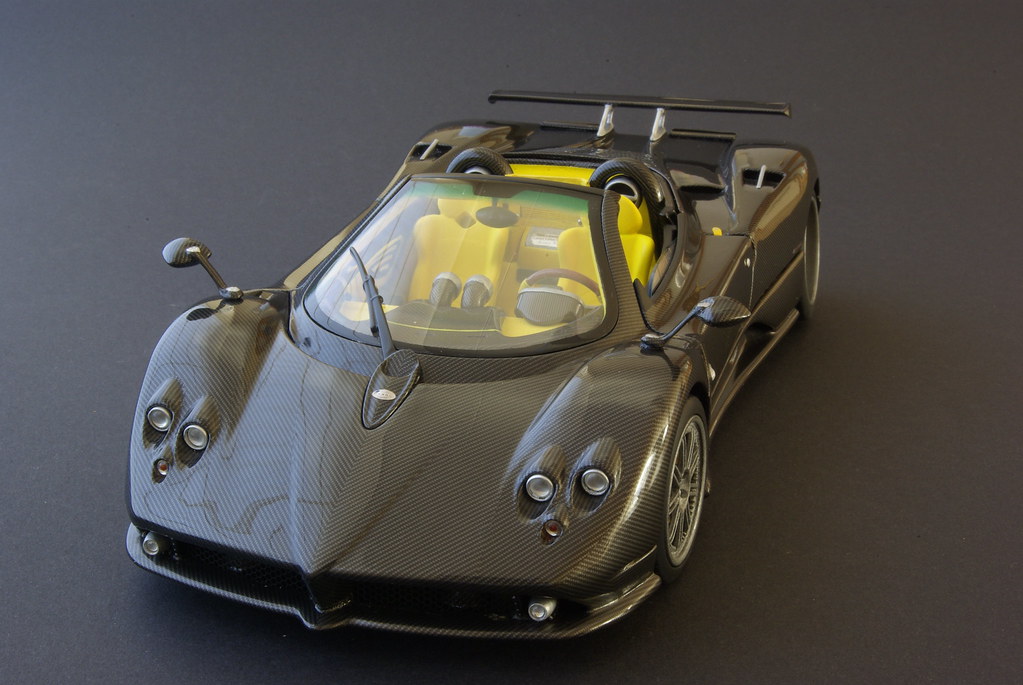
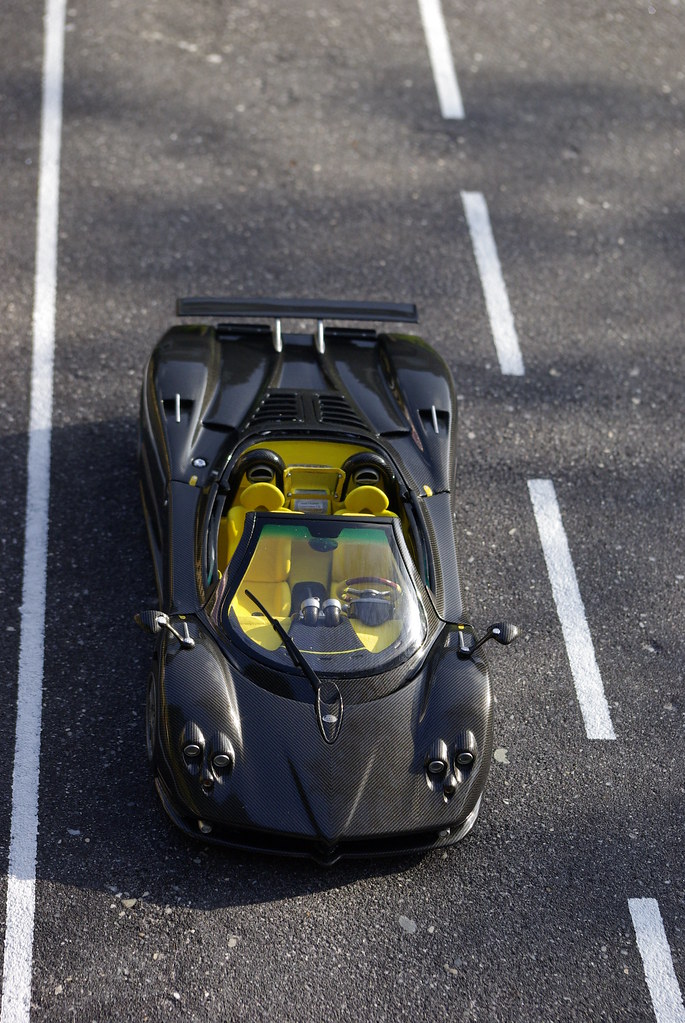
Finished


Real versus model


https://youtu.be/EcWuT4IsY_U
As said earlier the Mondo Motors model is a fairly accurate diecast. Biggest issue I overlooked was the nose. The diecast has still the softer Zonda S shape, while the F has a sharper nose and bigger chin spoiler. I will rectify that on my future Zonda models.


